DIY Patchy Wall Hanging
Practise your straight stitching and seam matching while turning your fabric scraps into a colourful piece of wall art. It’s time to make a DIY Patchy Wall Hanging!
I’ve been taking a break from sewing clothing to dress up my walls, and it’s been a really enjoyable way to play with colours and use up my scraps. There’s just something about a rainbow of colourful squares that makes my heart happy, and I wanted to share the steps with you so that you could give it a try yourself. Start small with this 16 square patchwork and then use the concept to make a Patchy Wall Hanging of any size.
You will need:
Woven Fabric Scraps. I like to use linen or cotton fabric.
Backing Fabric. You will need a piece that is the same size or slightly bigger than your patchwork. In this case, your back fabric would be a square about 45cm x 45cm. I use calico.
Neutral coloured thread. I like to use up my end of spools for all of the seams because they won’t be seen.
Rotary cutter or scissors
Cutting matt
Cardboard to make a template. I like to use thank you cards from online orders or the back cover of a magazine.
Flat-woven ribbon or tape
Sewing Machine
Ironing Board
To Hang: 25mm wooden dowel as wide as the finished wall hanging. My dowel ended up being 42cm long, and then I used some cotton cord to make a hanger and tied them to the ends.
Notes: This tutorial will explain how to make a patchwork wall hanging using 16 squares (12cm x 12cm) in a layout of 4 x 4. This tutorial uses a 1cm seam allowance unless stated otherwise. I recommend backstitching at the start and end of each seam.
Step 1
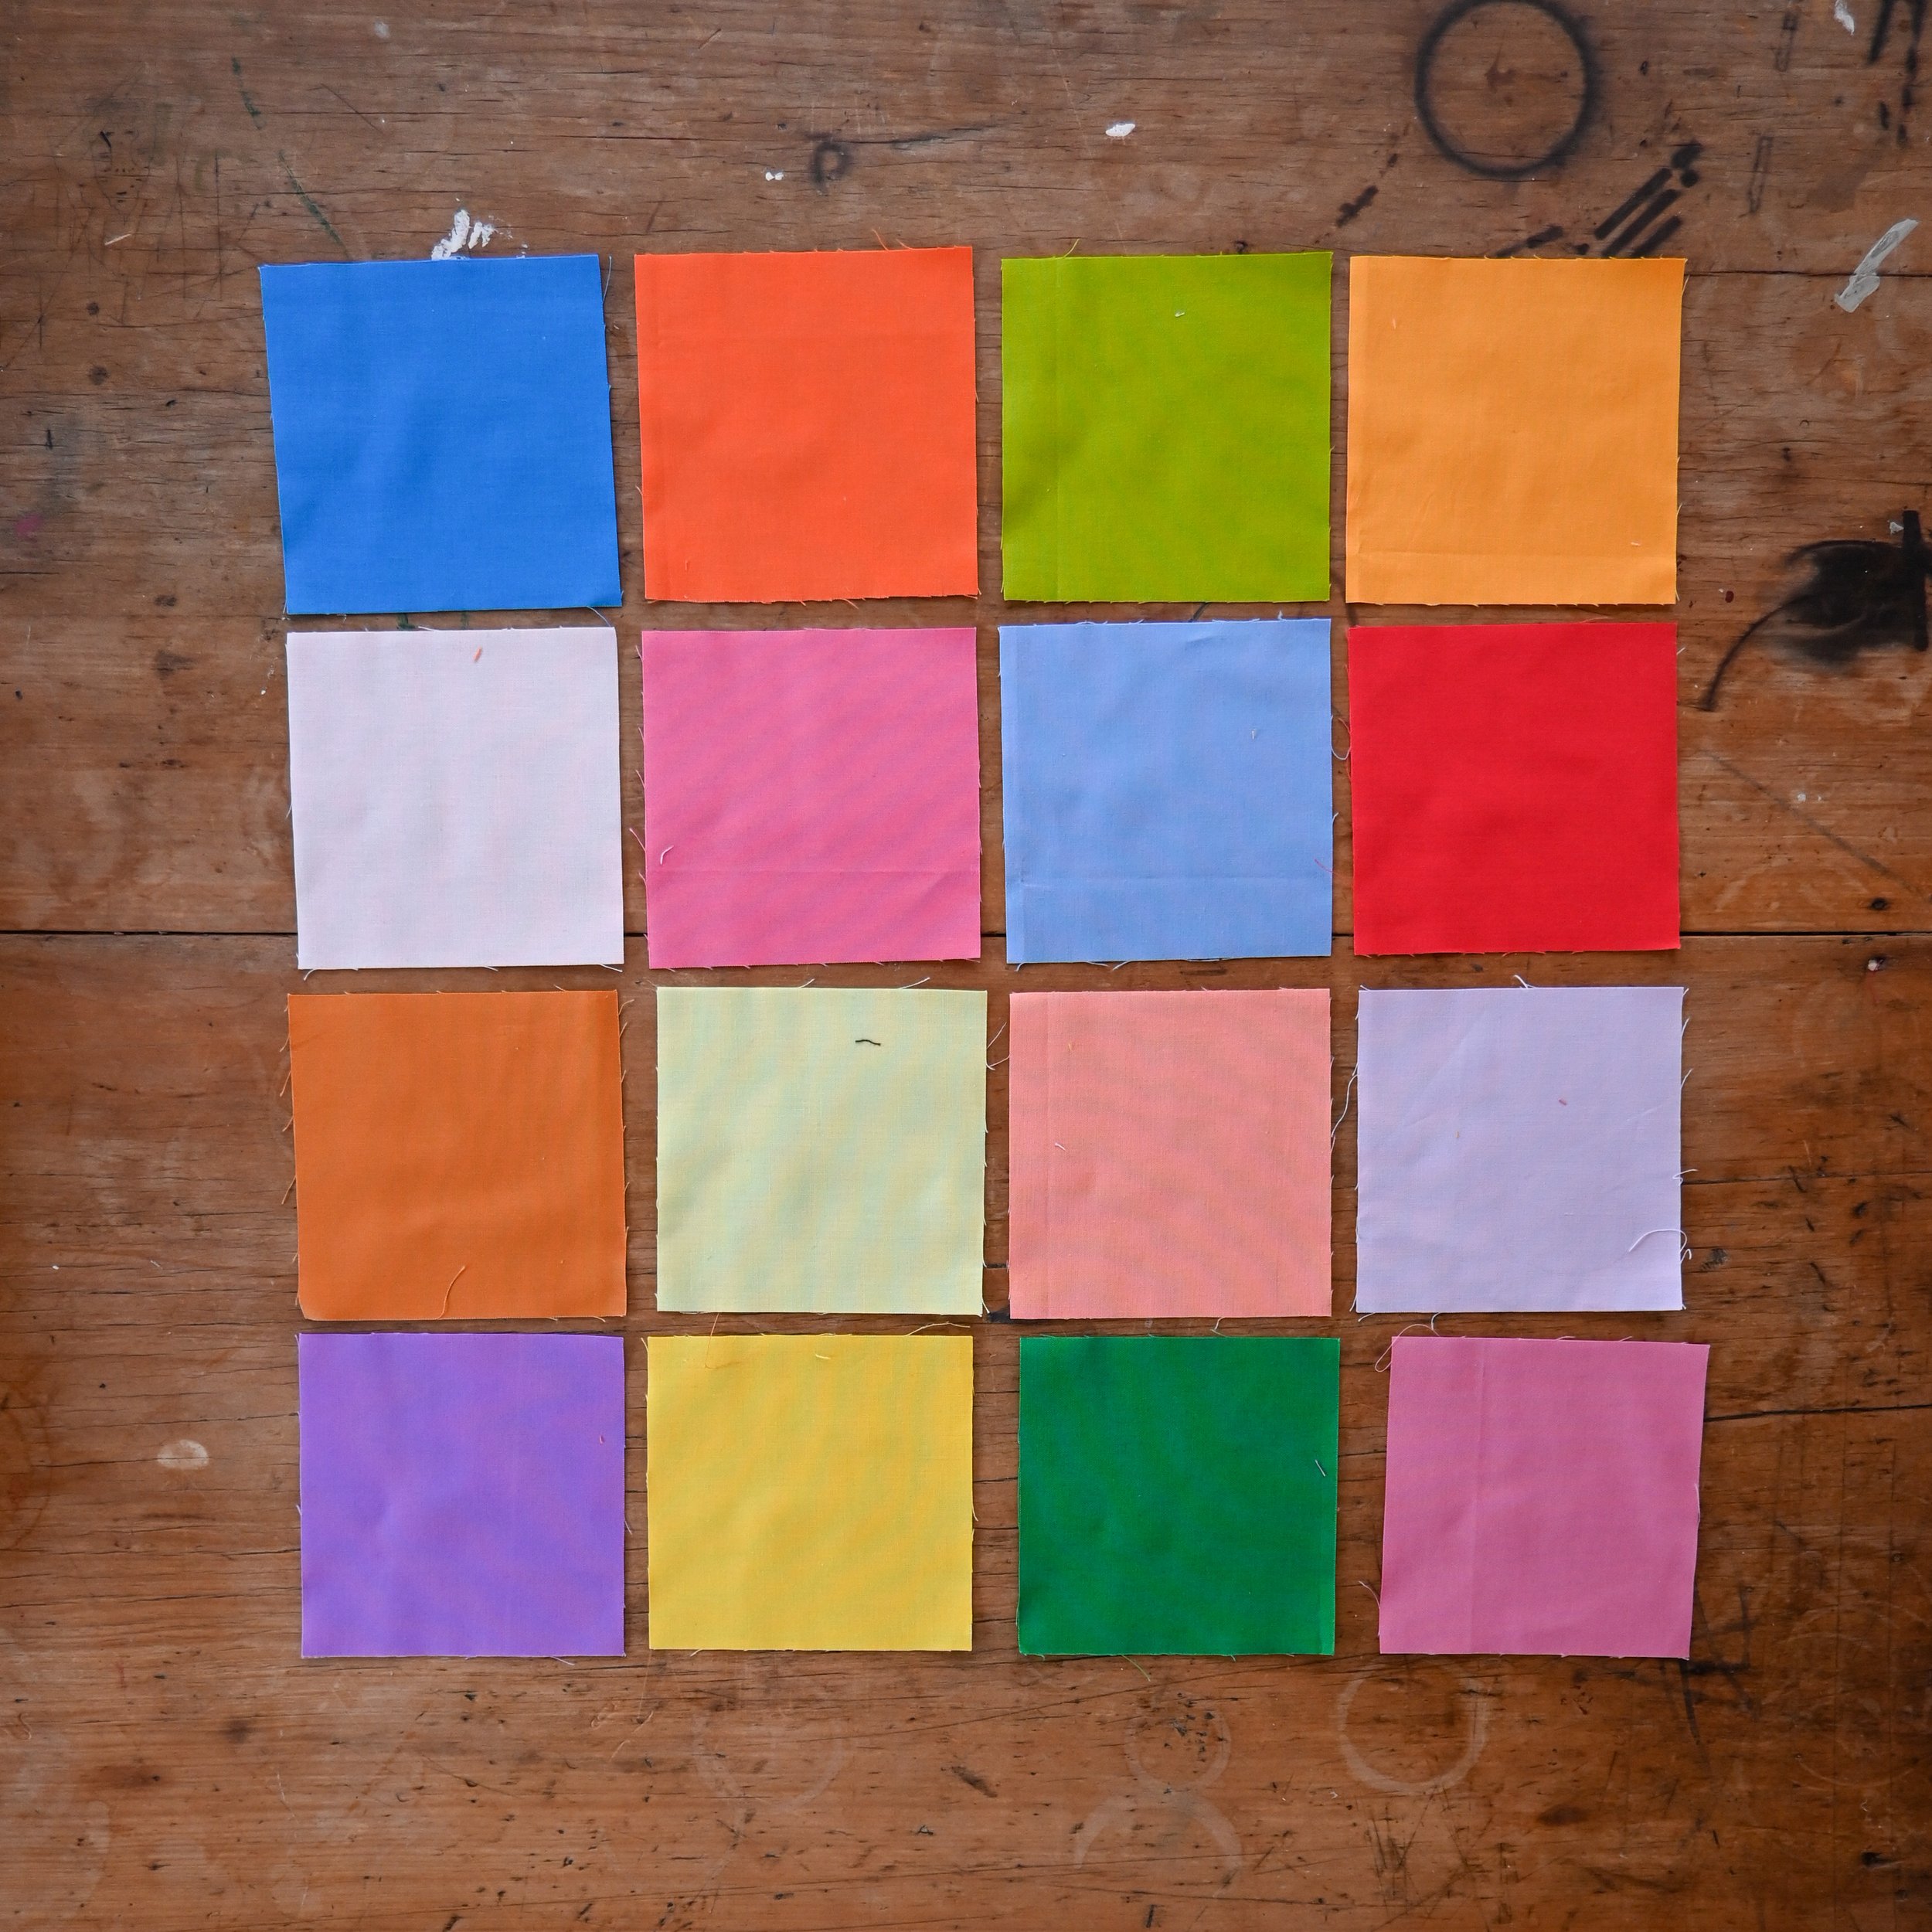
Make a 12cm x 12cm template using some card. If you are use scissors, mark out 16 squares on your fabric and cut them out. If you have a rotary cutter and cutting mat, tracing the template with a rotary cutter and cut out your pieces. Lay out the coloured squares on a flat surface and plan your design. This patchwork is 4 x 4 so there are 4 squares along the top and 4 down the side. I like to place a light coloured square on one of the sides so that when I stitch the wall hanging closed in the final steps you cant see the stitching. Snap a photo of your plan so you can refer to it later.
Step 2
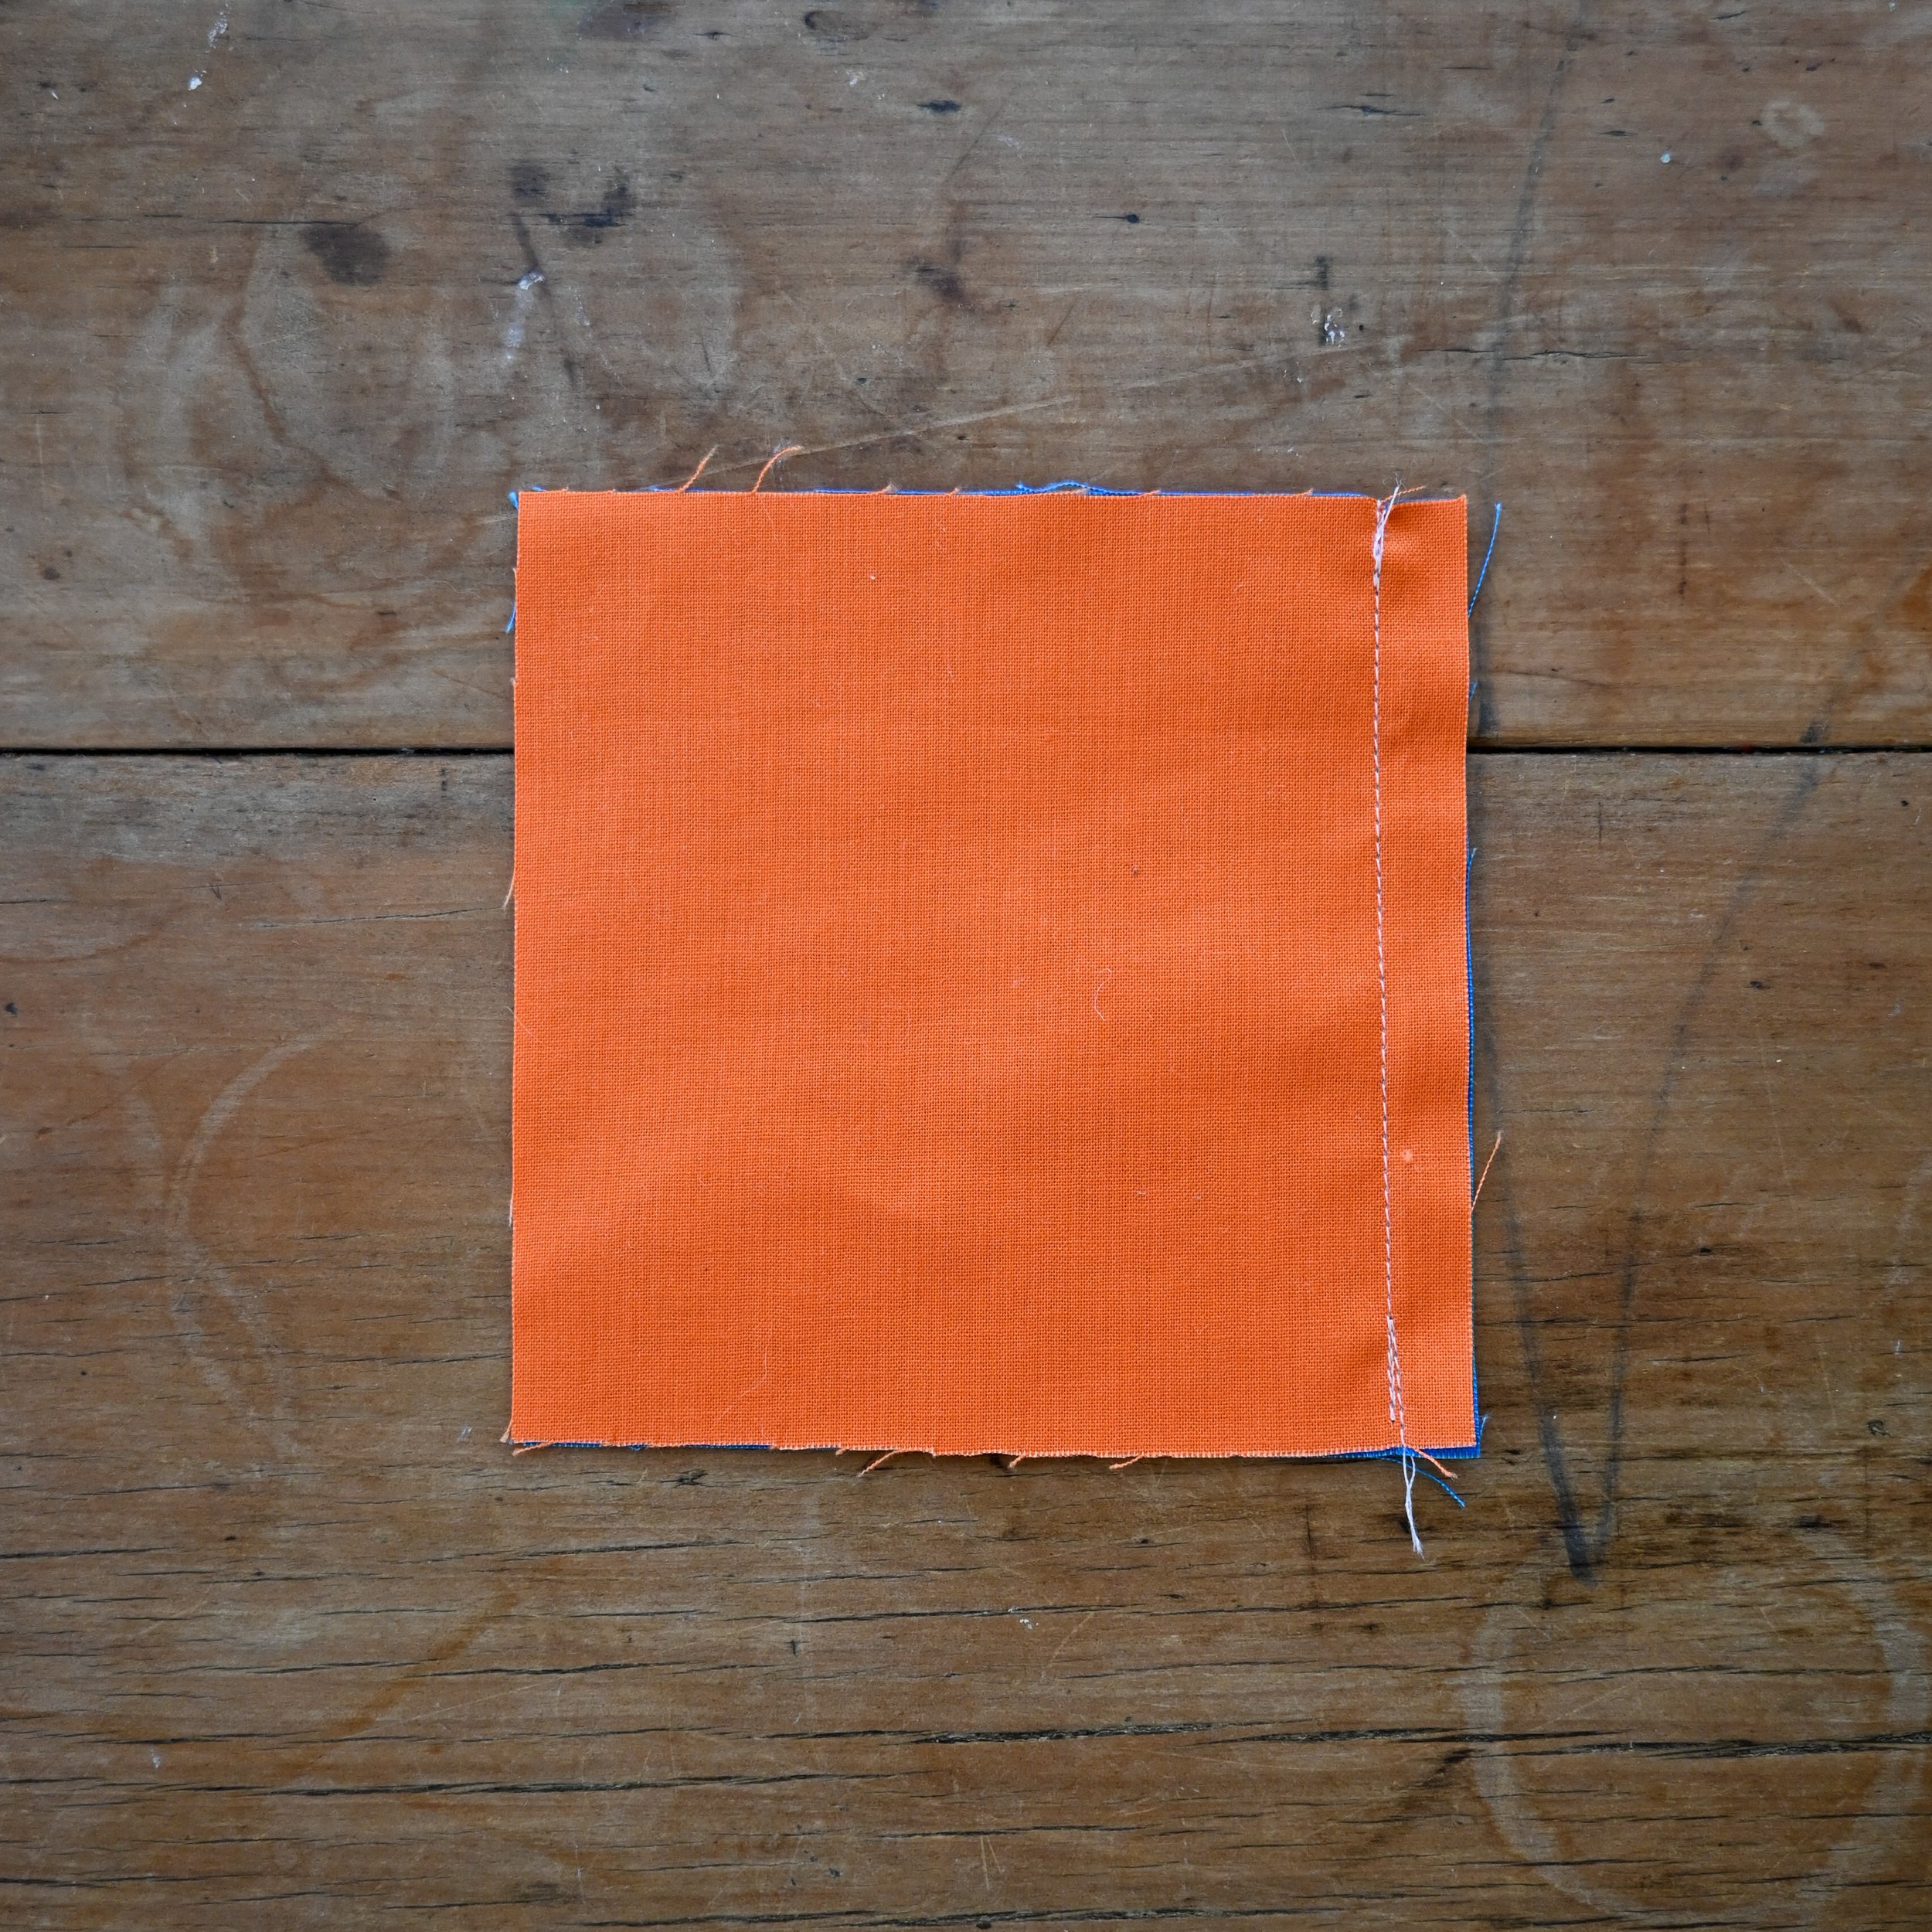
Start by stitching squares 1 and 2 together. (Ive numbered the squares across the top row 1-4, second row 5-8 etc.) We’re going to make PAIRS. Place them together with right sides facing and sew up the side seam. Repeat this step with the remaining squares until you have 8 pairs stitched together. Press the seams open.
Step 3
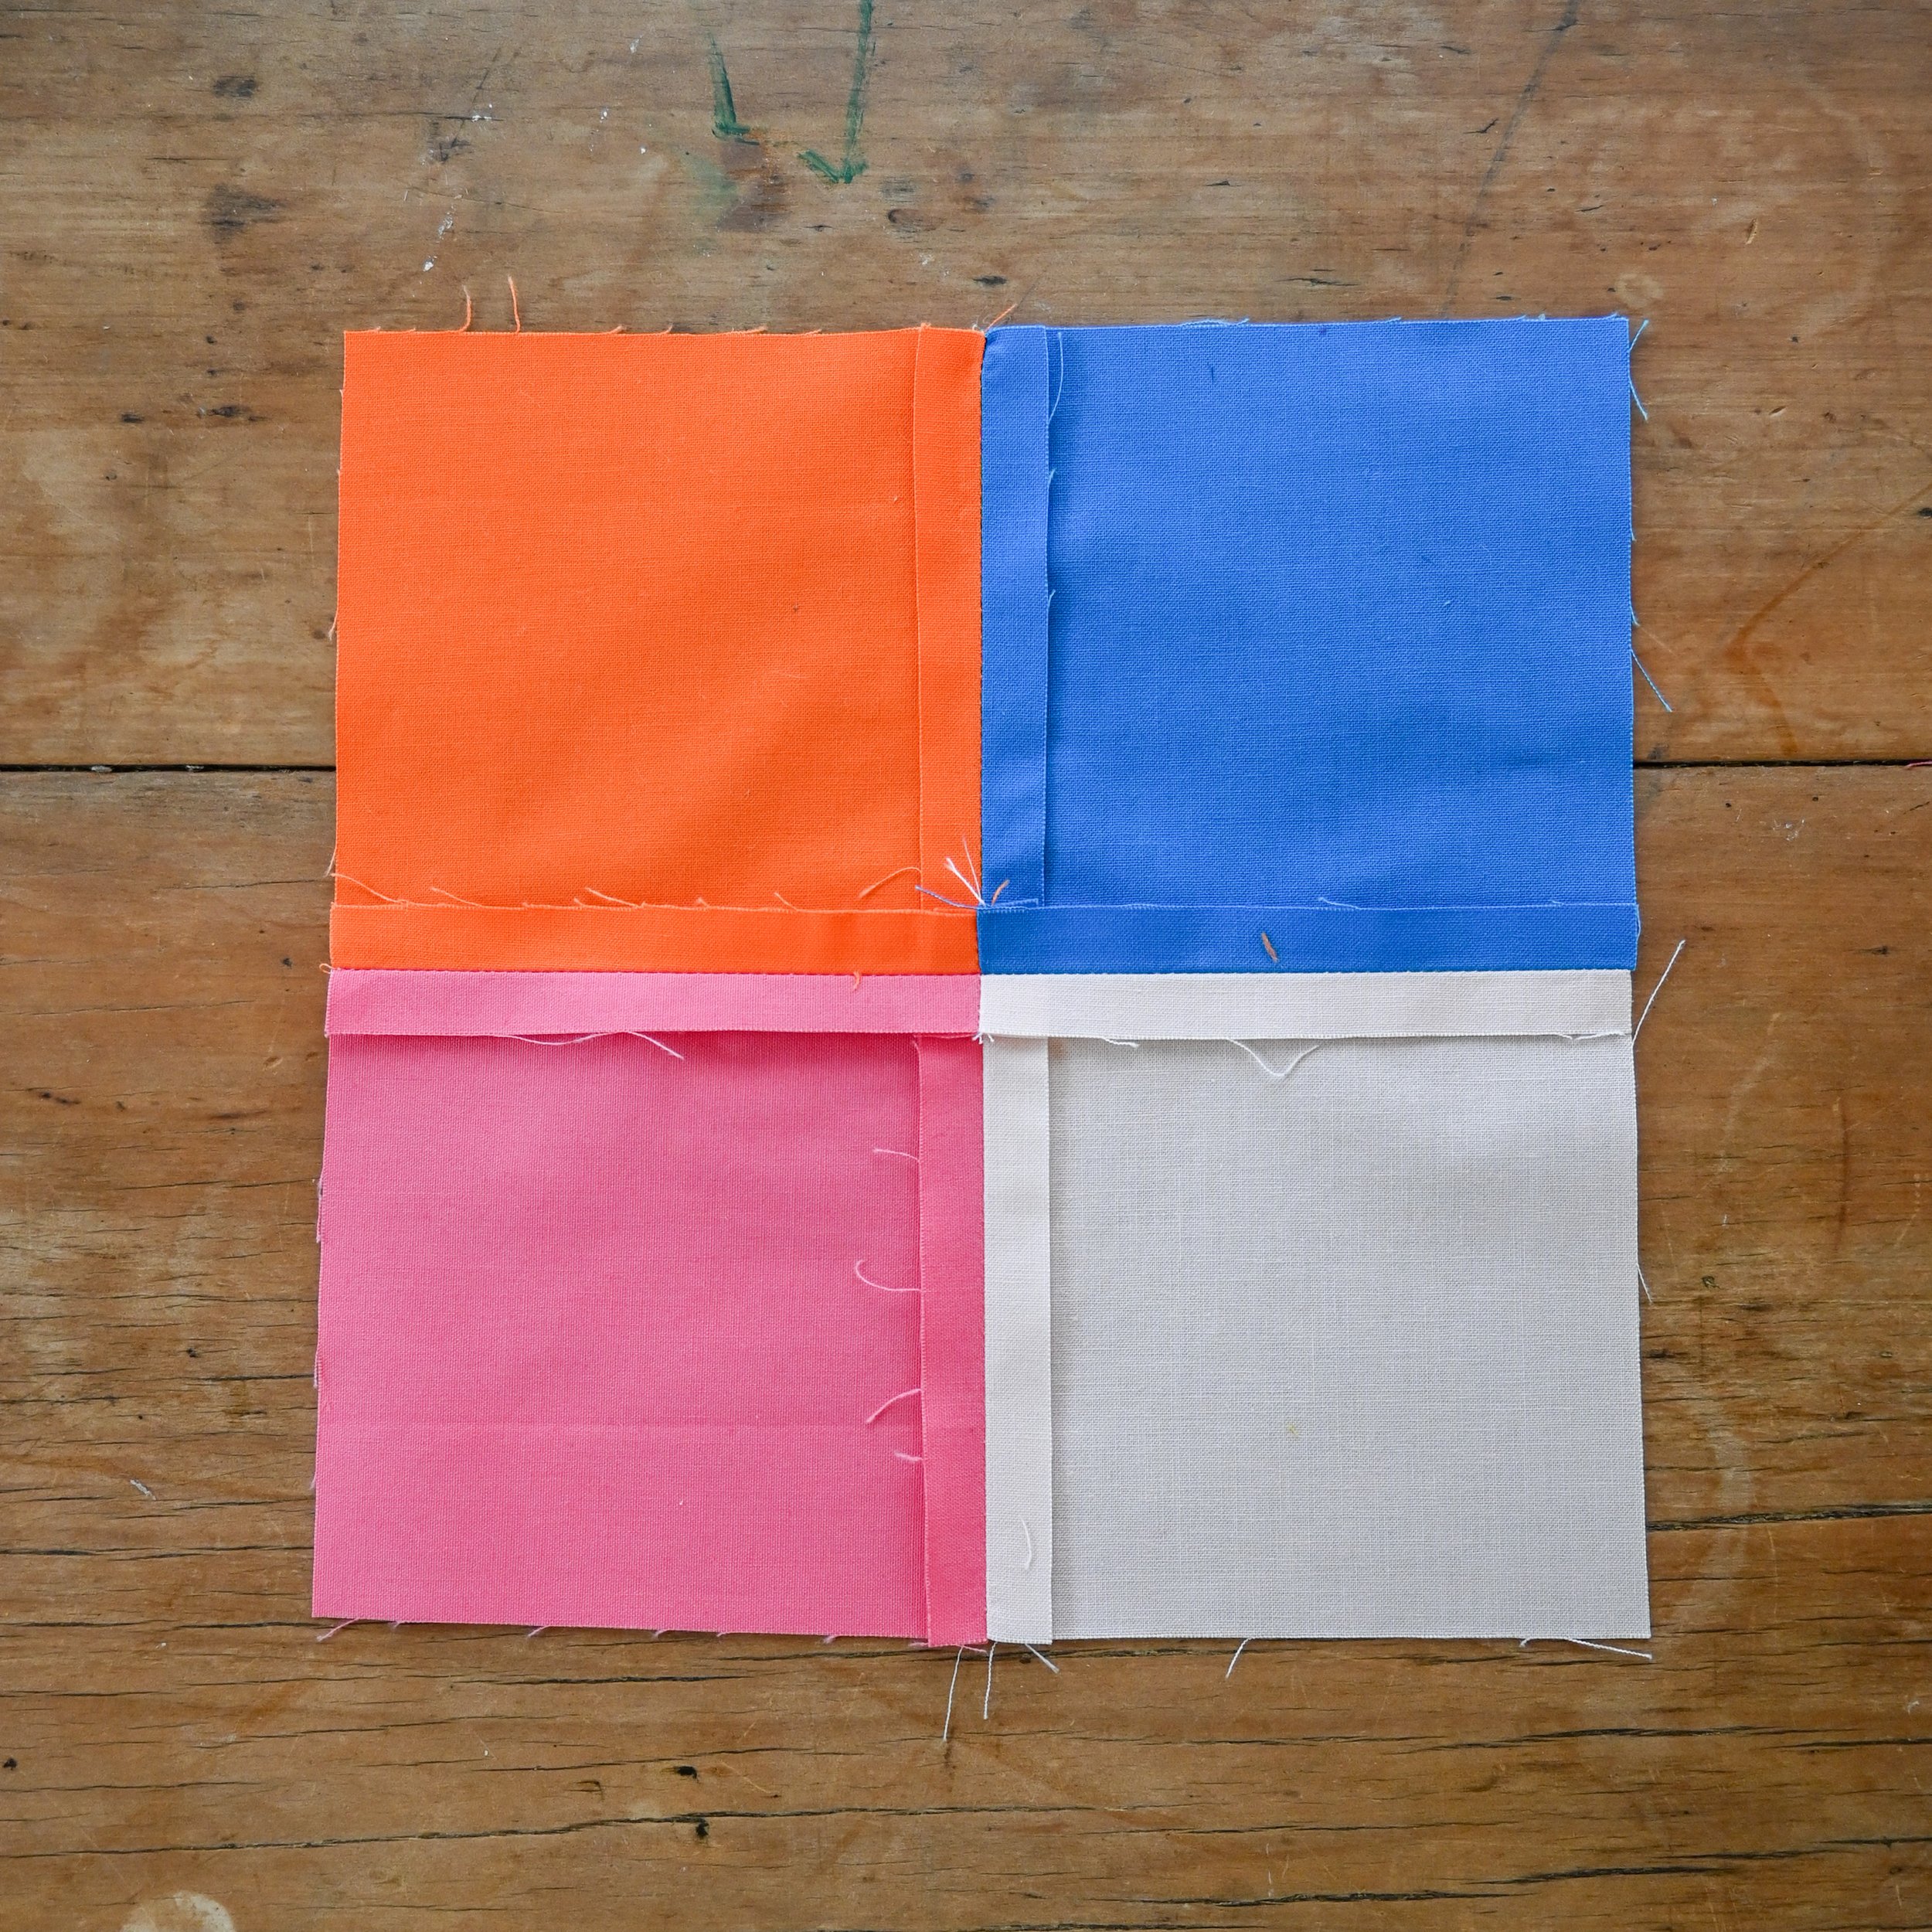
Now it’s time to make QUADS! Pair up 1 & 2 with 5 & 6. Place them together with right sides facing, match the seams and pin along the top edge. Sew along the top edge. Repeat this step with the remaining pieces until you have 4 squares of 4 colours. Press the seams open. You might be thinking here, “Daisy, why can’t I sew strips of squares and then sew the strips together?”. Well, I did that the first few times and my seams just weren’t lining up as neatly as I would have liked. Then my friend and quilting expert Robyn from The Strawberry Thief shared some tips with me and I learned that making quads or blocks of 4 squares is a better way to do it. So I’m passing on that little bit of wisdom here. Thanks for the great tip, Robyn!
Step 4
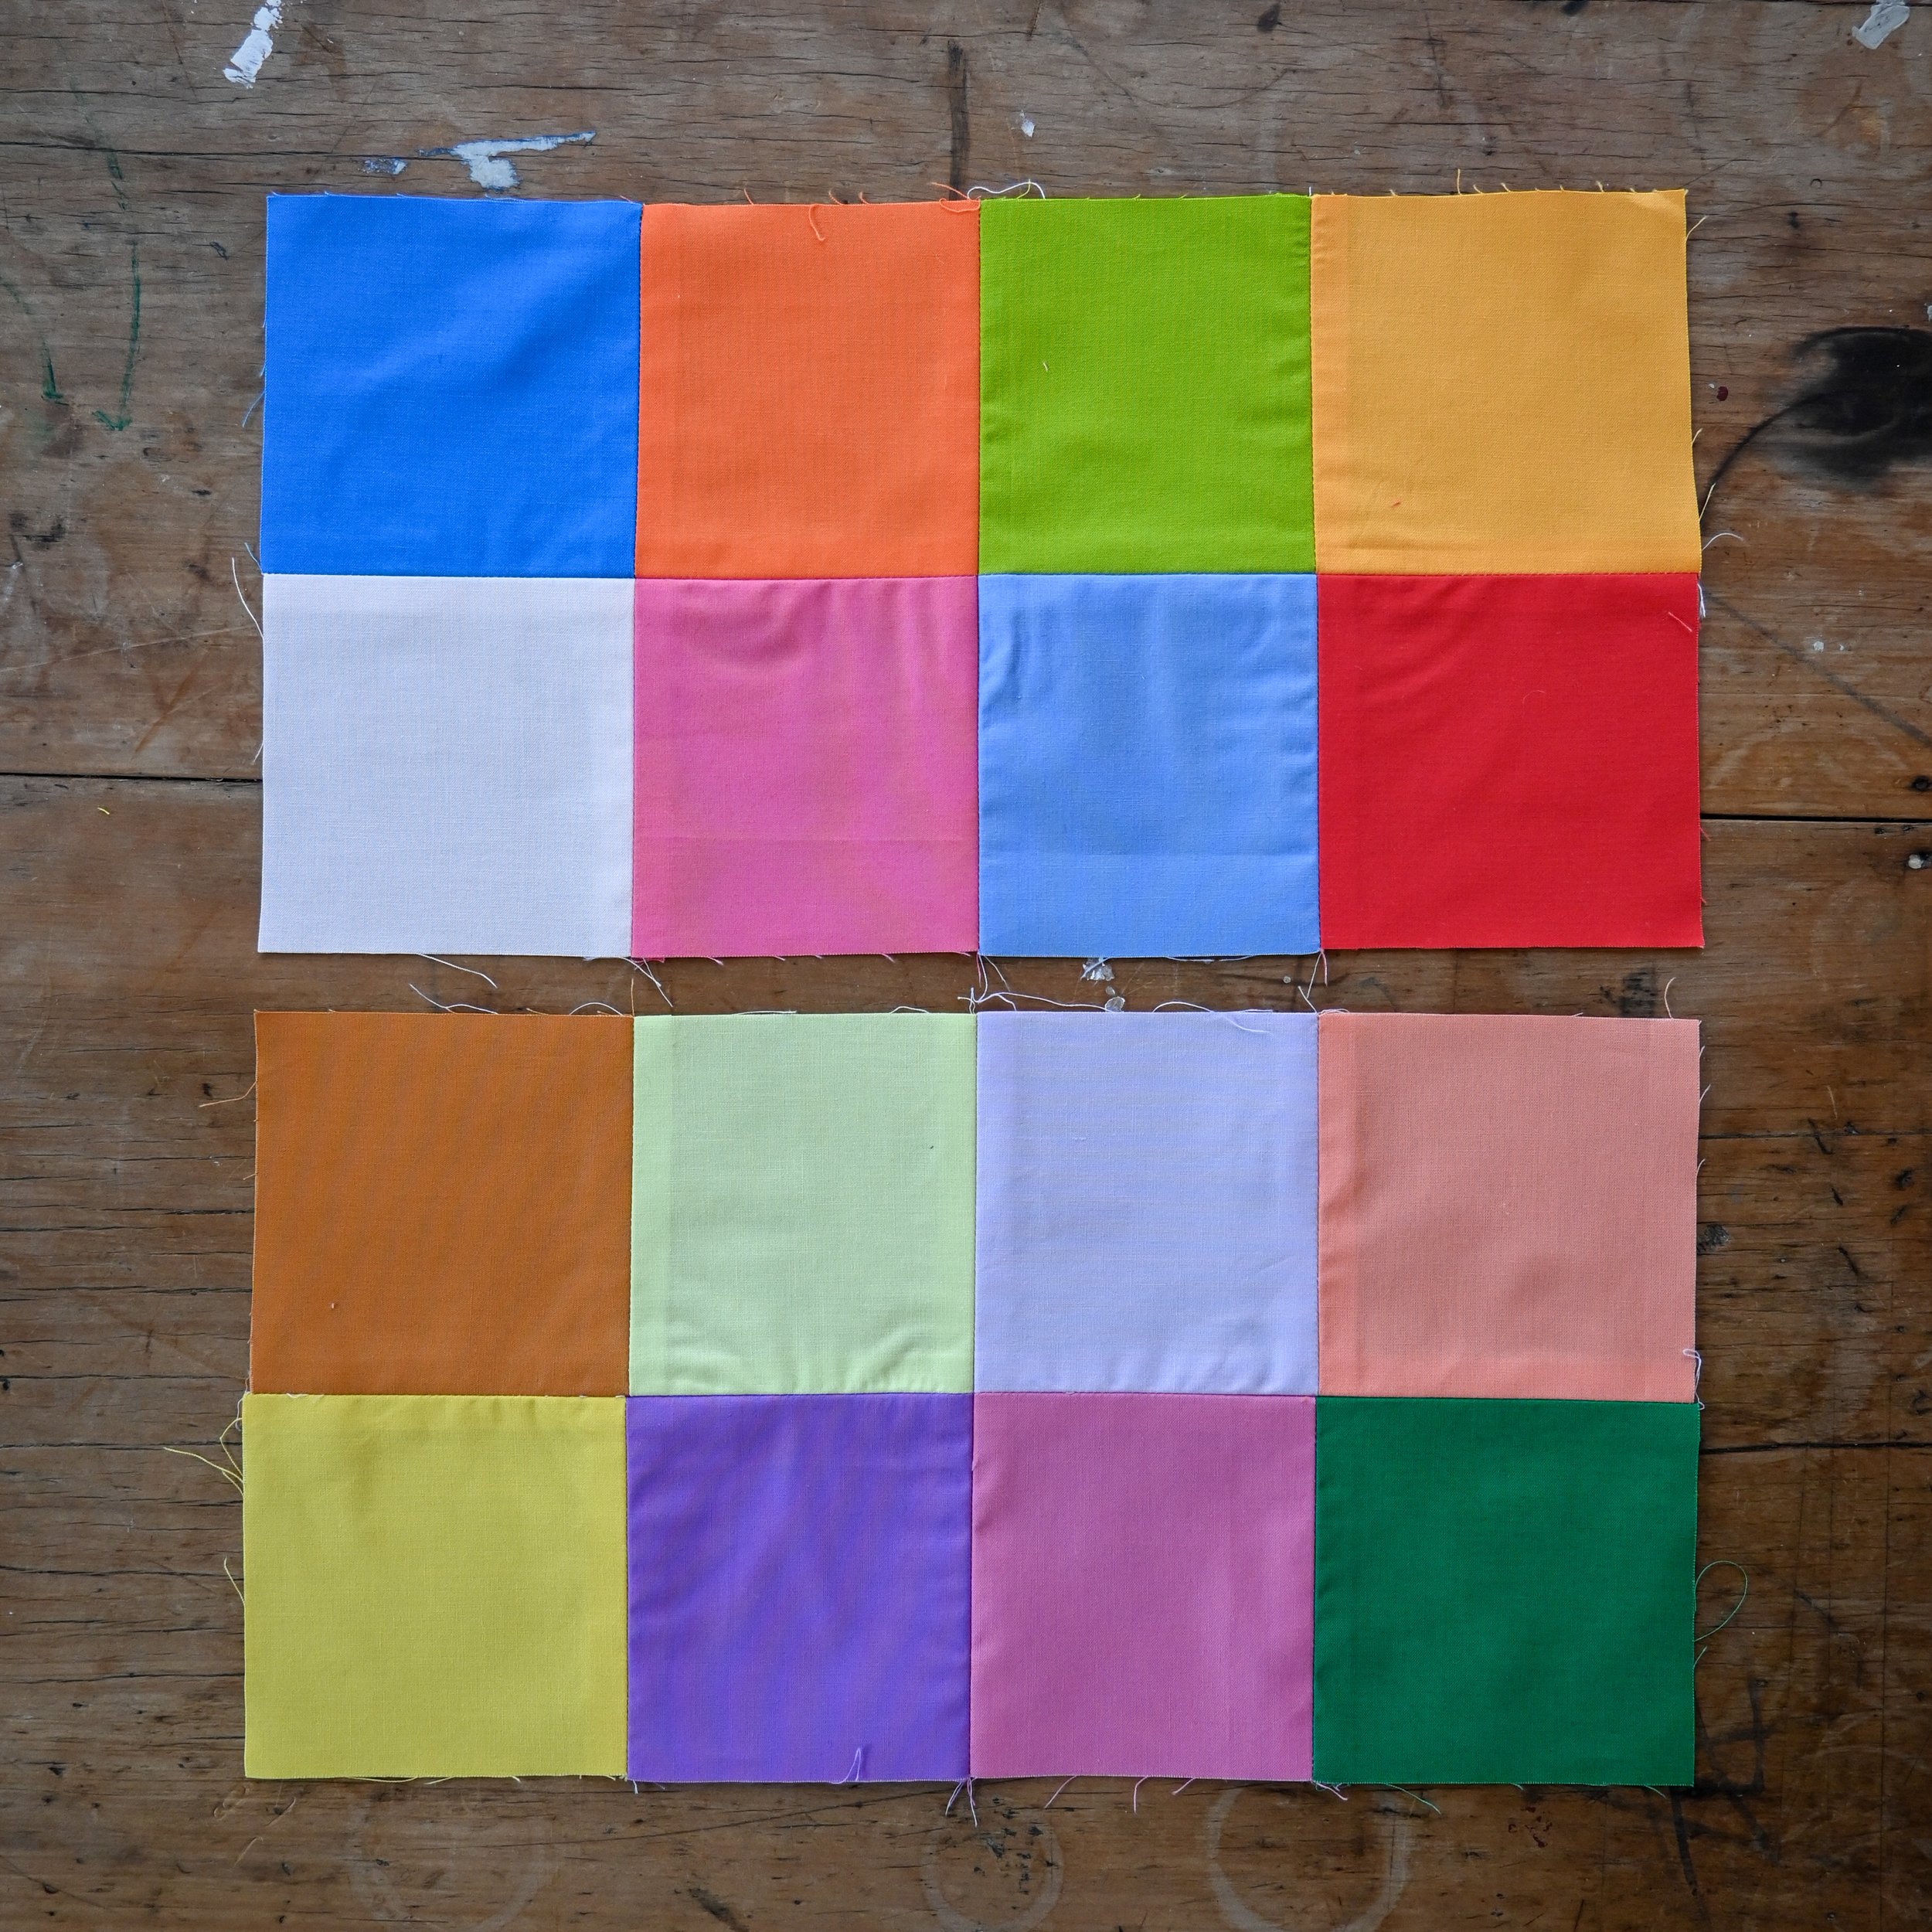
Repeat steps 2-5 piecing the 4 large squares together, matching and pinning the seams and stitching together. Press the seams open.

Step 5
Cut the woven tape into 8cm strips. Fold each strip in half and finger press the fold, these will be the loops. Place the loops along the top edge of your patchwork lining them up in the middle of each square. Pin in place and use a basting stitch to attach them to the patchwork with a 0.5cm seam allowance.
Step 6
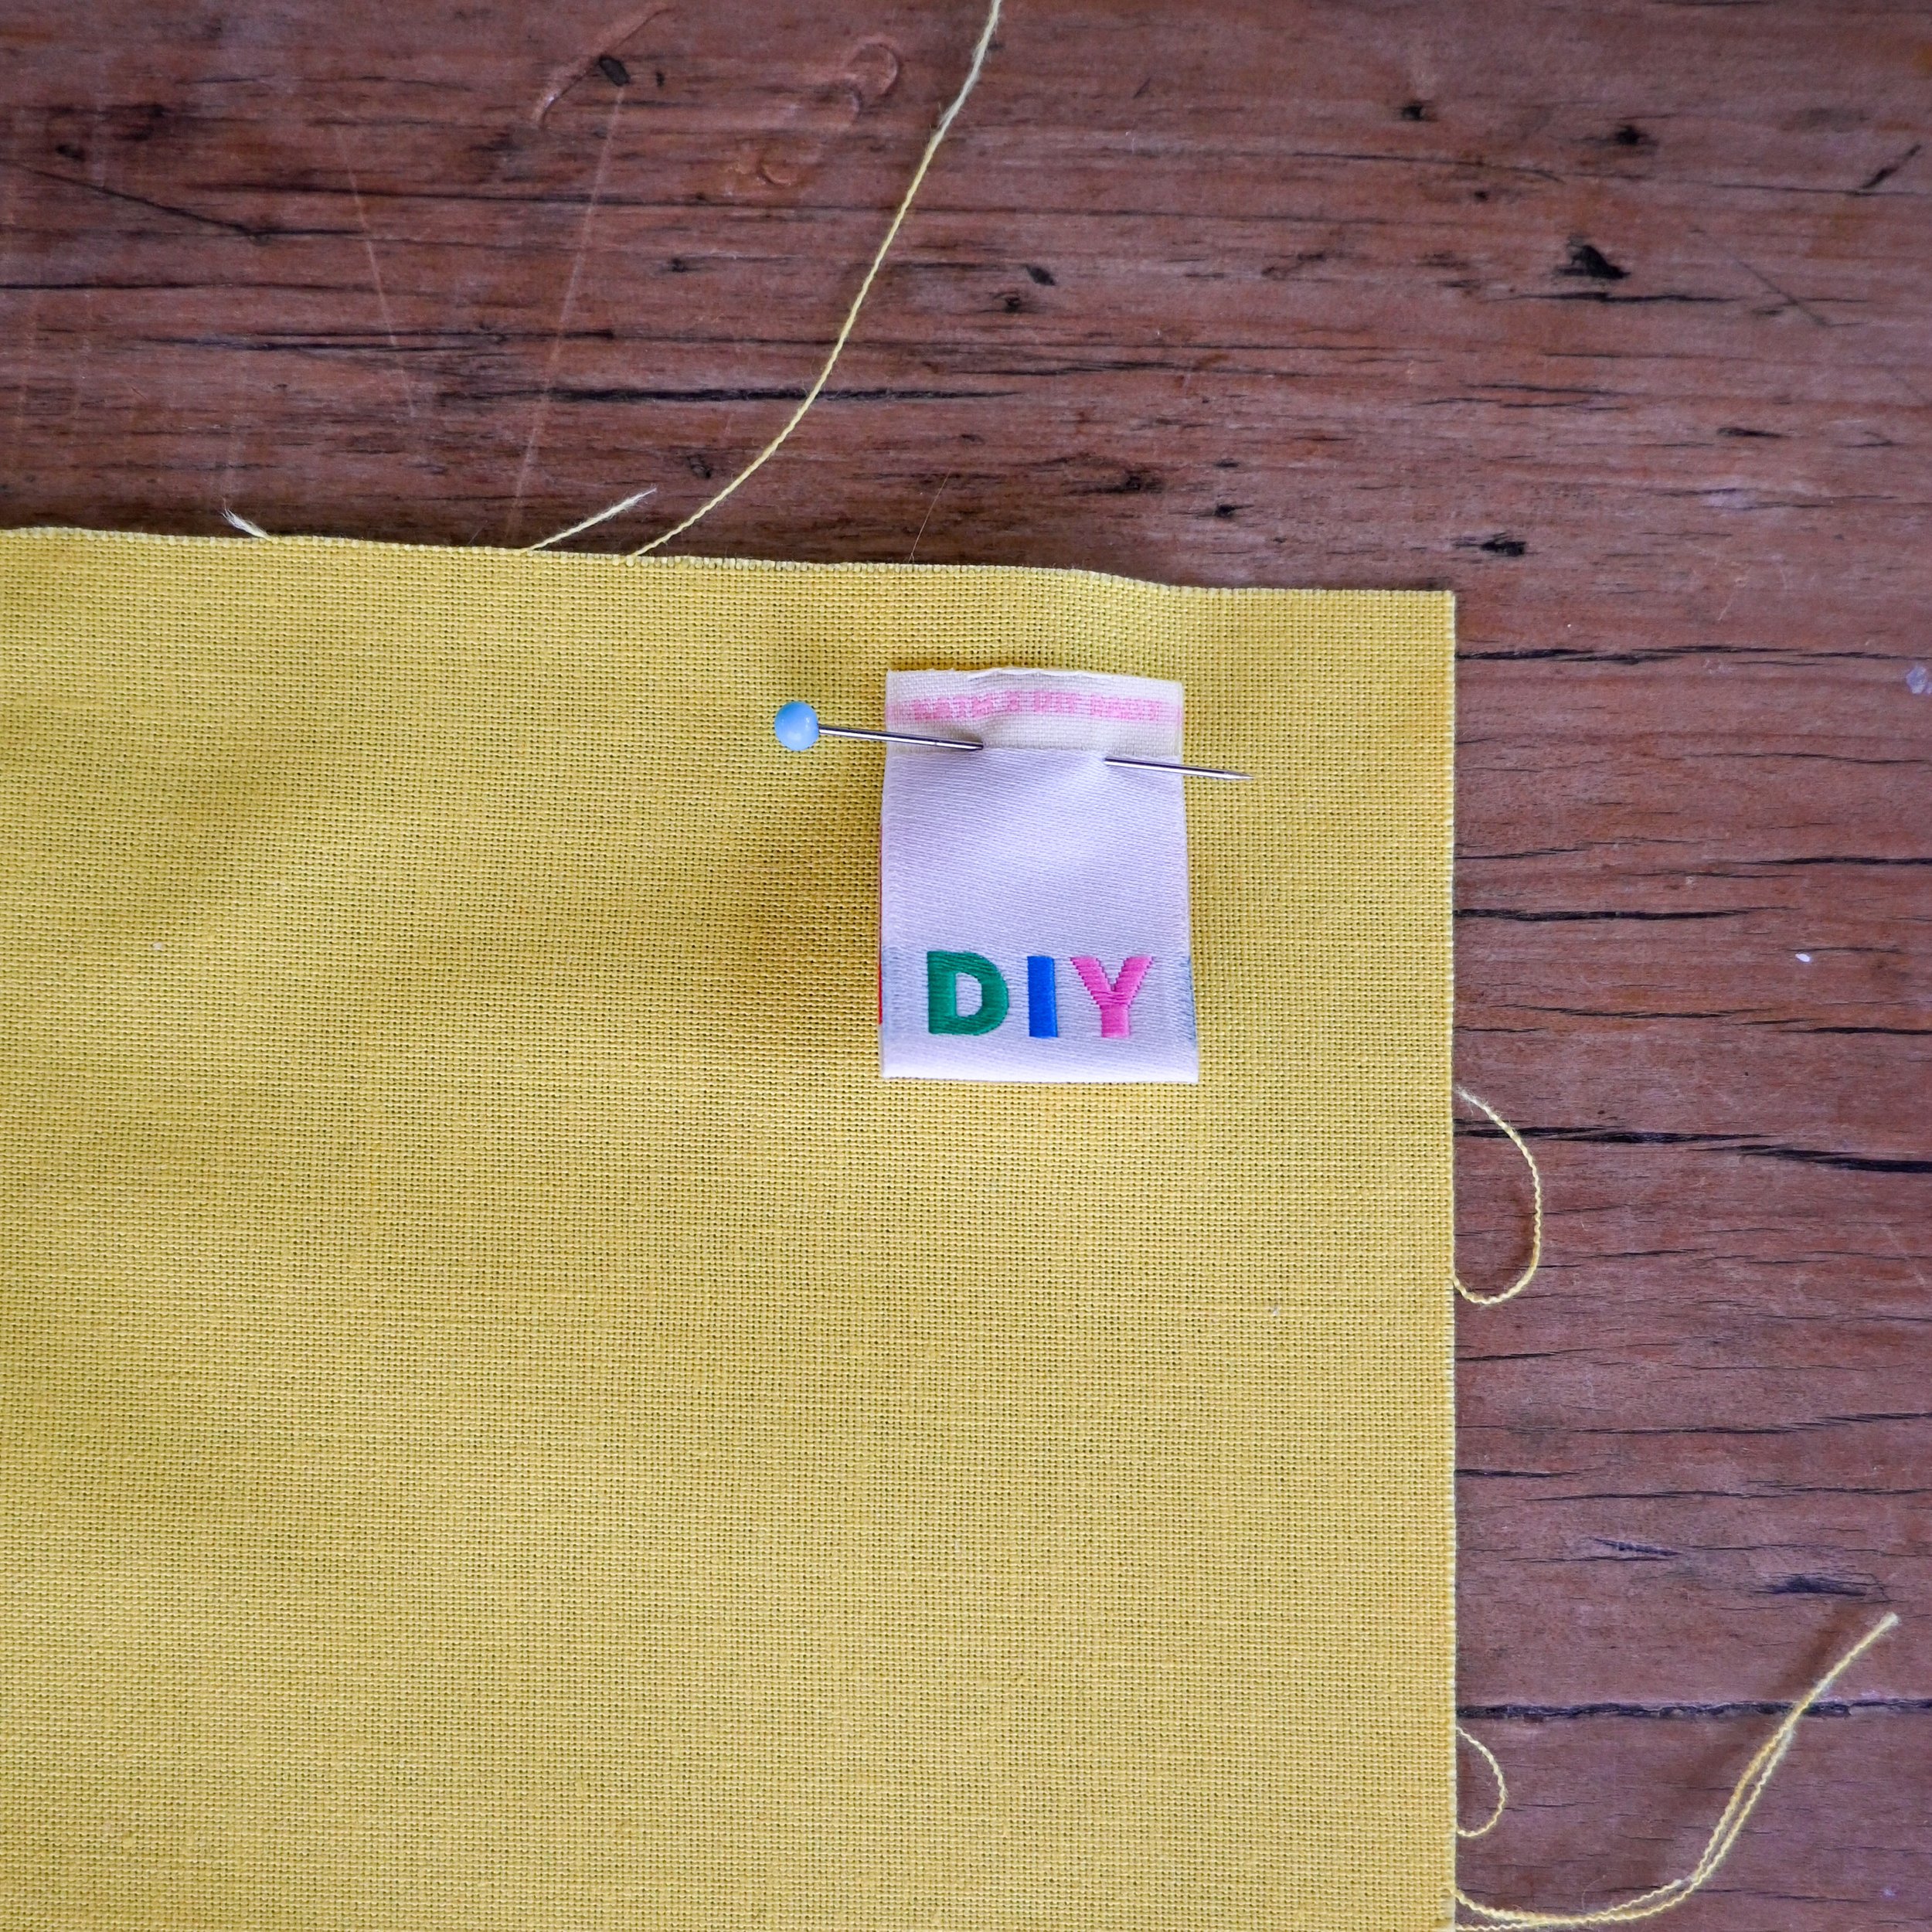
If you’d like to stitch a label into the seam: Place the label along the bottom edge of the patchwork at least 2.5cm in from the side and pin in place 0.5cm away from the bottom edge. Baste the label in place very close to the edge of the label.

Step 7
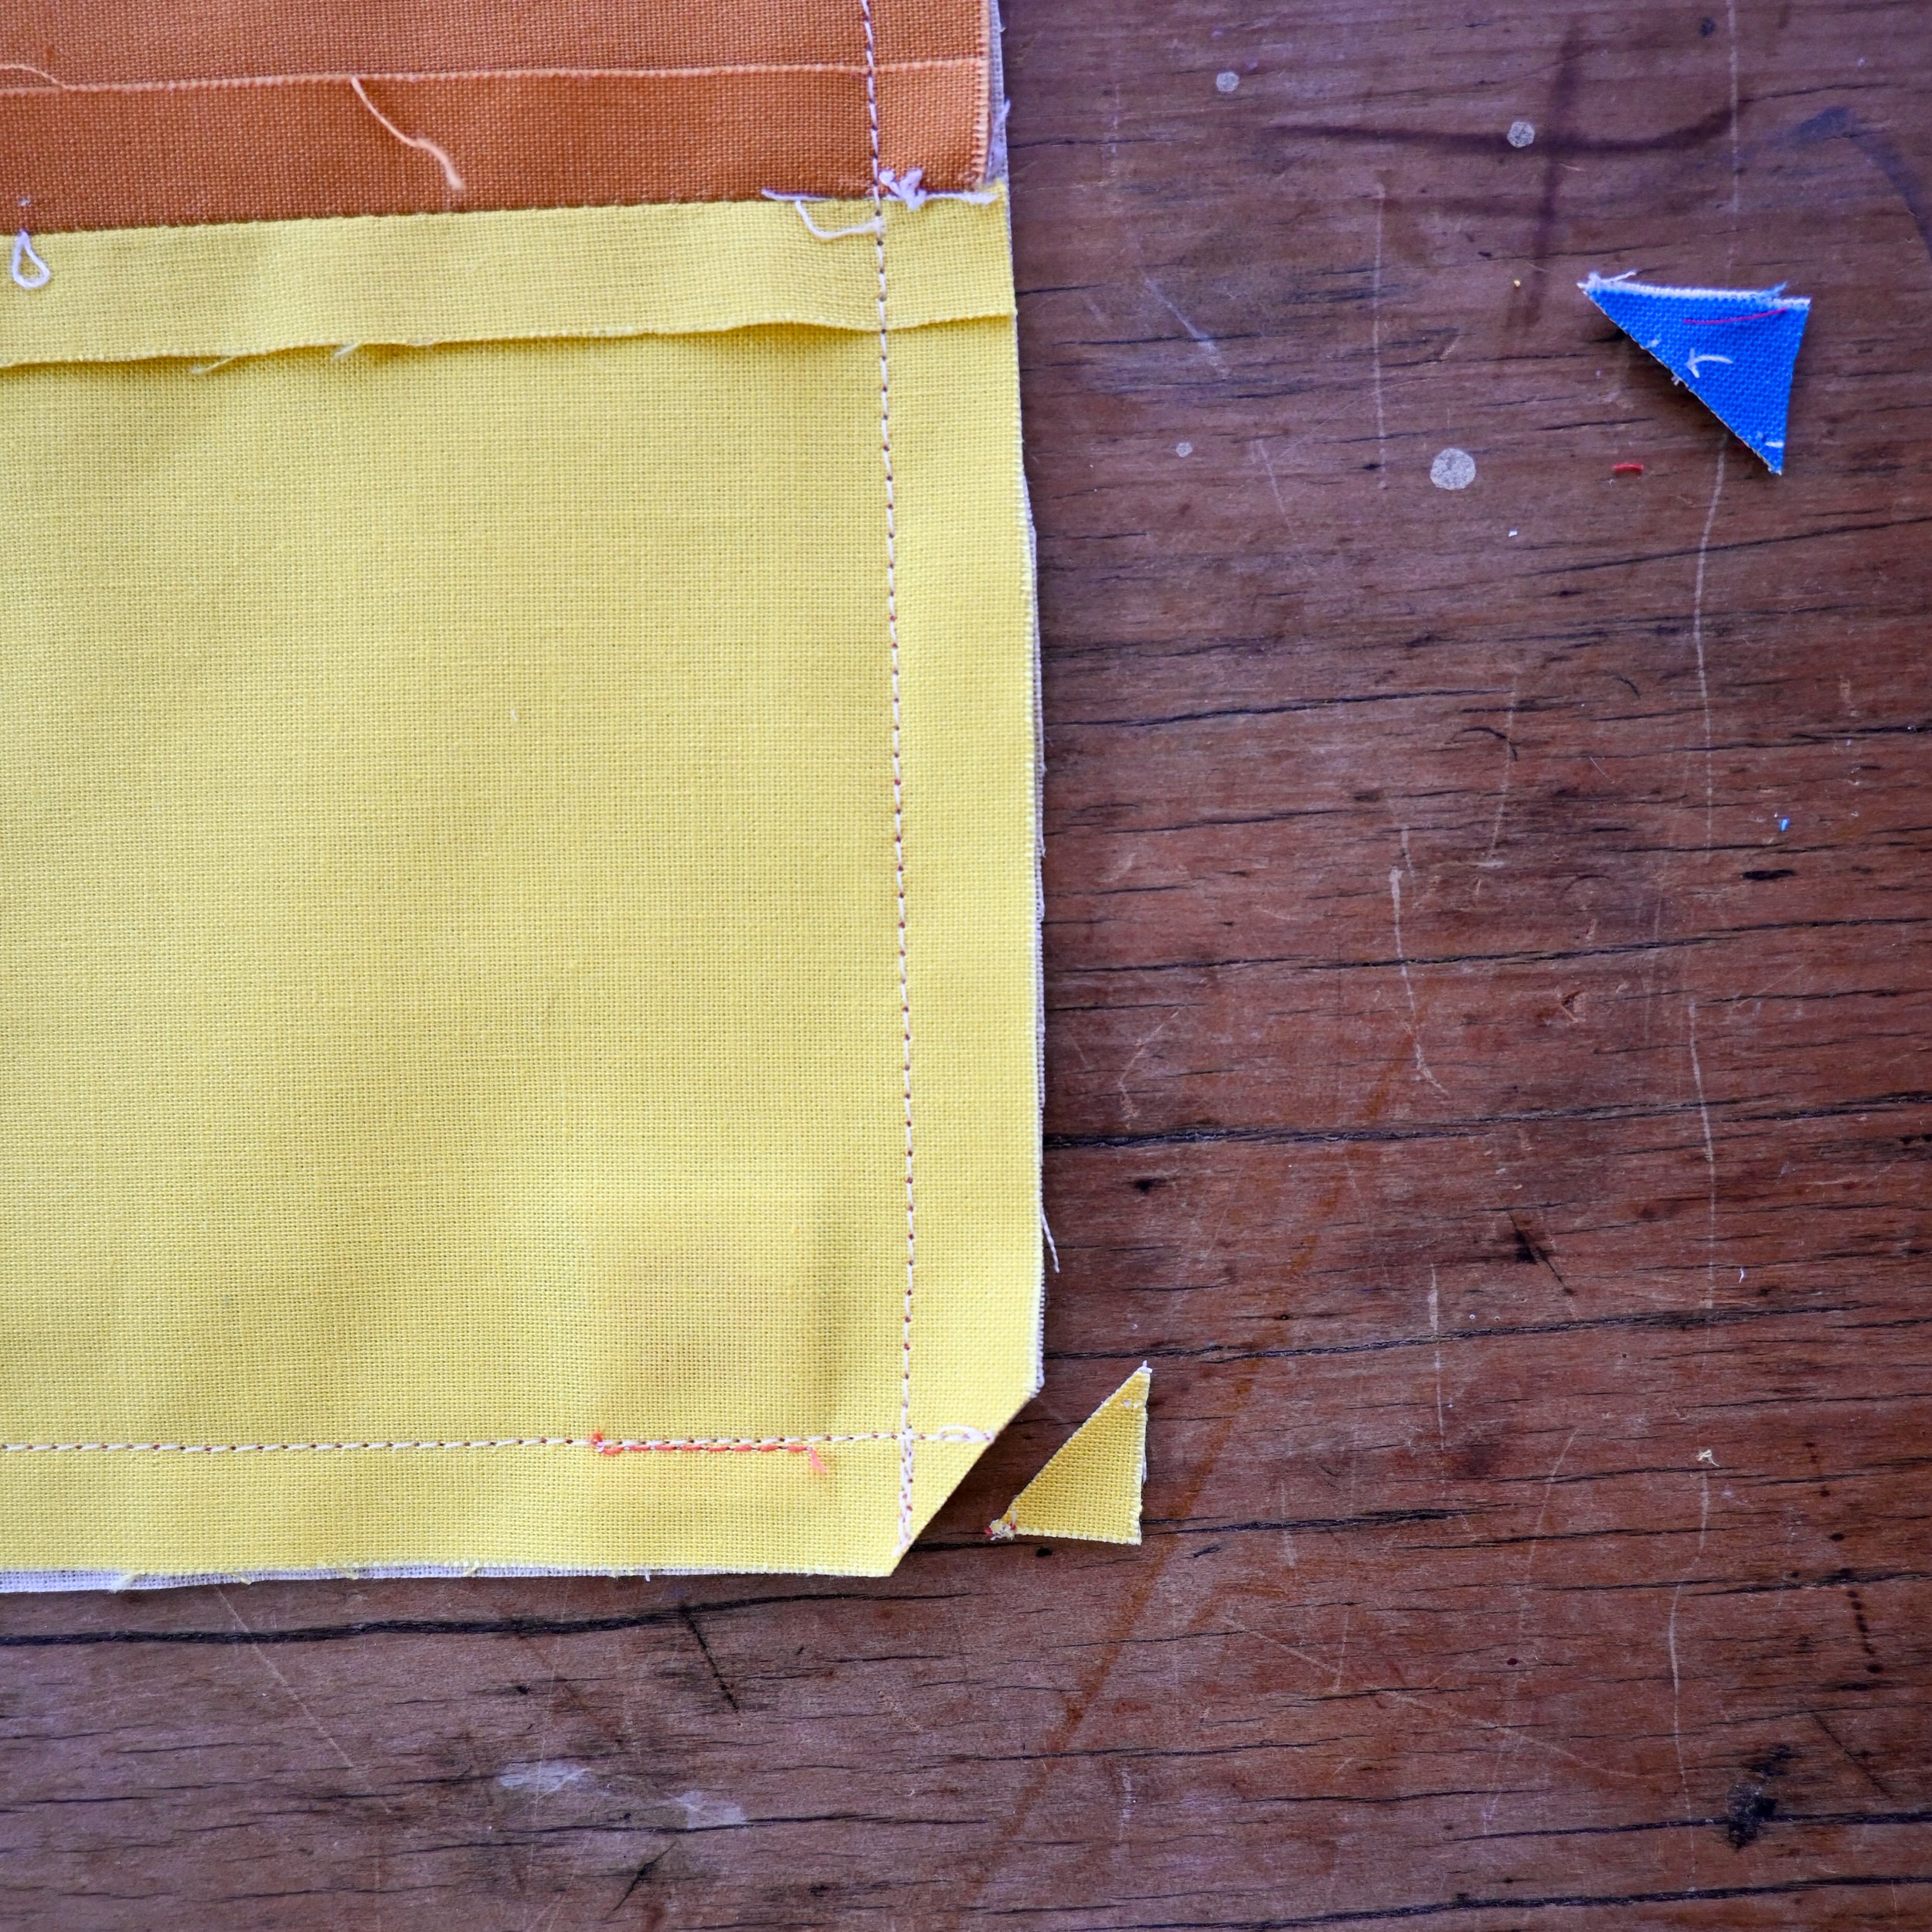
It’s time to attach the backing fabric. Iron the backing fabric and then lay the patchwork on top with right sides together. Pin around the edges to secure in place and then starting along the top edge, stitch the patchwork and backing together with a 1cm seam allowance. Be careful not to stretch the patchwork as you are sewing as you dont want any puckers. Before stitching the other sides, smooth out the patchwork and make sure it hasn't moved. Unpin and repin the sides and bottom edge if required. Continue by stitching the left side seam, leaving a 7cm gap if your cream or light square is along this side. Smooth out the patchwork again making sure it hasn't been stretched, unpin and repin if required. Stitch up the right side, leaving a 7cm gap if your cream or light square is on this side. Finally stitch along the bottom edge.
Step 8
Clip the corners and trim any excess seam allowance. Turn out the wall hanging using the gap and push out all the corners. Carefully press the wall hanging all over. Hand stitch or sew the gap closed and clip any loose threads.
And that’s it! Give your finished project a good press all over and then it’s time to hang it on the wall to admire.
If you give this project a try, tag me on Instagram @_diydaisy so I can see your colourful patchy creation.
