DIY Daisy Chain Charm
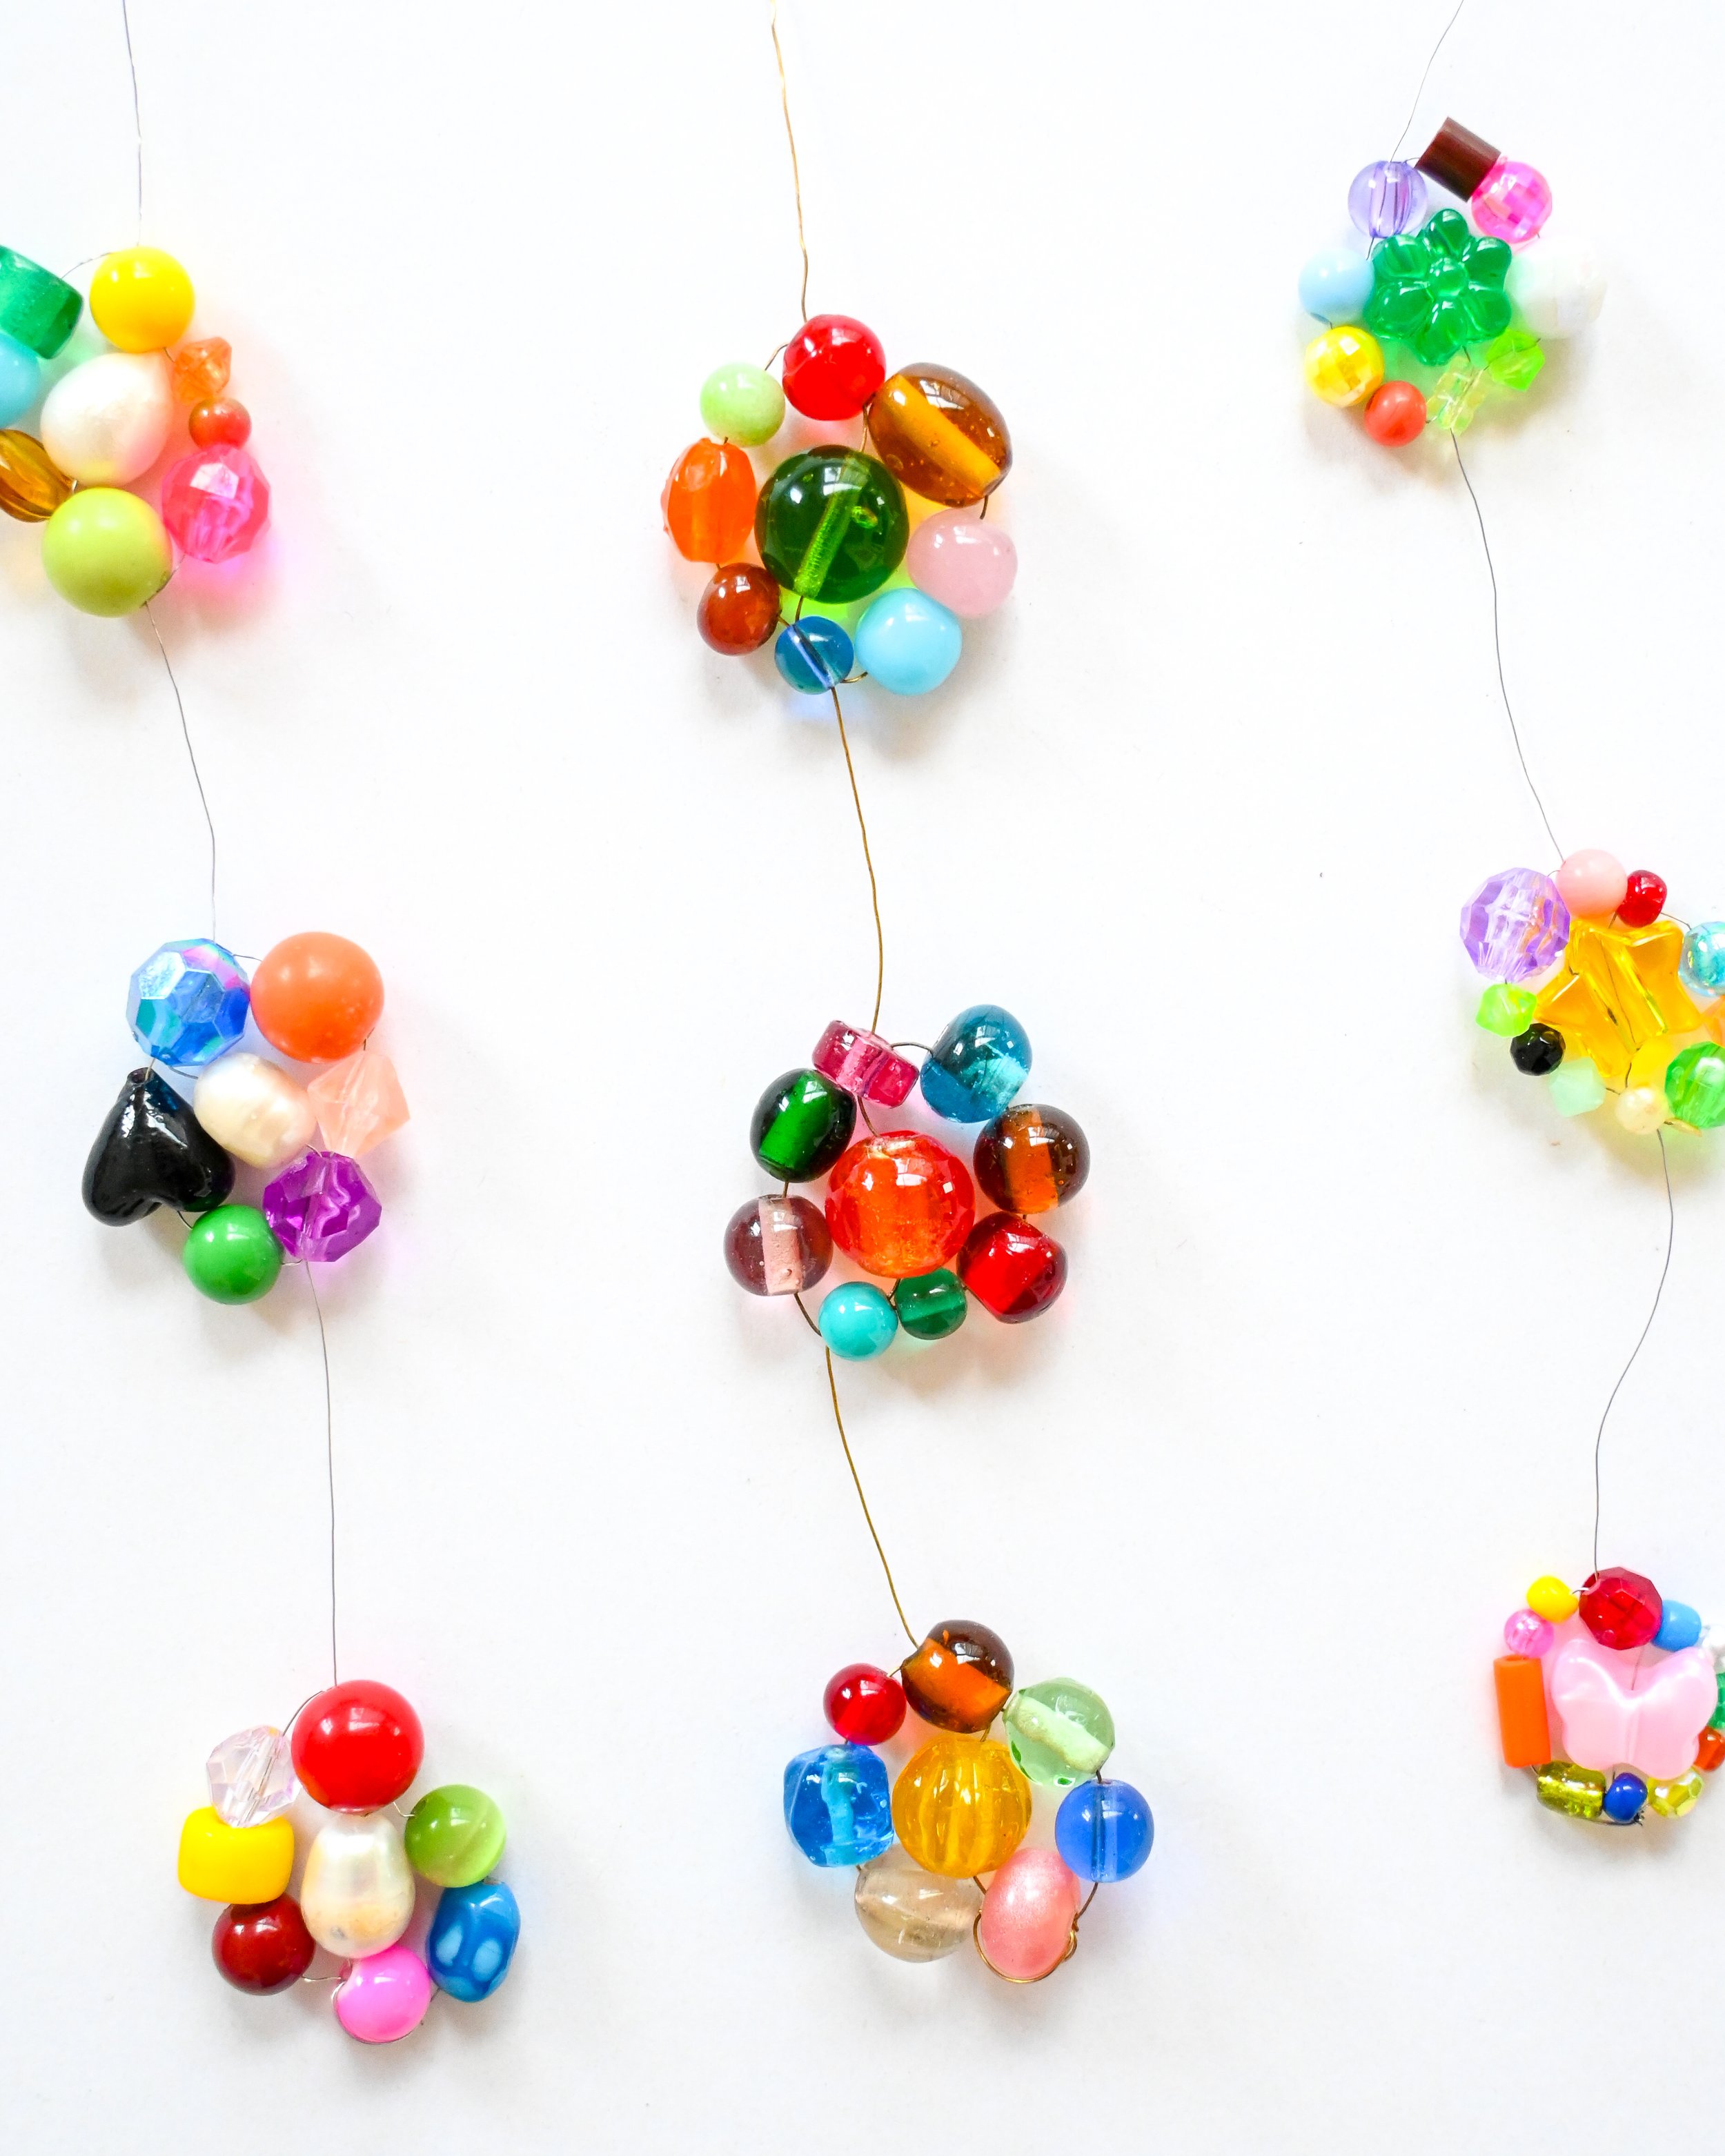
This month my creative prompt is beads so I came up with this cute project, a Daisy Chain Charm!
This project uses the traditional beading technique for daisy chain bracelets with a bit of a twist! Instead of using the same beads, I decided to mix and match all of the different beads I had found to make my charms unique in size and shape. As I was crafting these daisy chain charms, I realised I could have used fishing line as my string but, I was determined to use the materials I already had, so I improvised with some wire I found in one of the second hand jewellery kits.
These Daisy Chain Wall Charms are not just quirky and colourful, they're like little bouquets of upcycled treasure.
You will need:
A variety of beads - Each flower uses around 9-12 beads.
Fishing line, jewellery wire, wire (that will fit through bead holes) or some string
Jewellery pliers and wire cutters
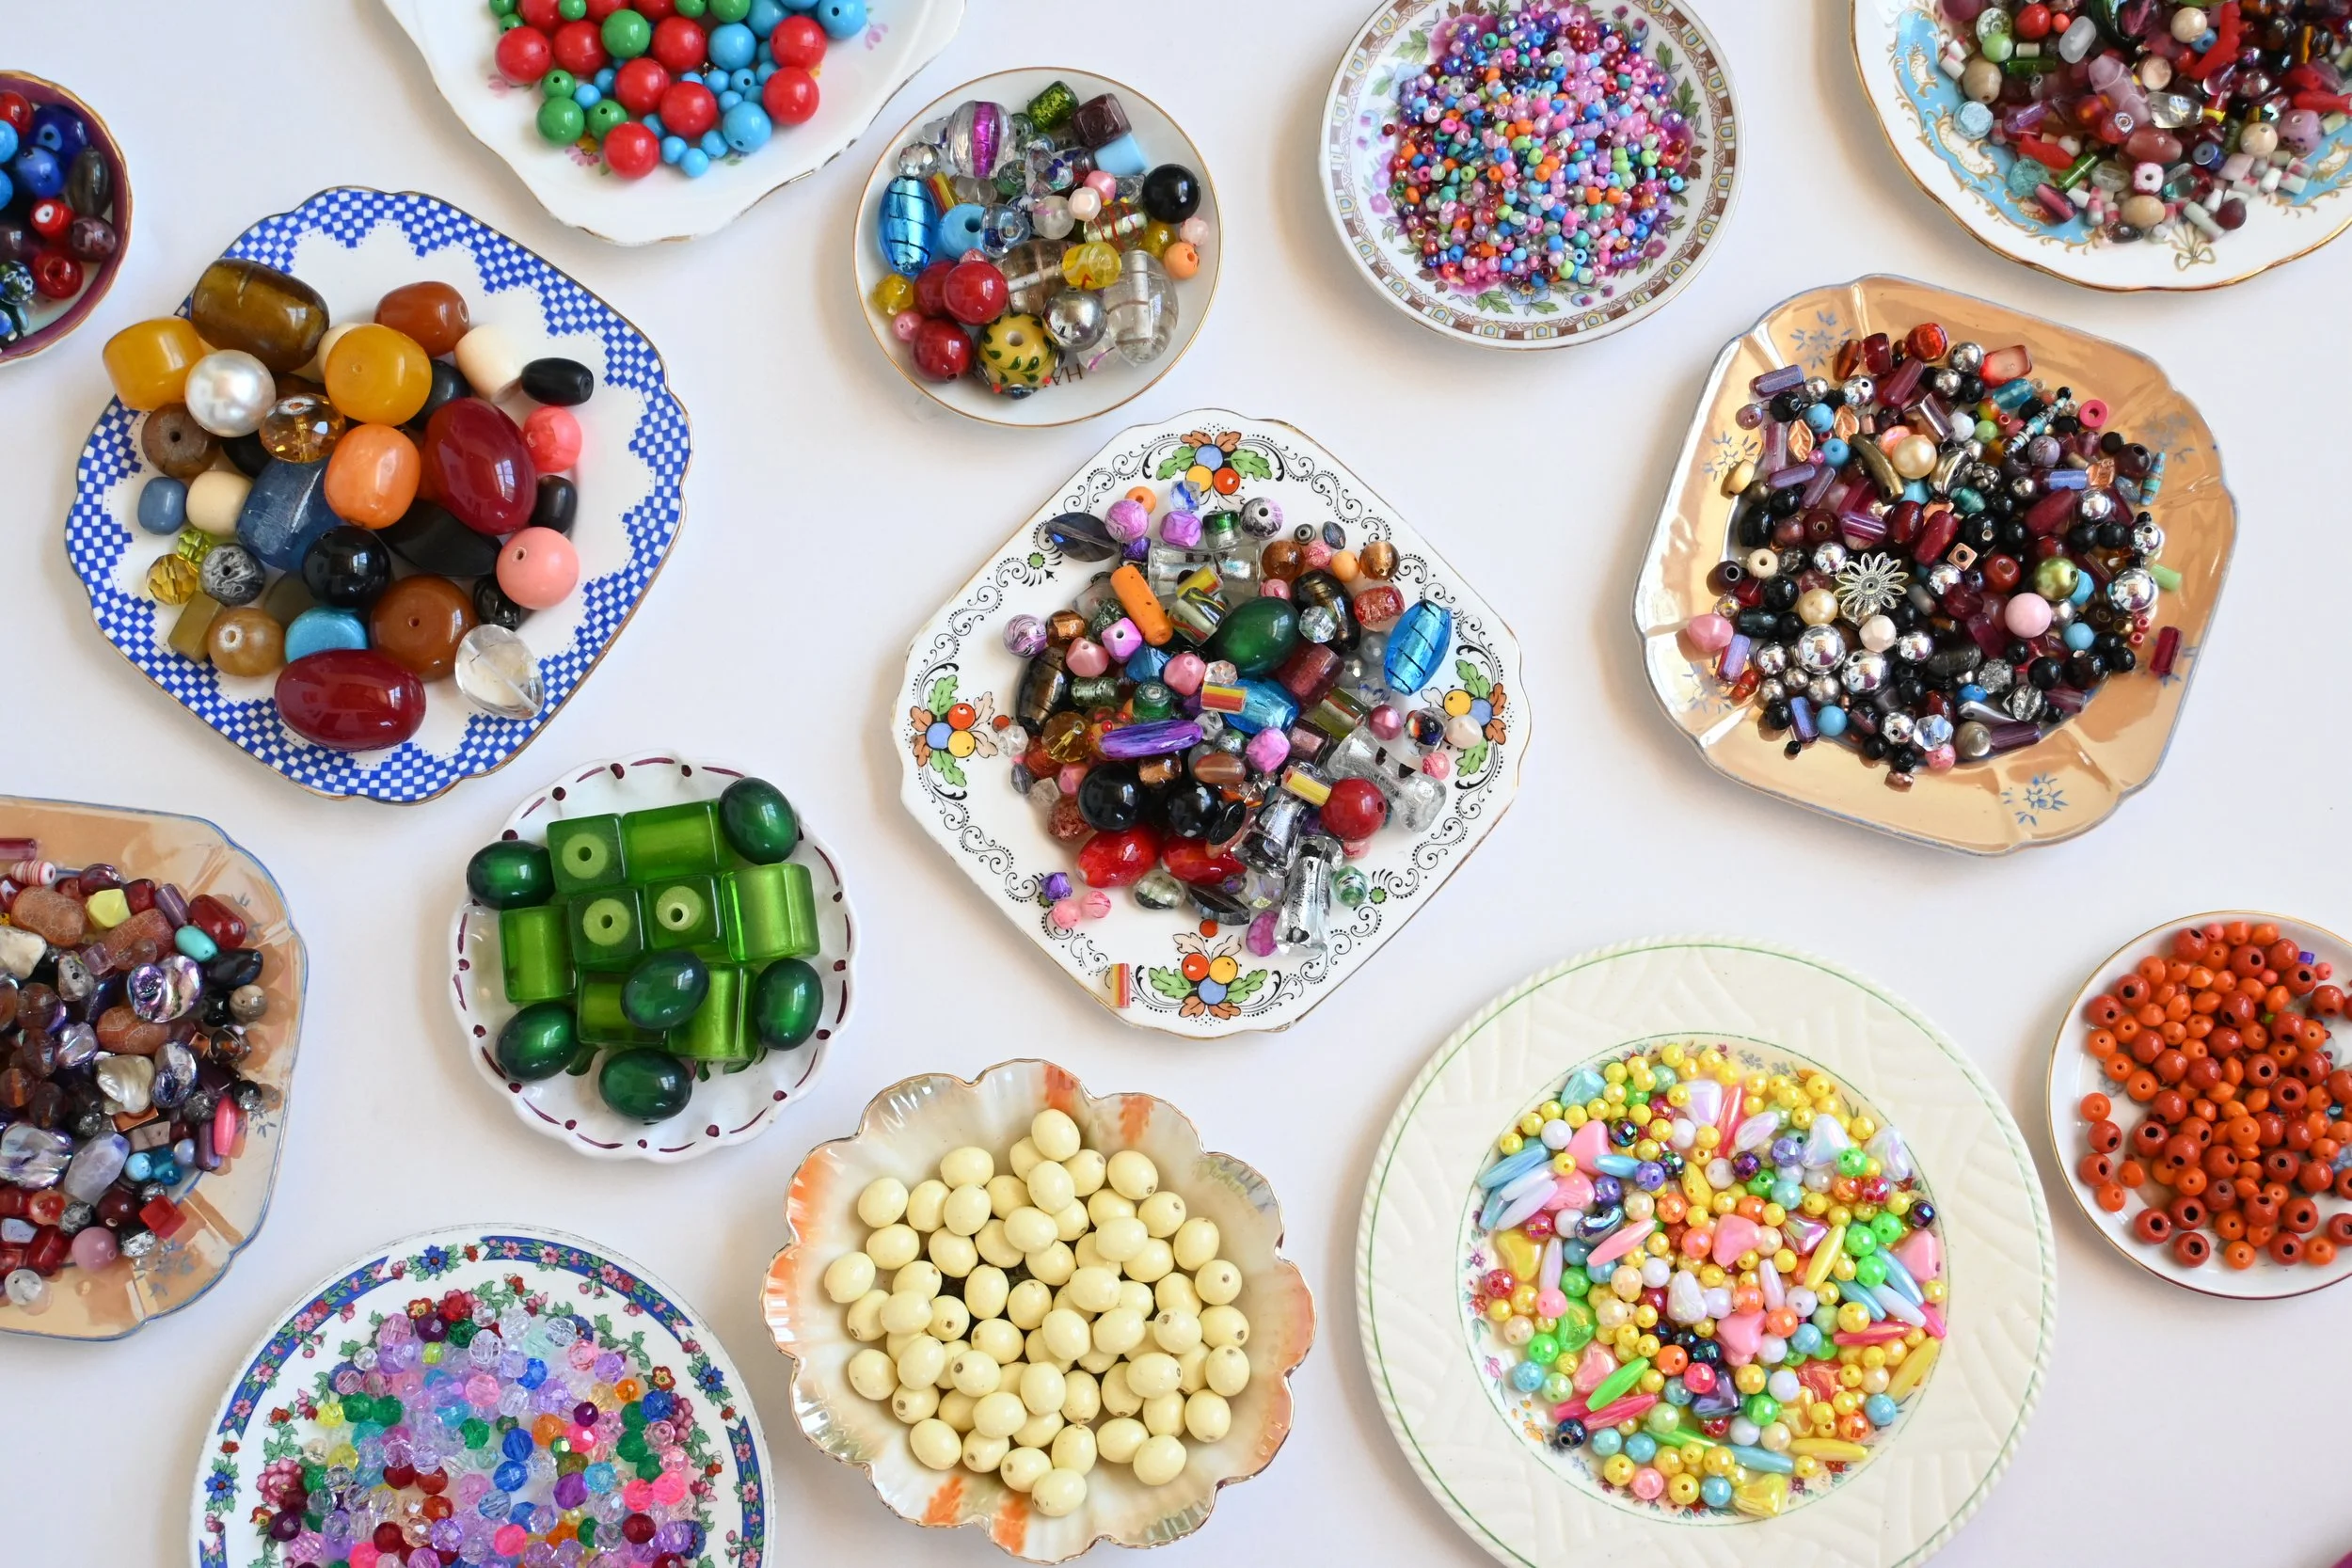
Some of the second hand beads I collected from opshops and Facebook marketplace!
How to make a Daisy Chain Charm:
Design your flowers. I like rainbow flowers, so I try mixing cool and warm tones and light and dark colours for a perfect balance. You want your beads to be similar in size, but you can play around until you get the perfect number and combination of beads.
Watch tutorials on Youtube, Tiktok or read this blog to see how to form the Daisies. Most tutorials will say to have 4 petals, then a centre bead and then 4 petals, but when you use various beads, that might change to 5 or even 6. You CAN undo your flower and re-bead it to make sure your petal beads fit nicely around your centre bead.
Cut a piece of wire 30-50cm long. Starting about 10cm from one end, bead your first flower. Leave a short gap before starting your second flower. Repeat until you have 3 flowers dangling, and then loop your wire, string or fishing line around the last bead to secure. Basically, do whatever you need to do to stop the beads from falling off. I used wire, so mine was secure with a second loop through one of the beads. You could also use a dab of hot glue - this is DIY friends, you make the rules!
Make a little loopy on one end and hang it on your wall. Woohoo, look at you go bead babe!

If you’re inspired to make one to fill a gap on a gallery wall or add a small me-made touch to your space, I’d be stoked to see what you create - tag me on Instagram so I can see and re-share. Use the hashtag #diydaisychaincharm :-)