DIY Hand Stand

I saw some cool antique glove moulds at Flotsam & Jetsam in Aotearoa, New Zealand and decided to try my hand at making one for myself! This DIY project takes hand made very seriously and is made from upcycled materials. I love how it turned out, a little bit lumpier than its shiny smooth inspiration, but still just as quirky and cool - Also much cheaper than buying the real thing!
Here’s how I made it:
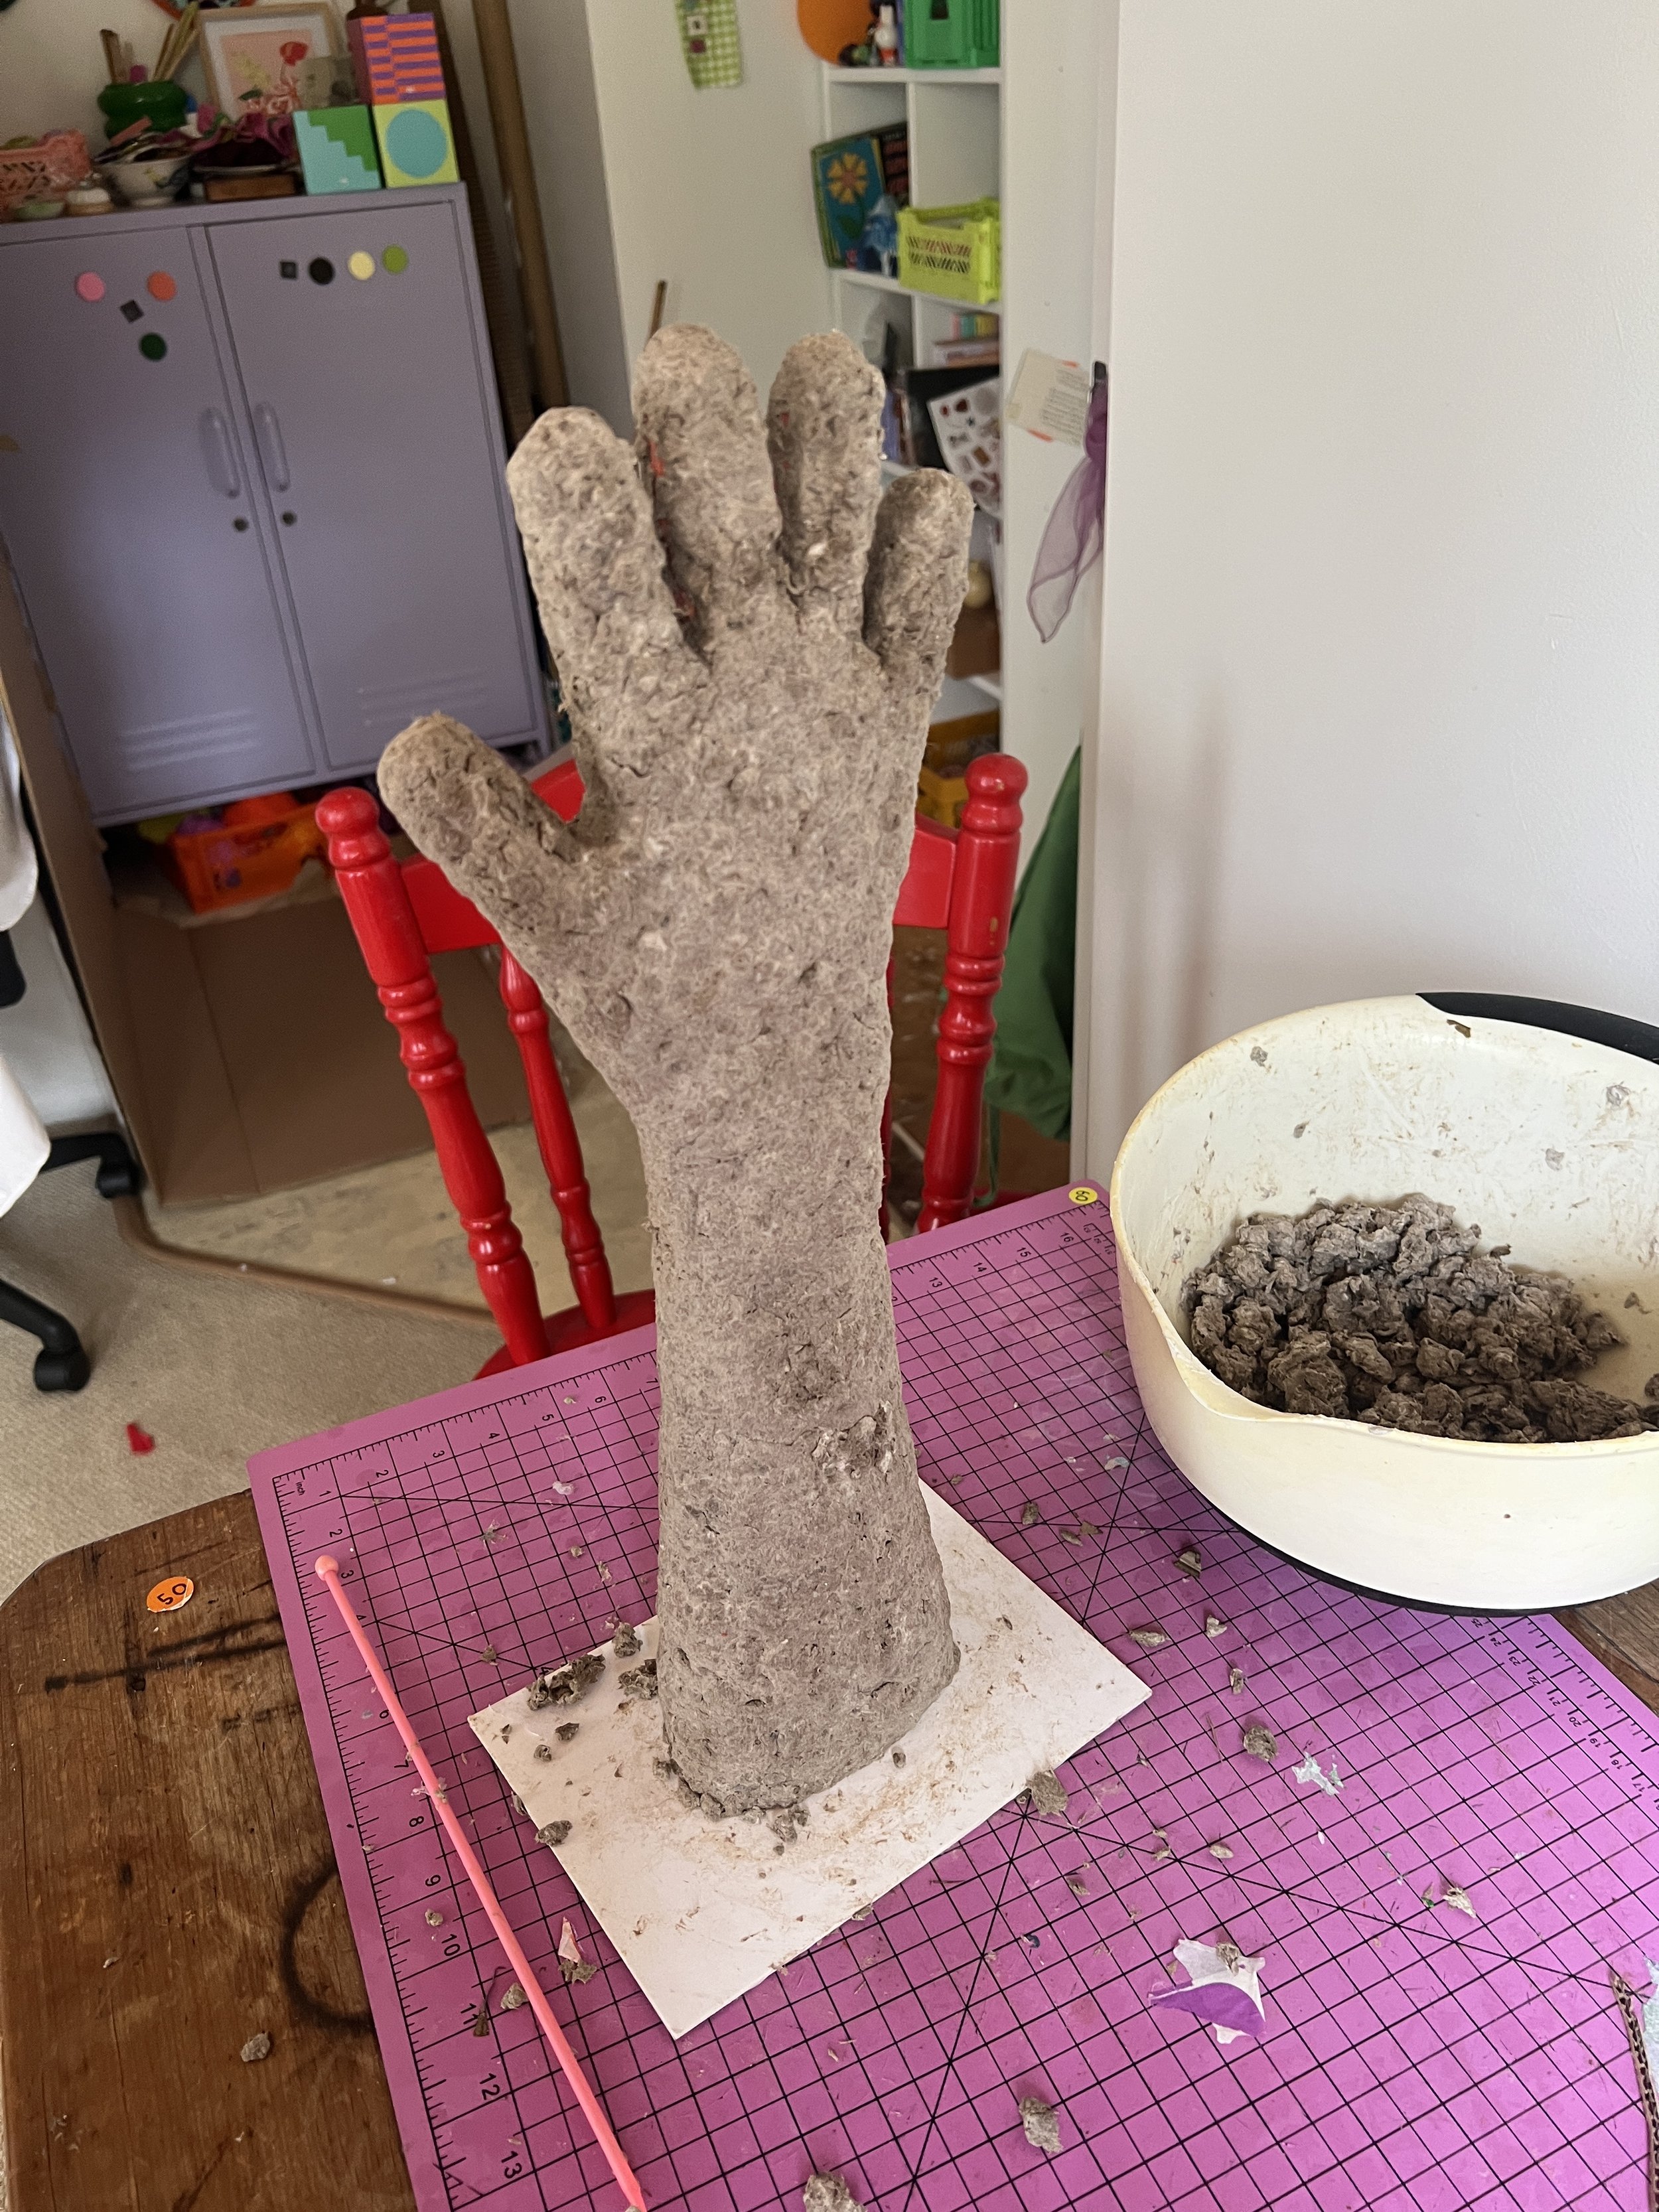
I started by tracing my hand and arm down to just above my elbow onto a piece of cardboard. Then I cut it out and started trying to make it stand up. I used hot glue and other smaller pieces of cardboard to prop it up and I made a base. Once it was giving “hand” I did a couple of layers of traditional paper mache and left it to dry.
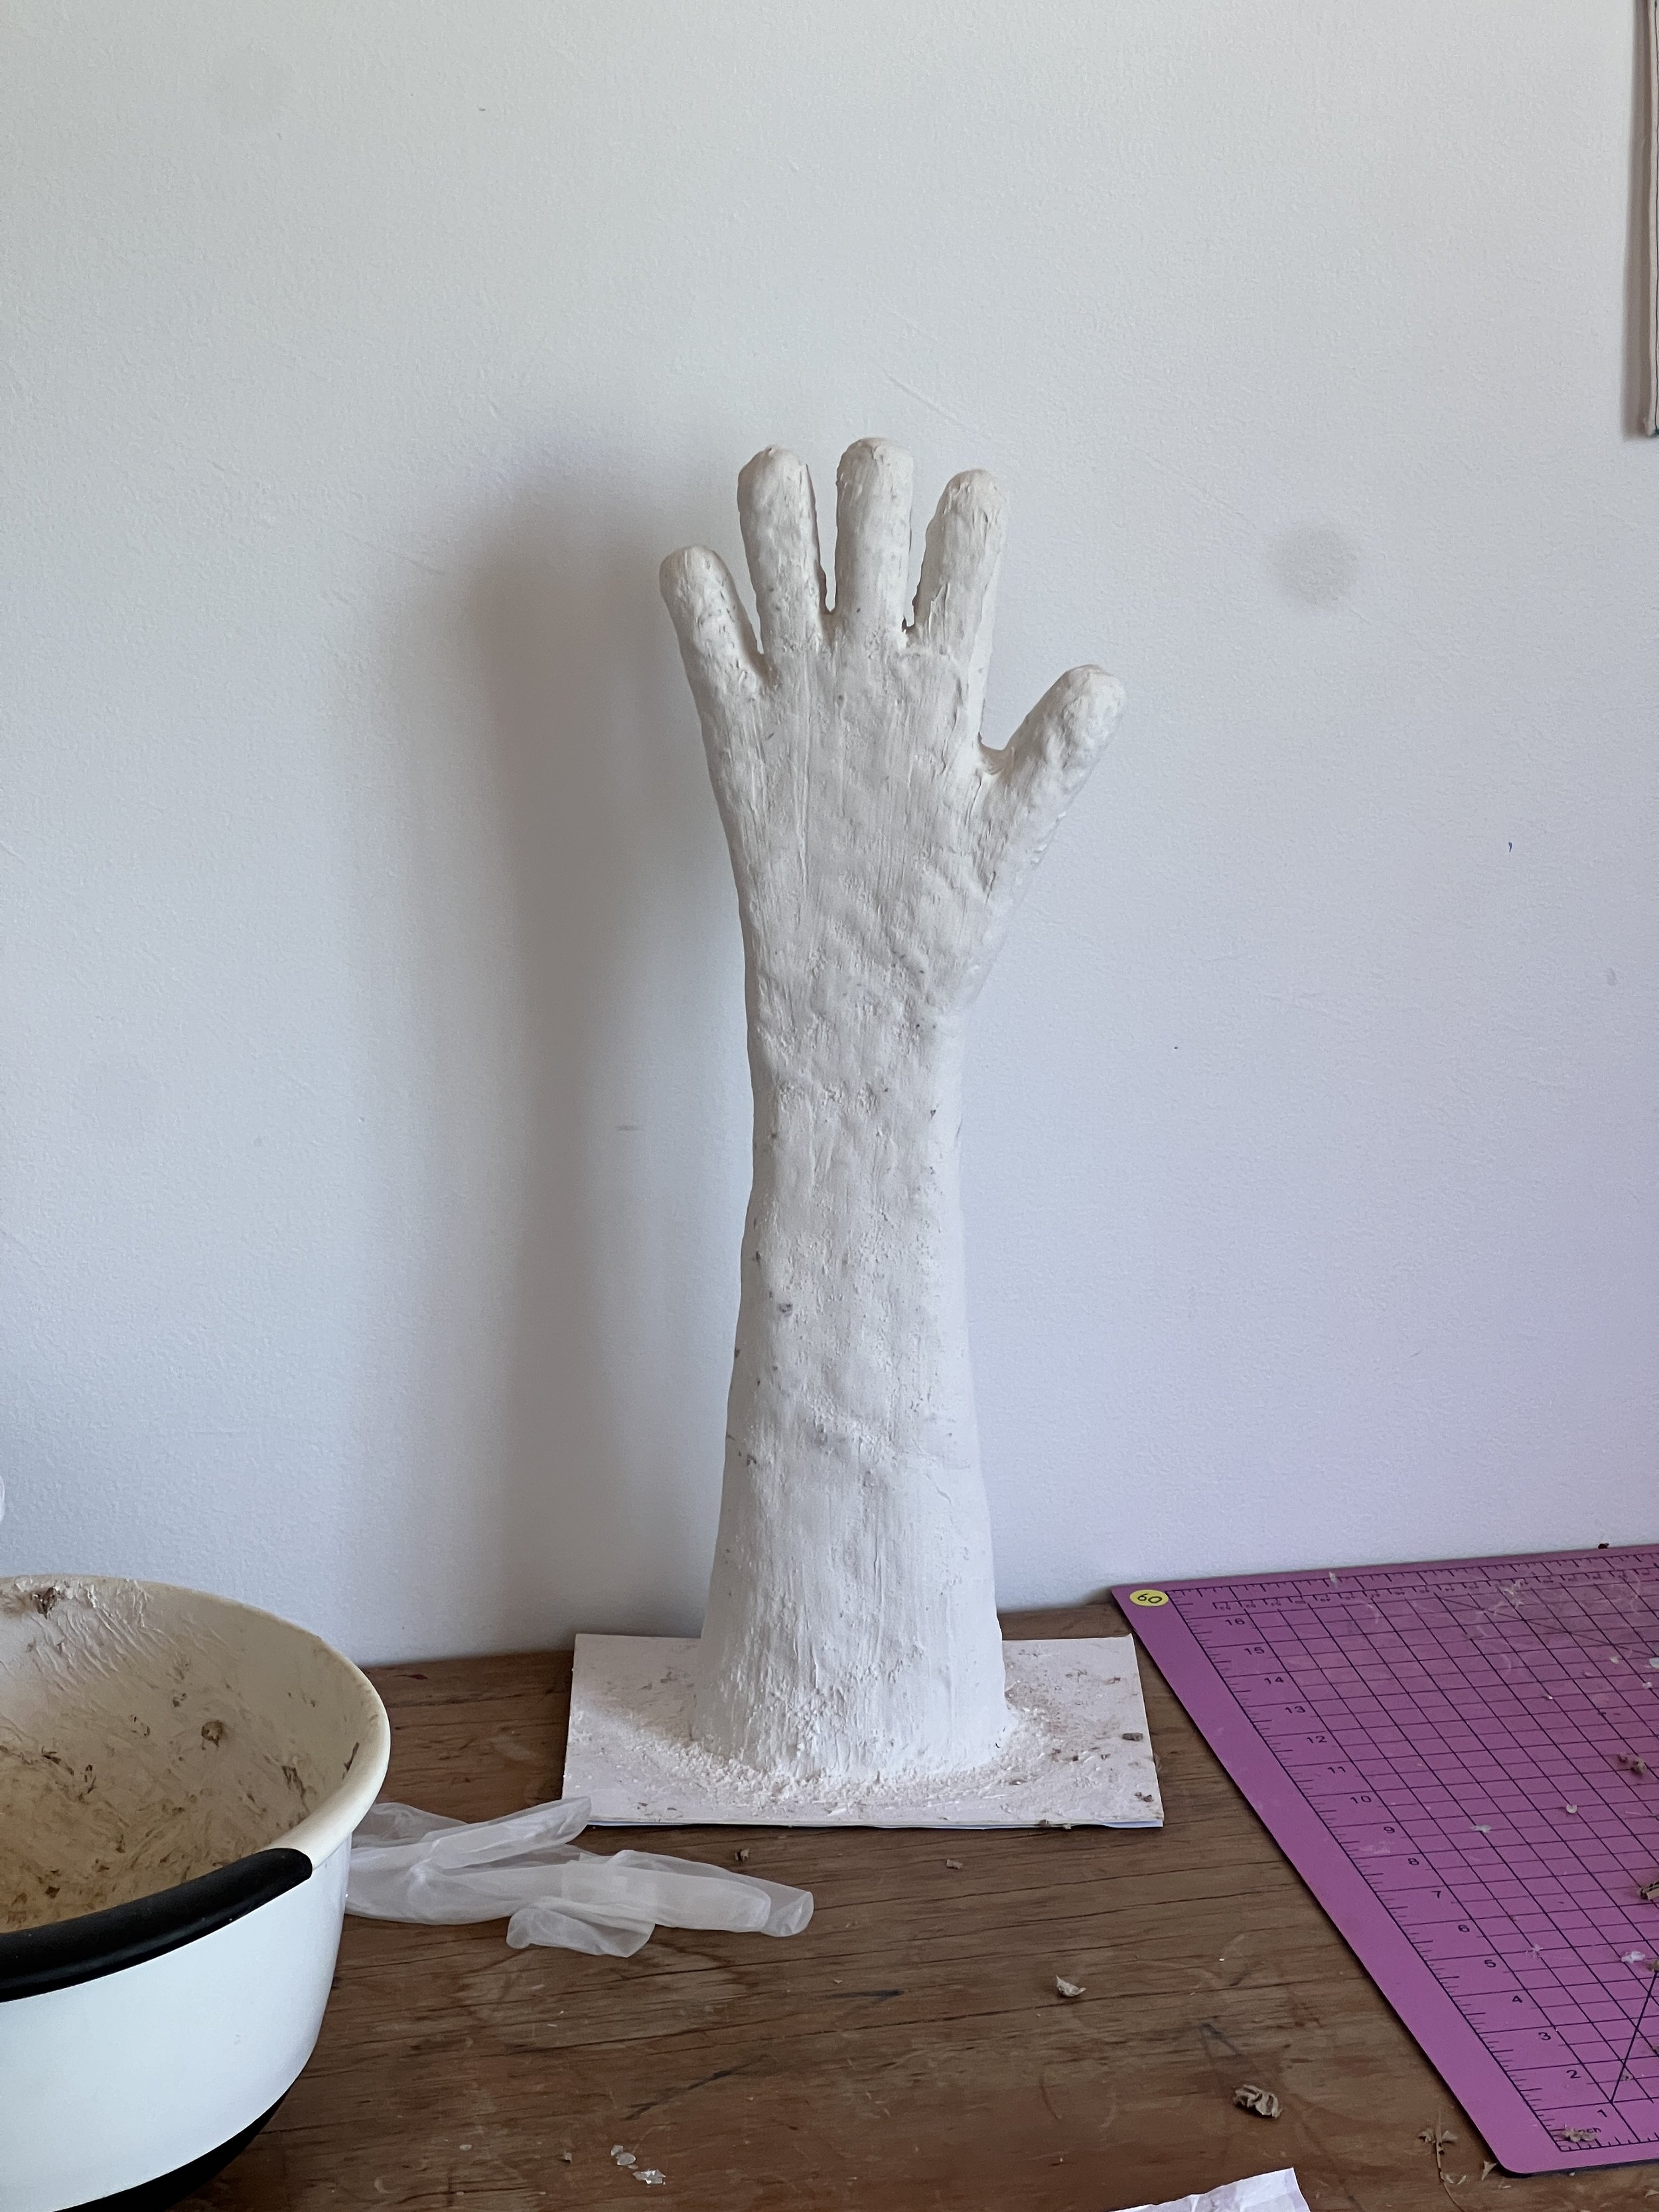
Then I used paper mache clay to flesh it out and really build up the shape so it looked round. I left it to dry and then iced it like a cake using mixing compound to fill in the gaps.
Once it was dry, I gave it sand in a well-ventilated space, wearing good protective equipment to smooth it all out.
Finally, I painted it with house paint (you could also use acrylic), and after it had dried, I sealed it with Matte Modge Podge.
This project is part of my Year of DIY personal creative challenge and my DIY Decor series. Each month, Im inspired by a prompt word to create 1-3 projects that use a certain material or technique to create new objects to decorate my space. Im trying to use second-hand materials or materials I already own as much as possible to be a more sustainable maker and stop hoarding my craft supplies. If you want to learn more or follow along, find me @_diydaisy.