DIY Light Switch Cover Tutorial
In 2022, I had the idea to create a light switch cover using polymer clay! I started seeing plastic light switch covers on Pinterest and thought, “I can make that!” and I did! I shared the tutorial on TikTok and Instagram, but I never got around to writing up instructions, so here I am, a year later, being a good blogger and typing this out for those who like a good step-by-step process.
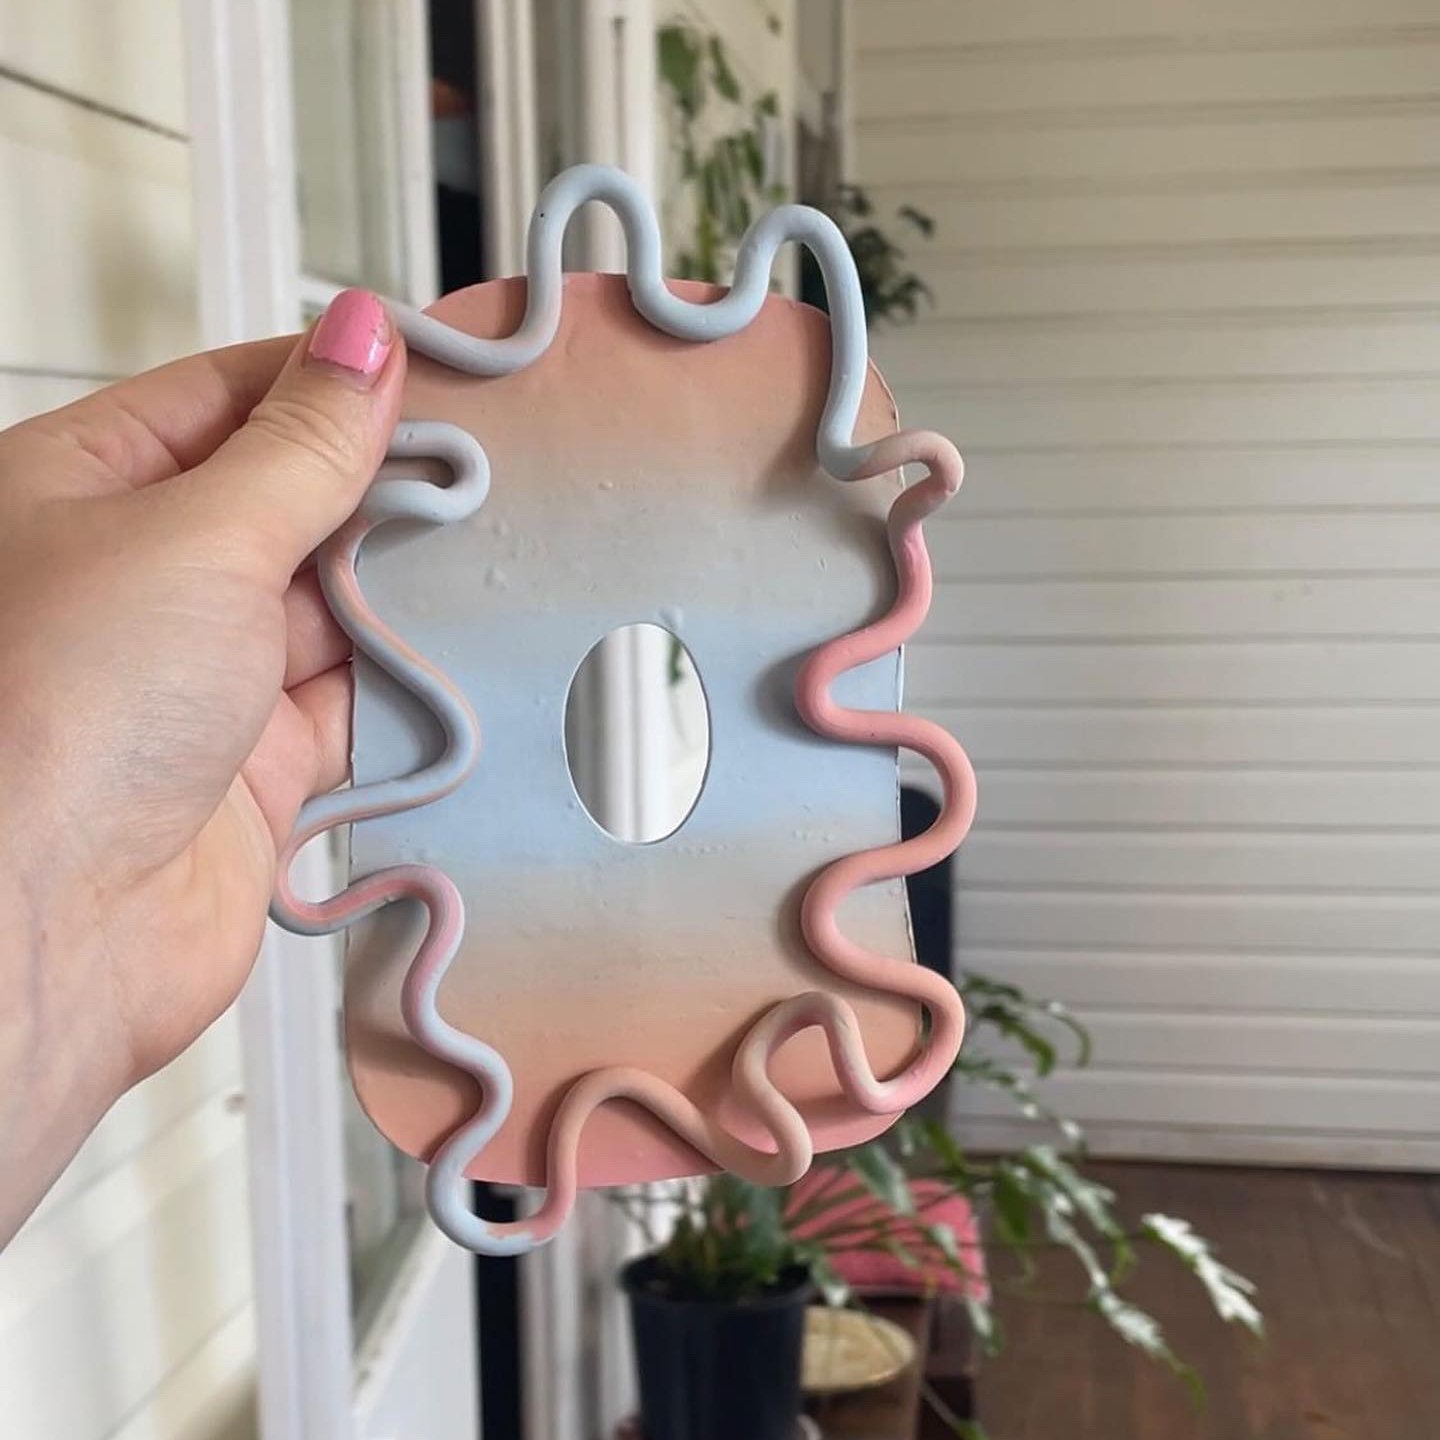
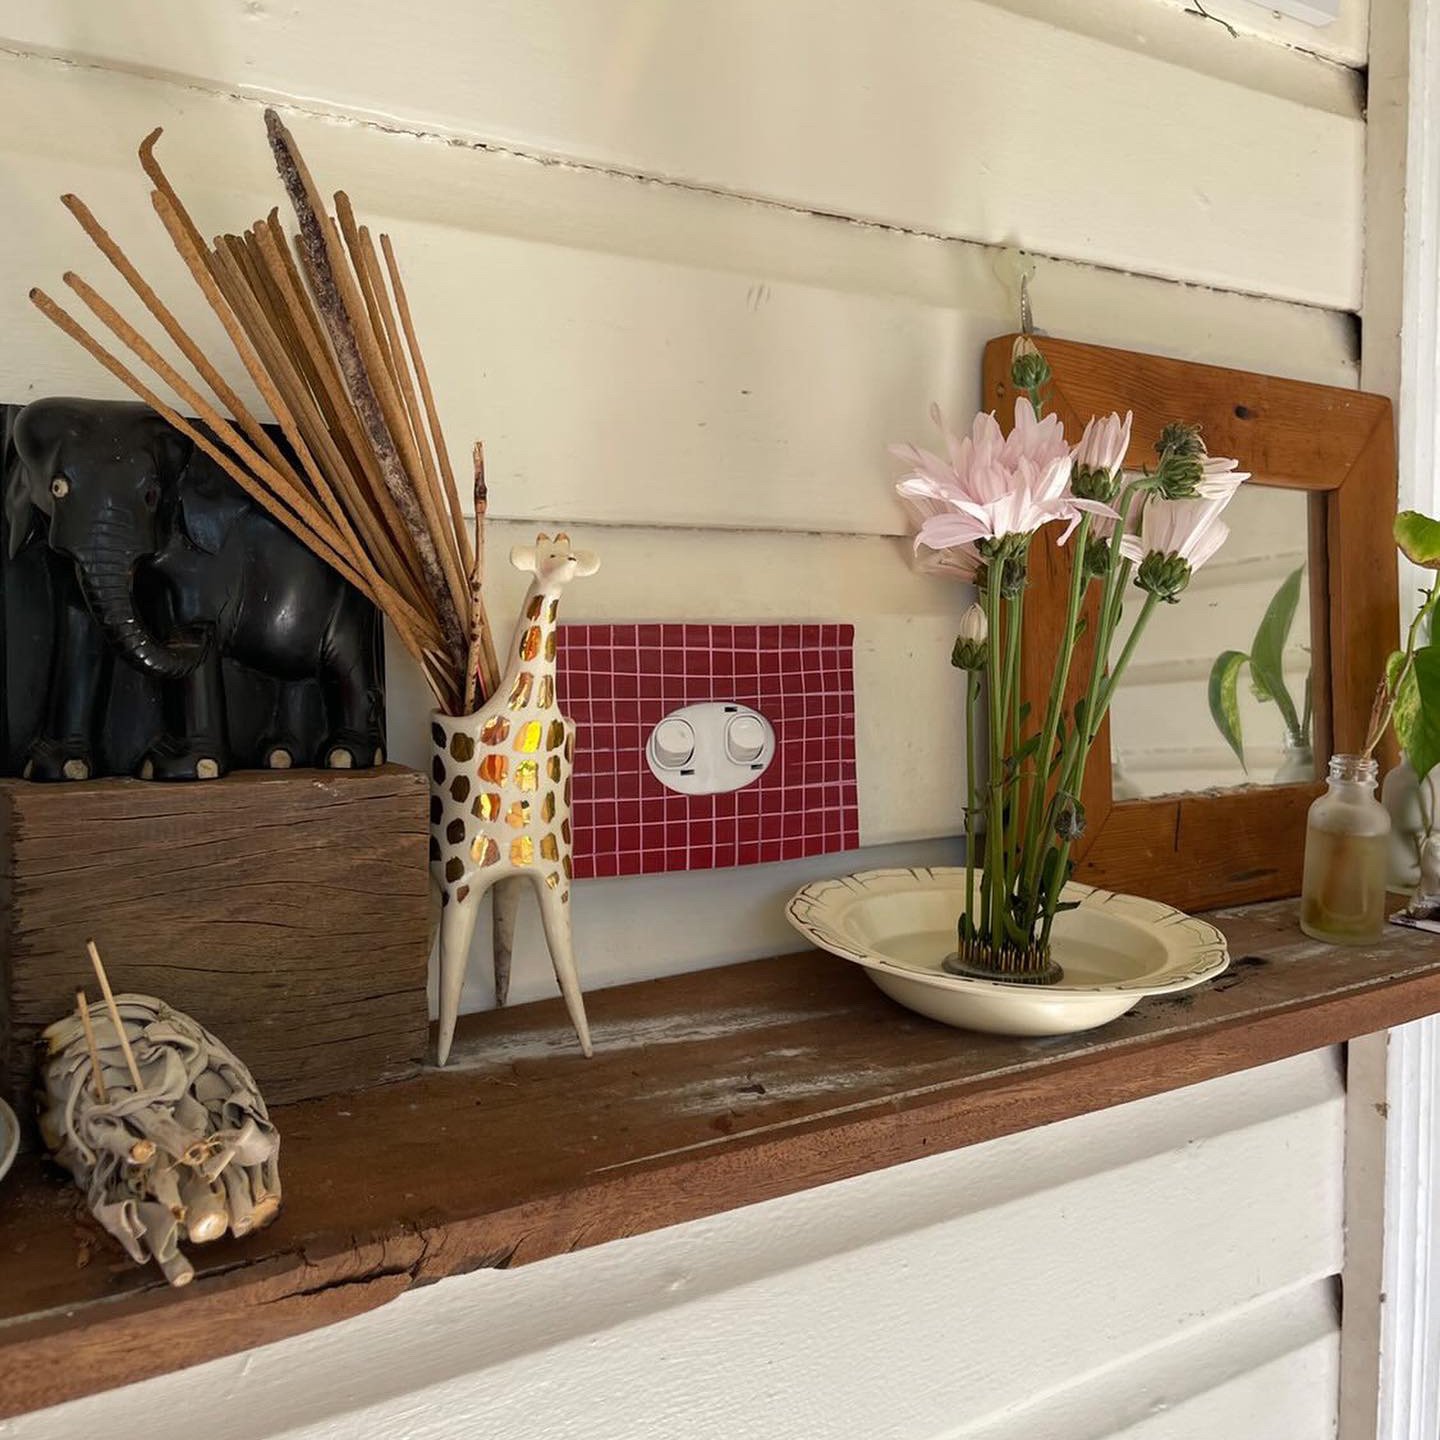
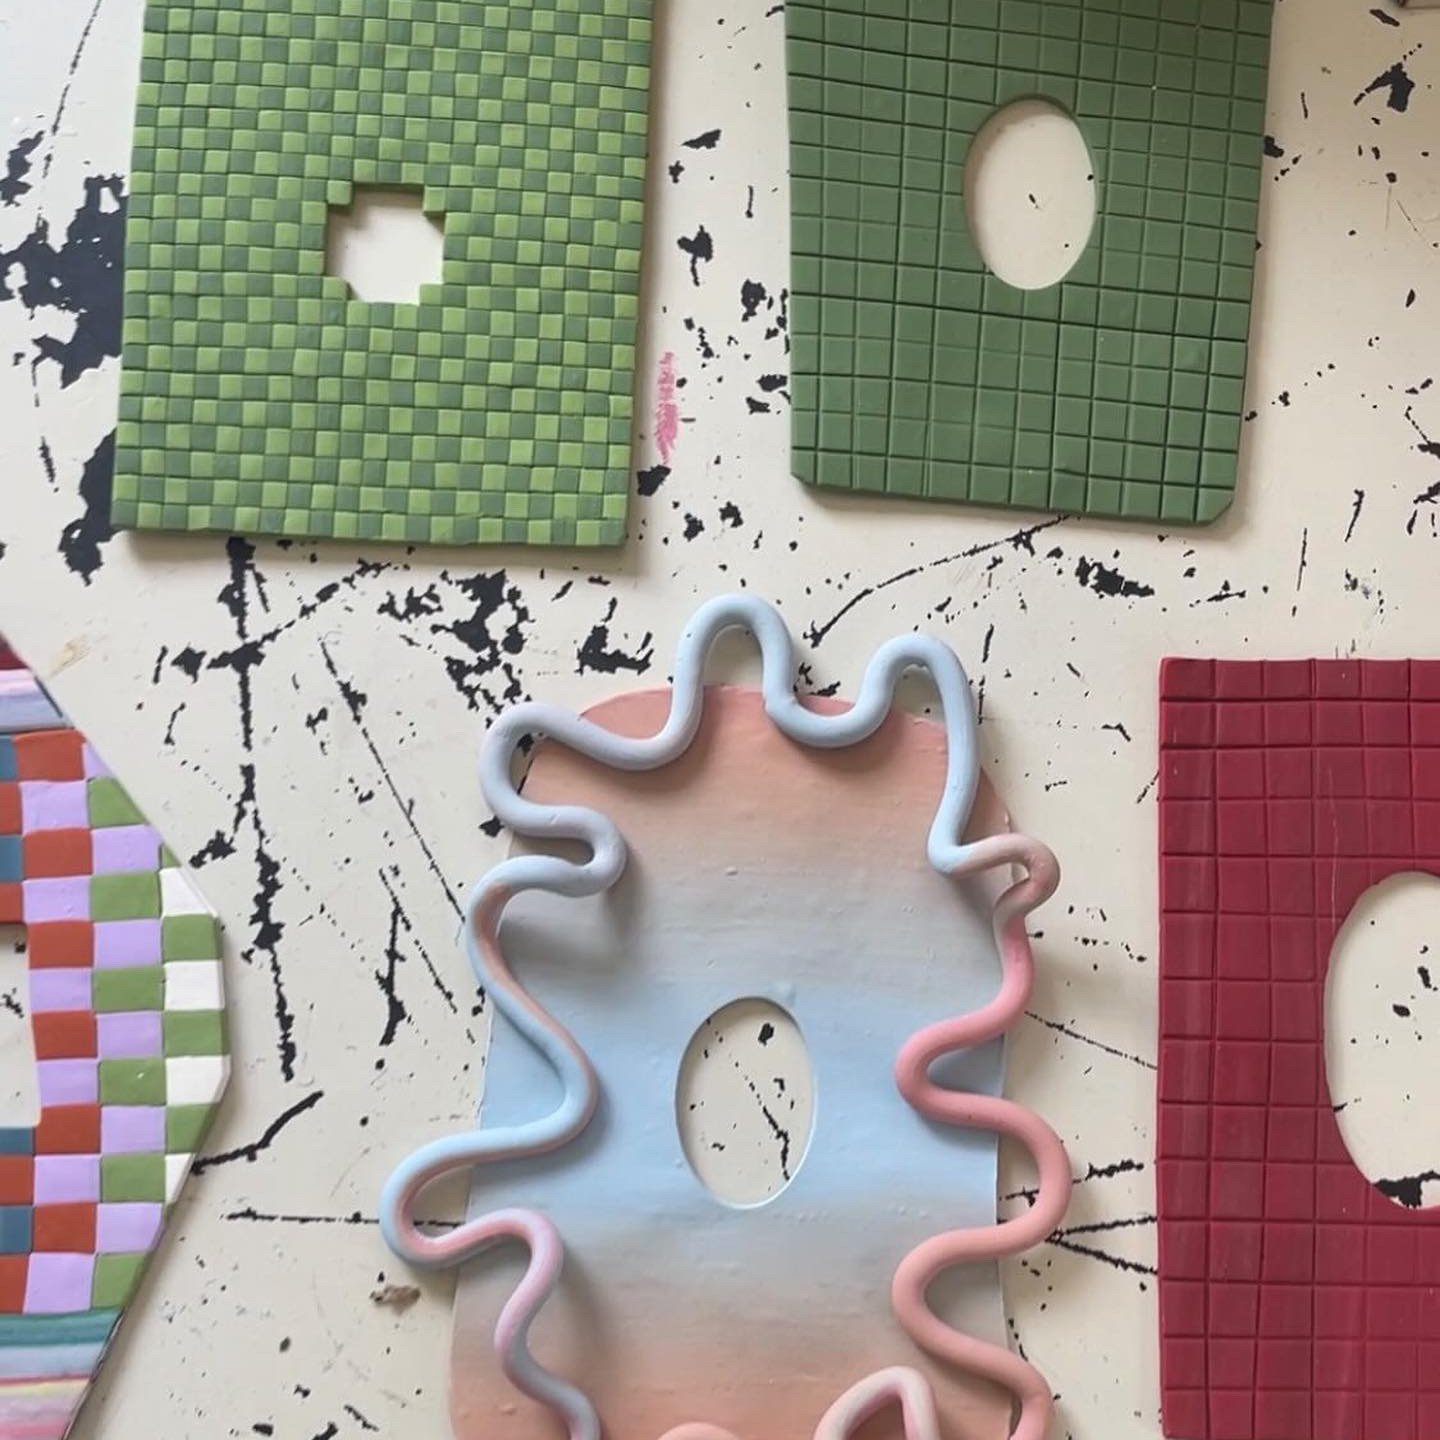
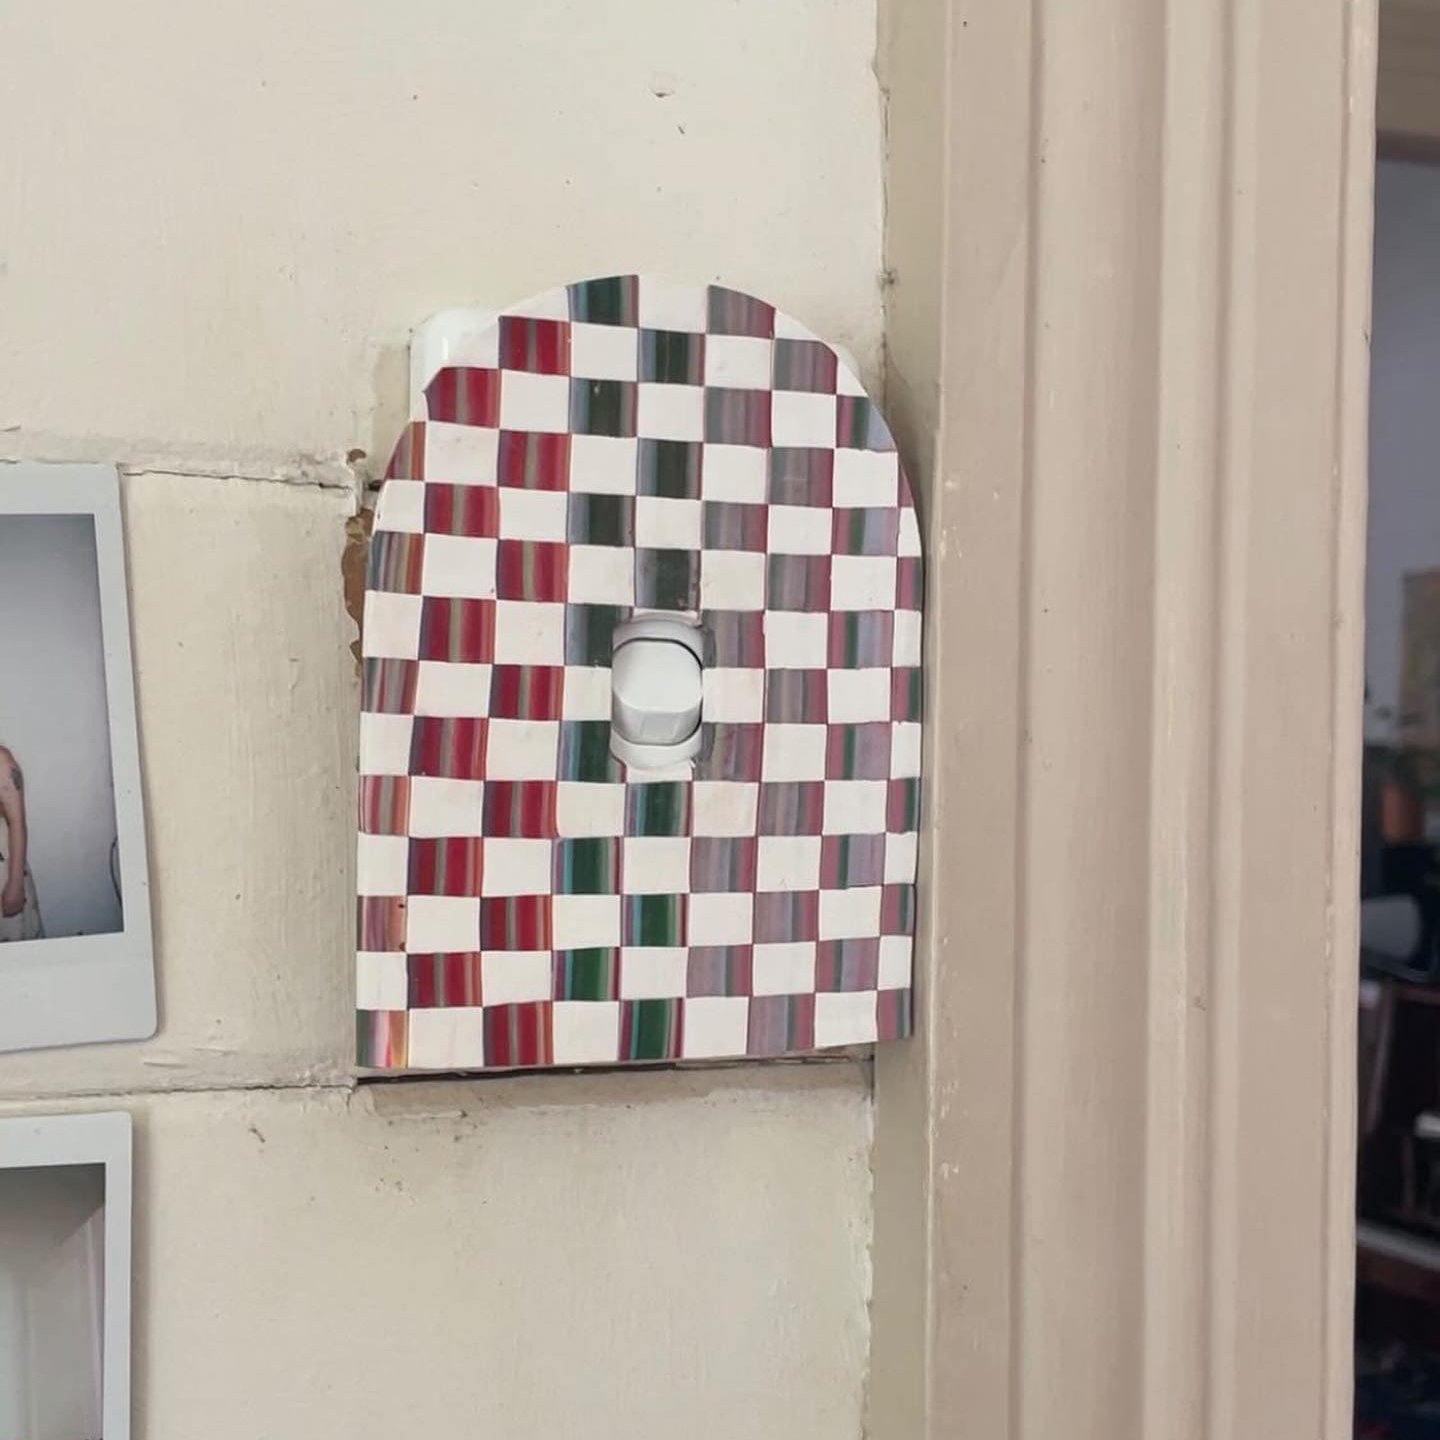
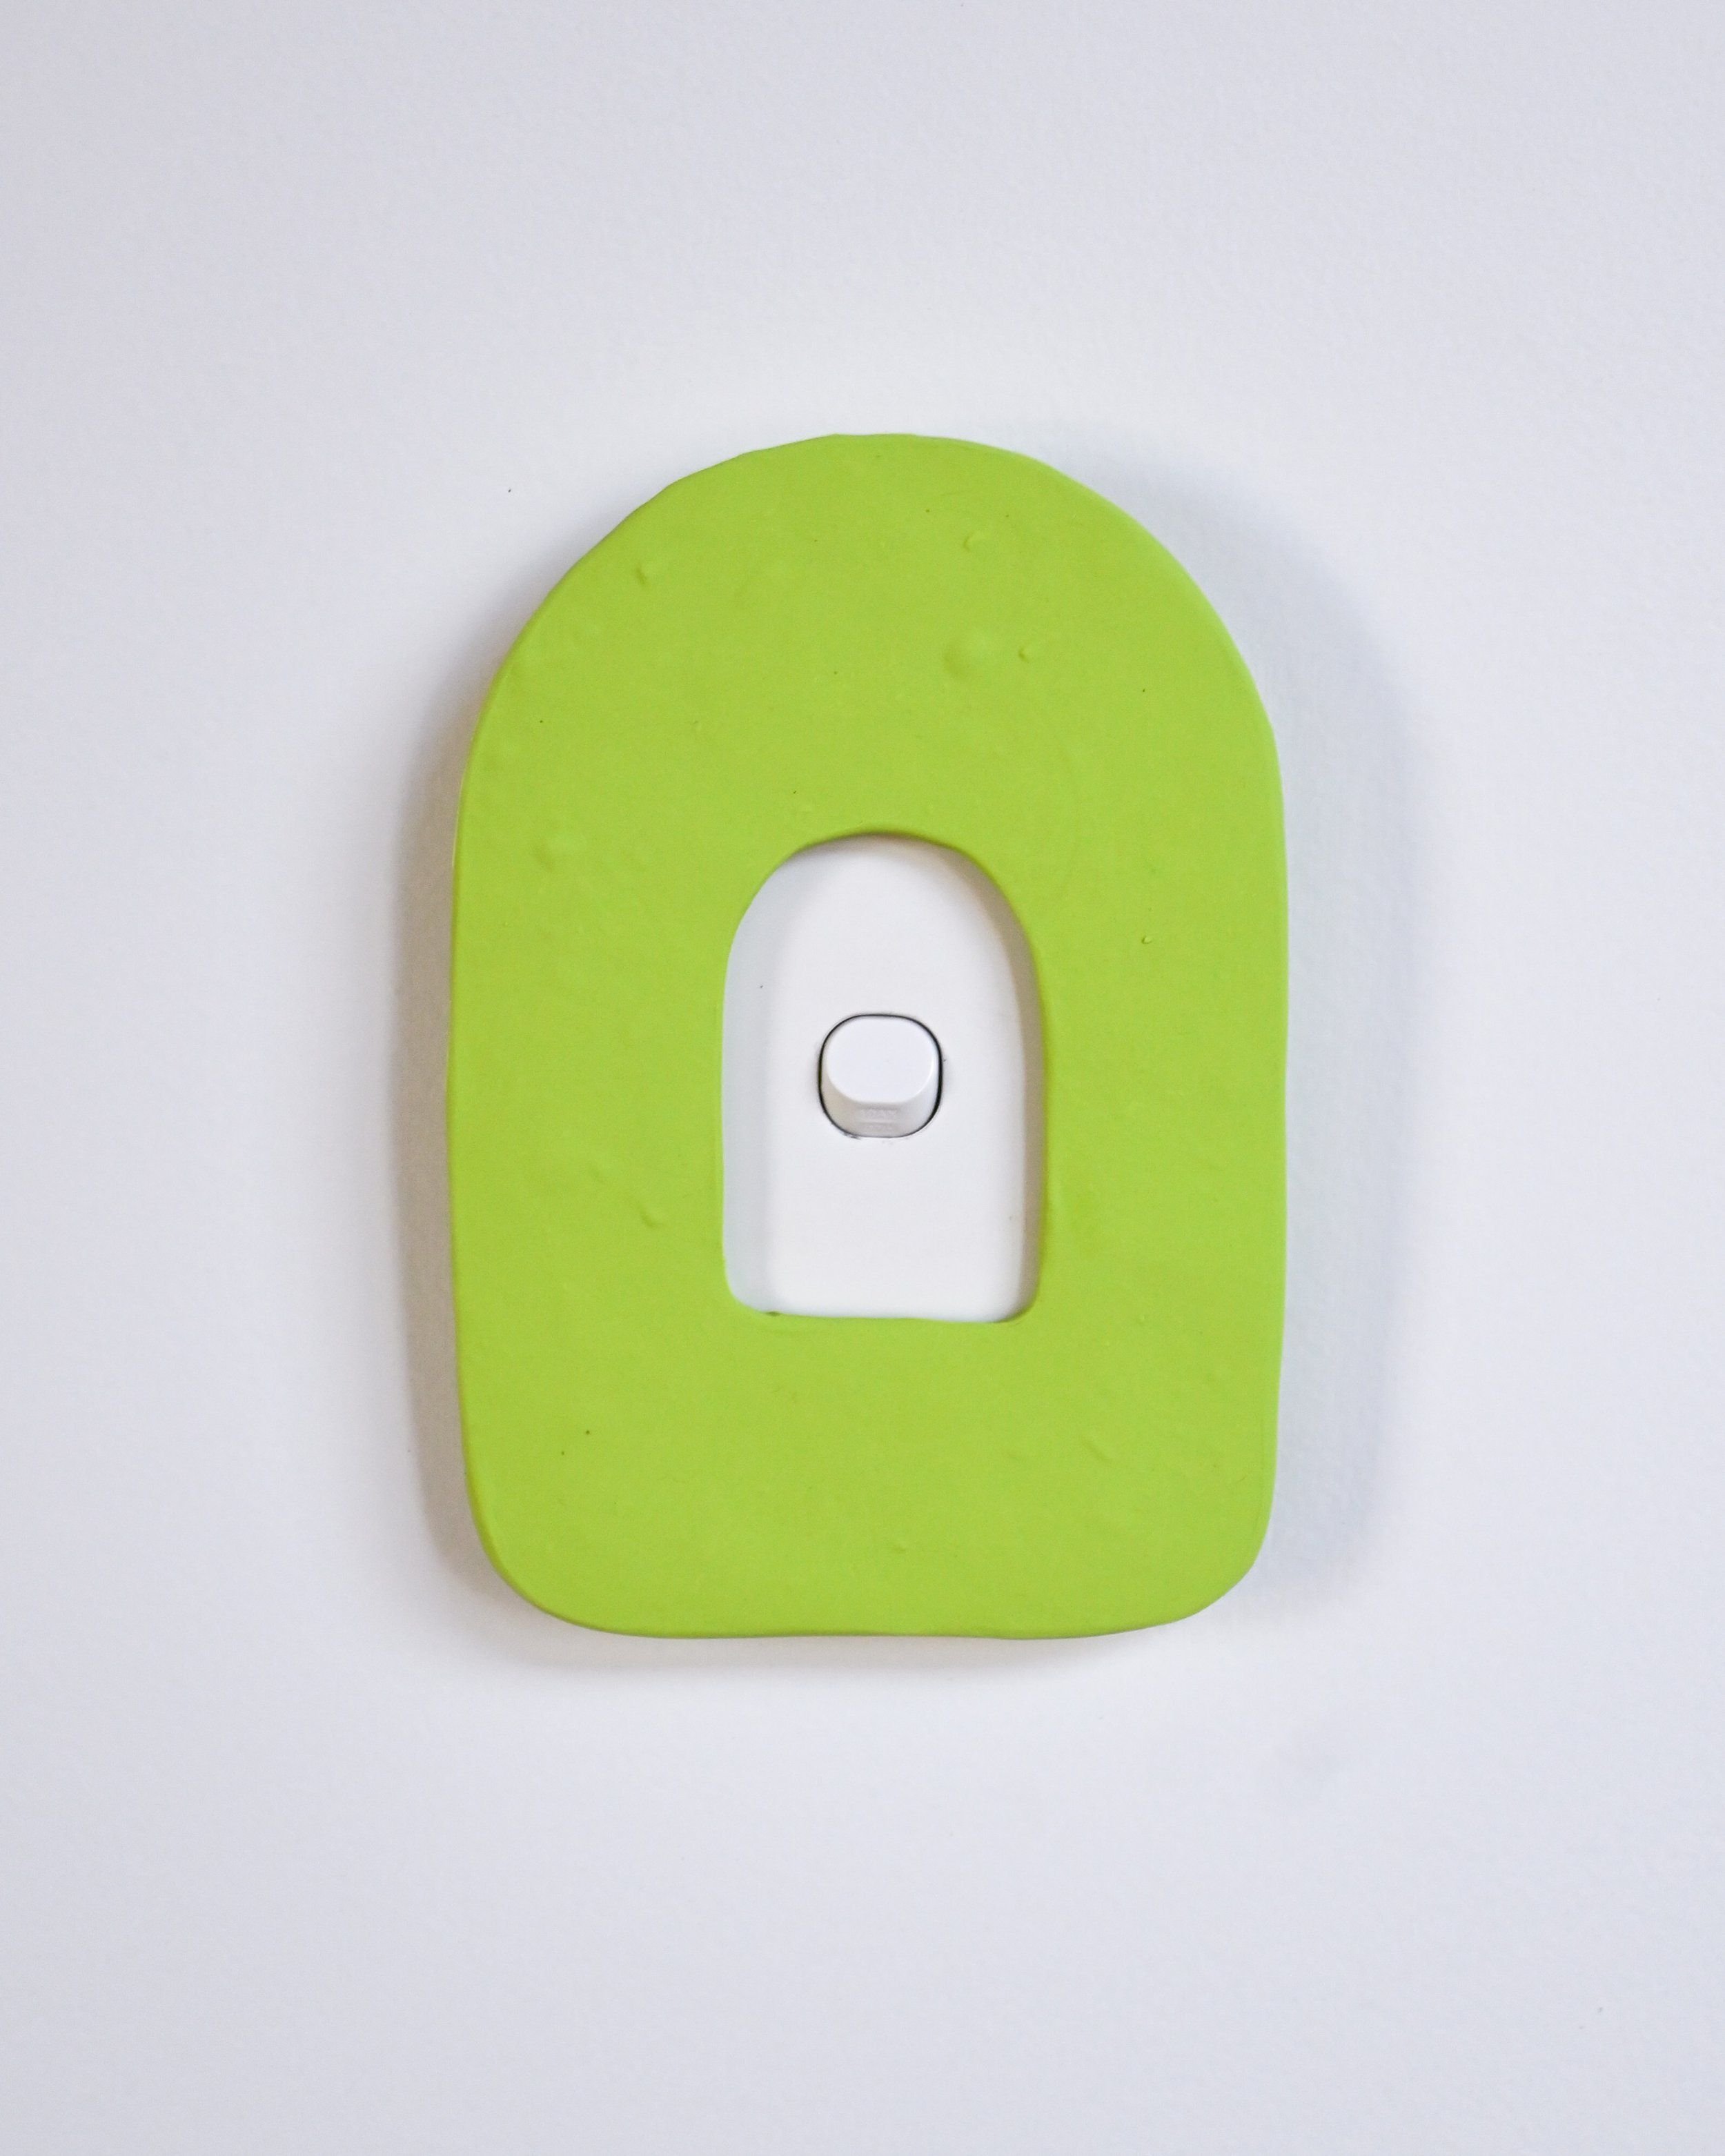
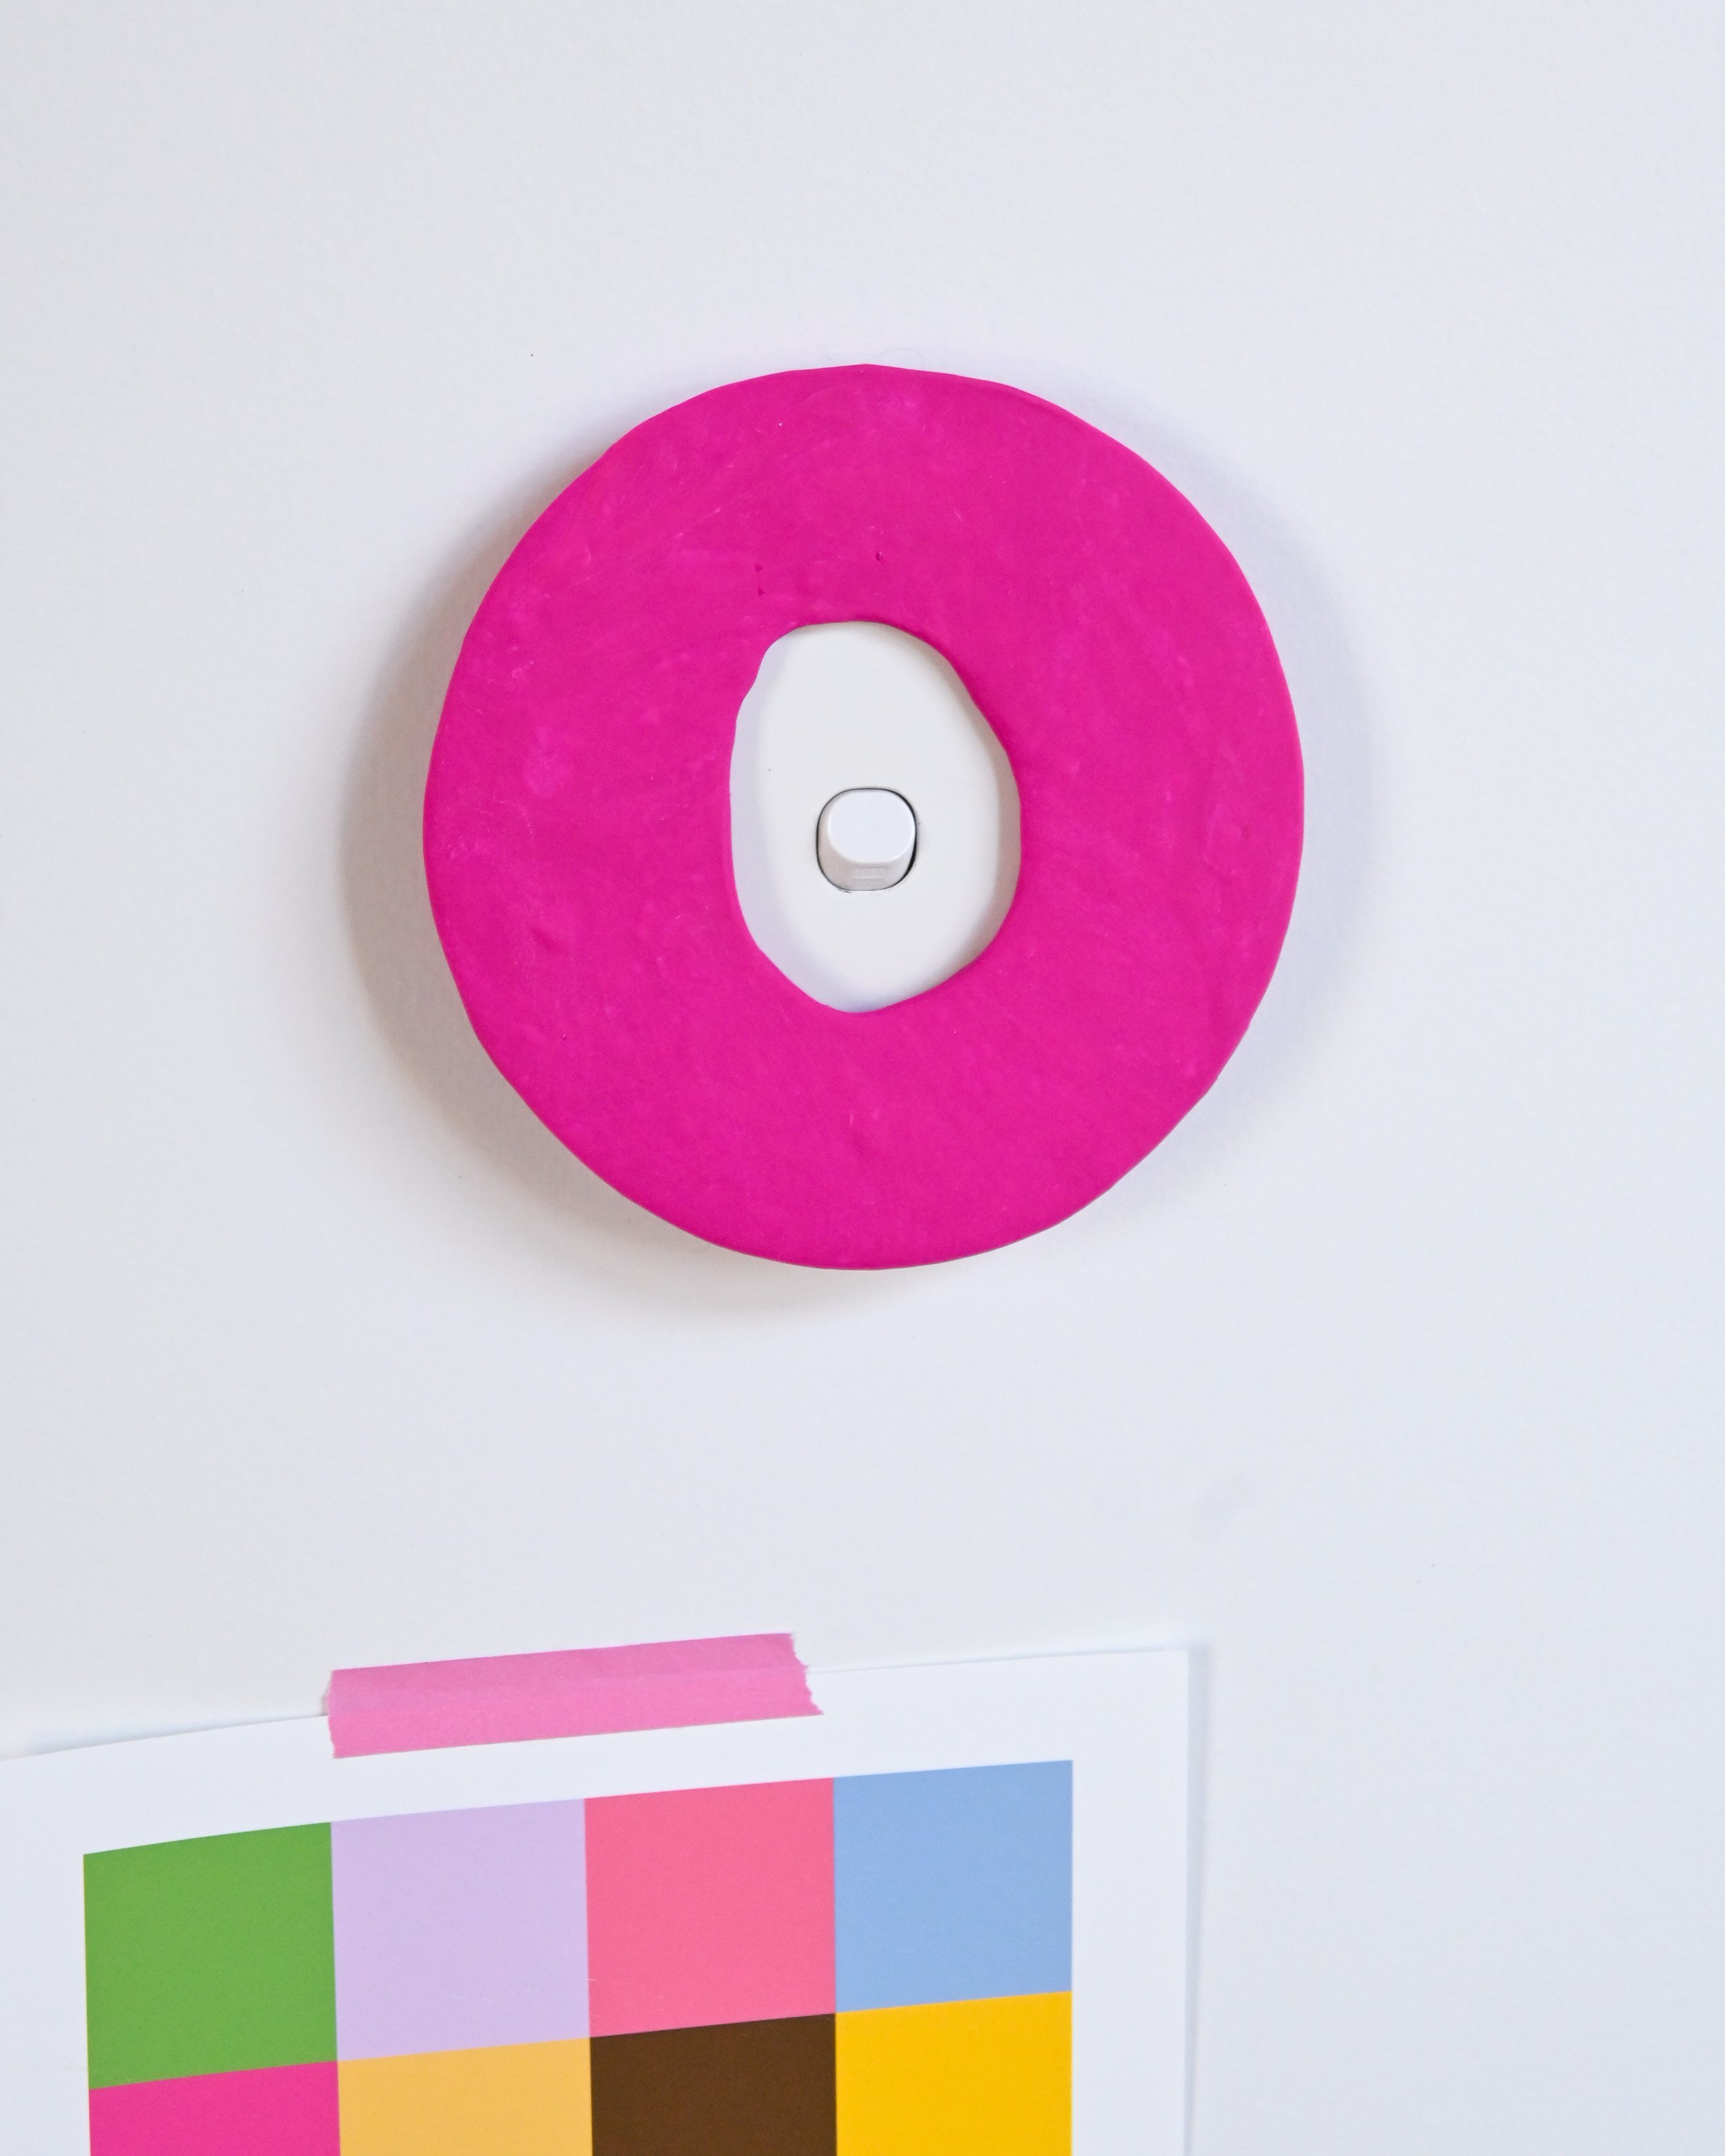
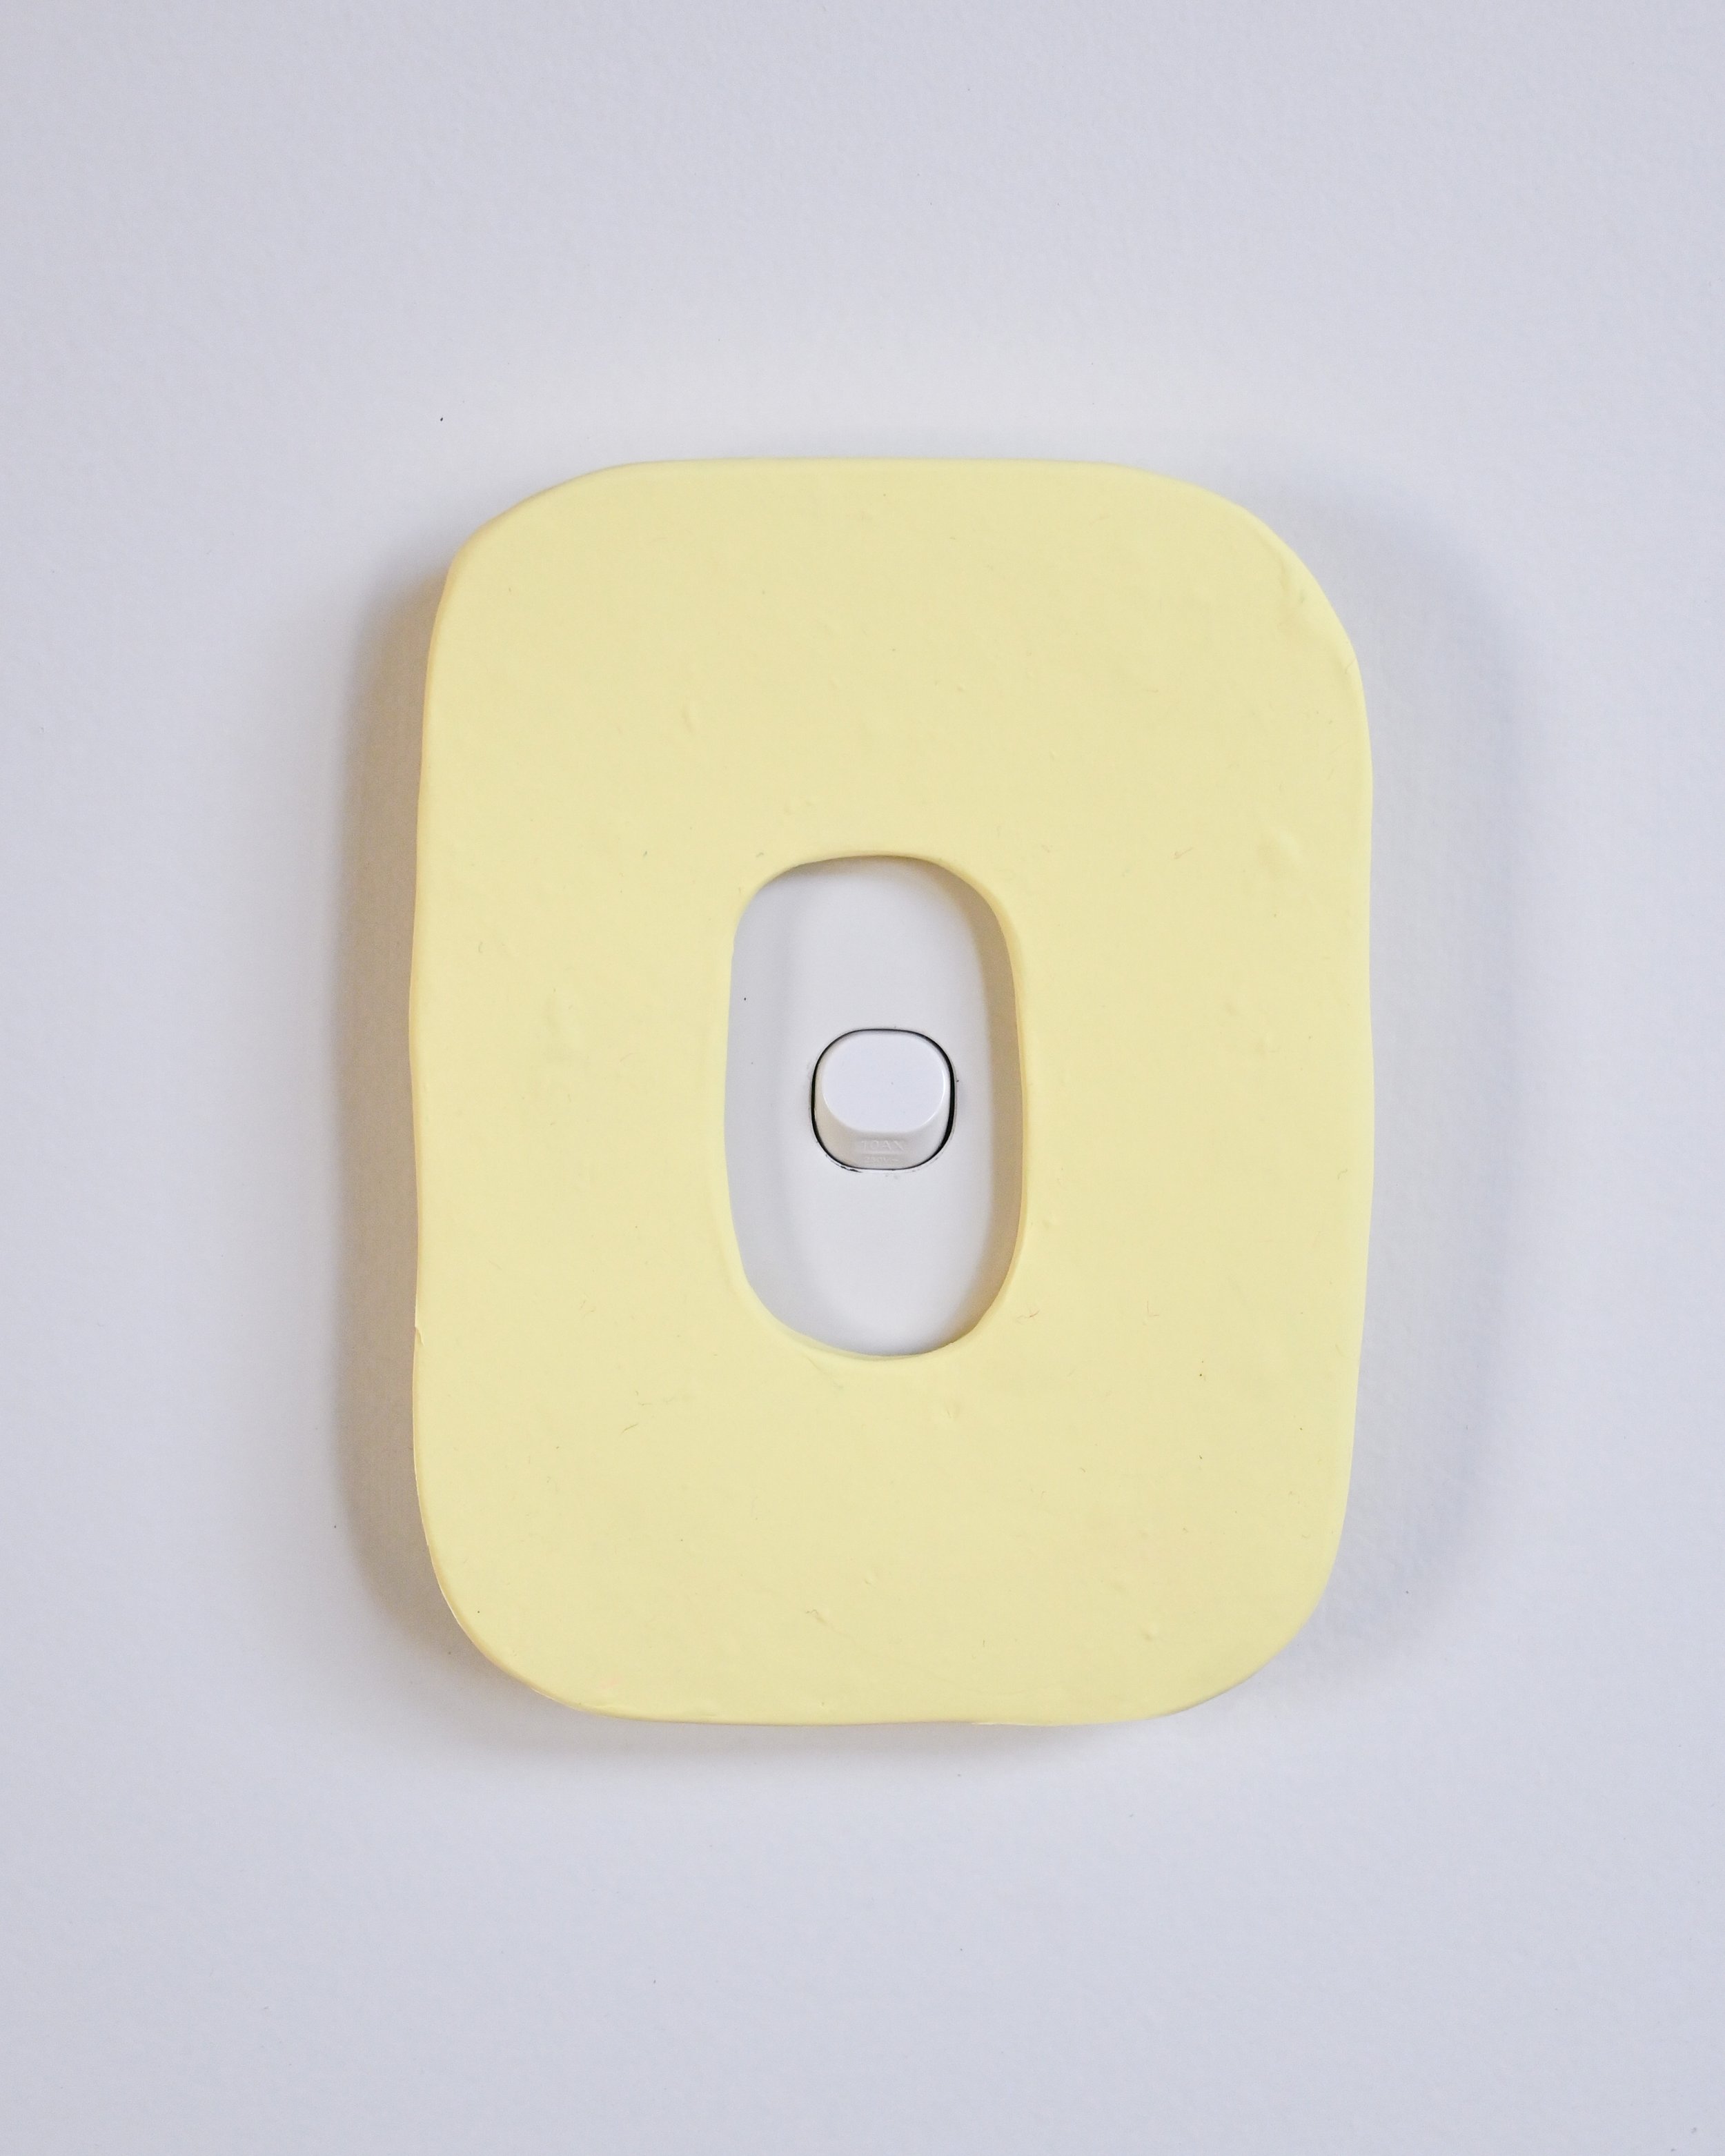
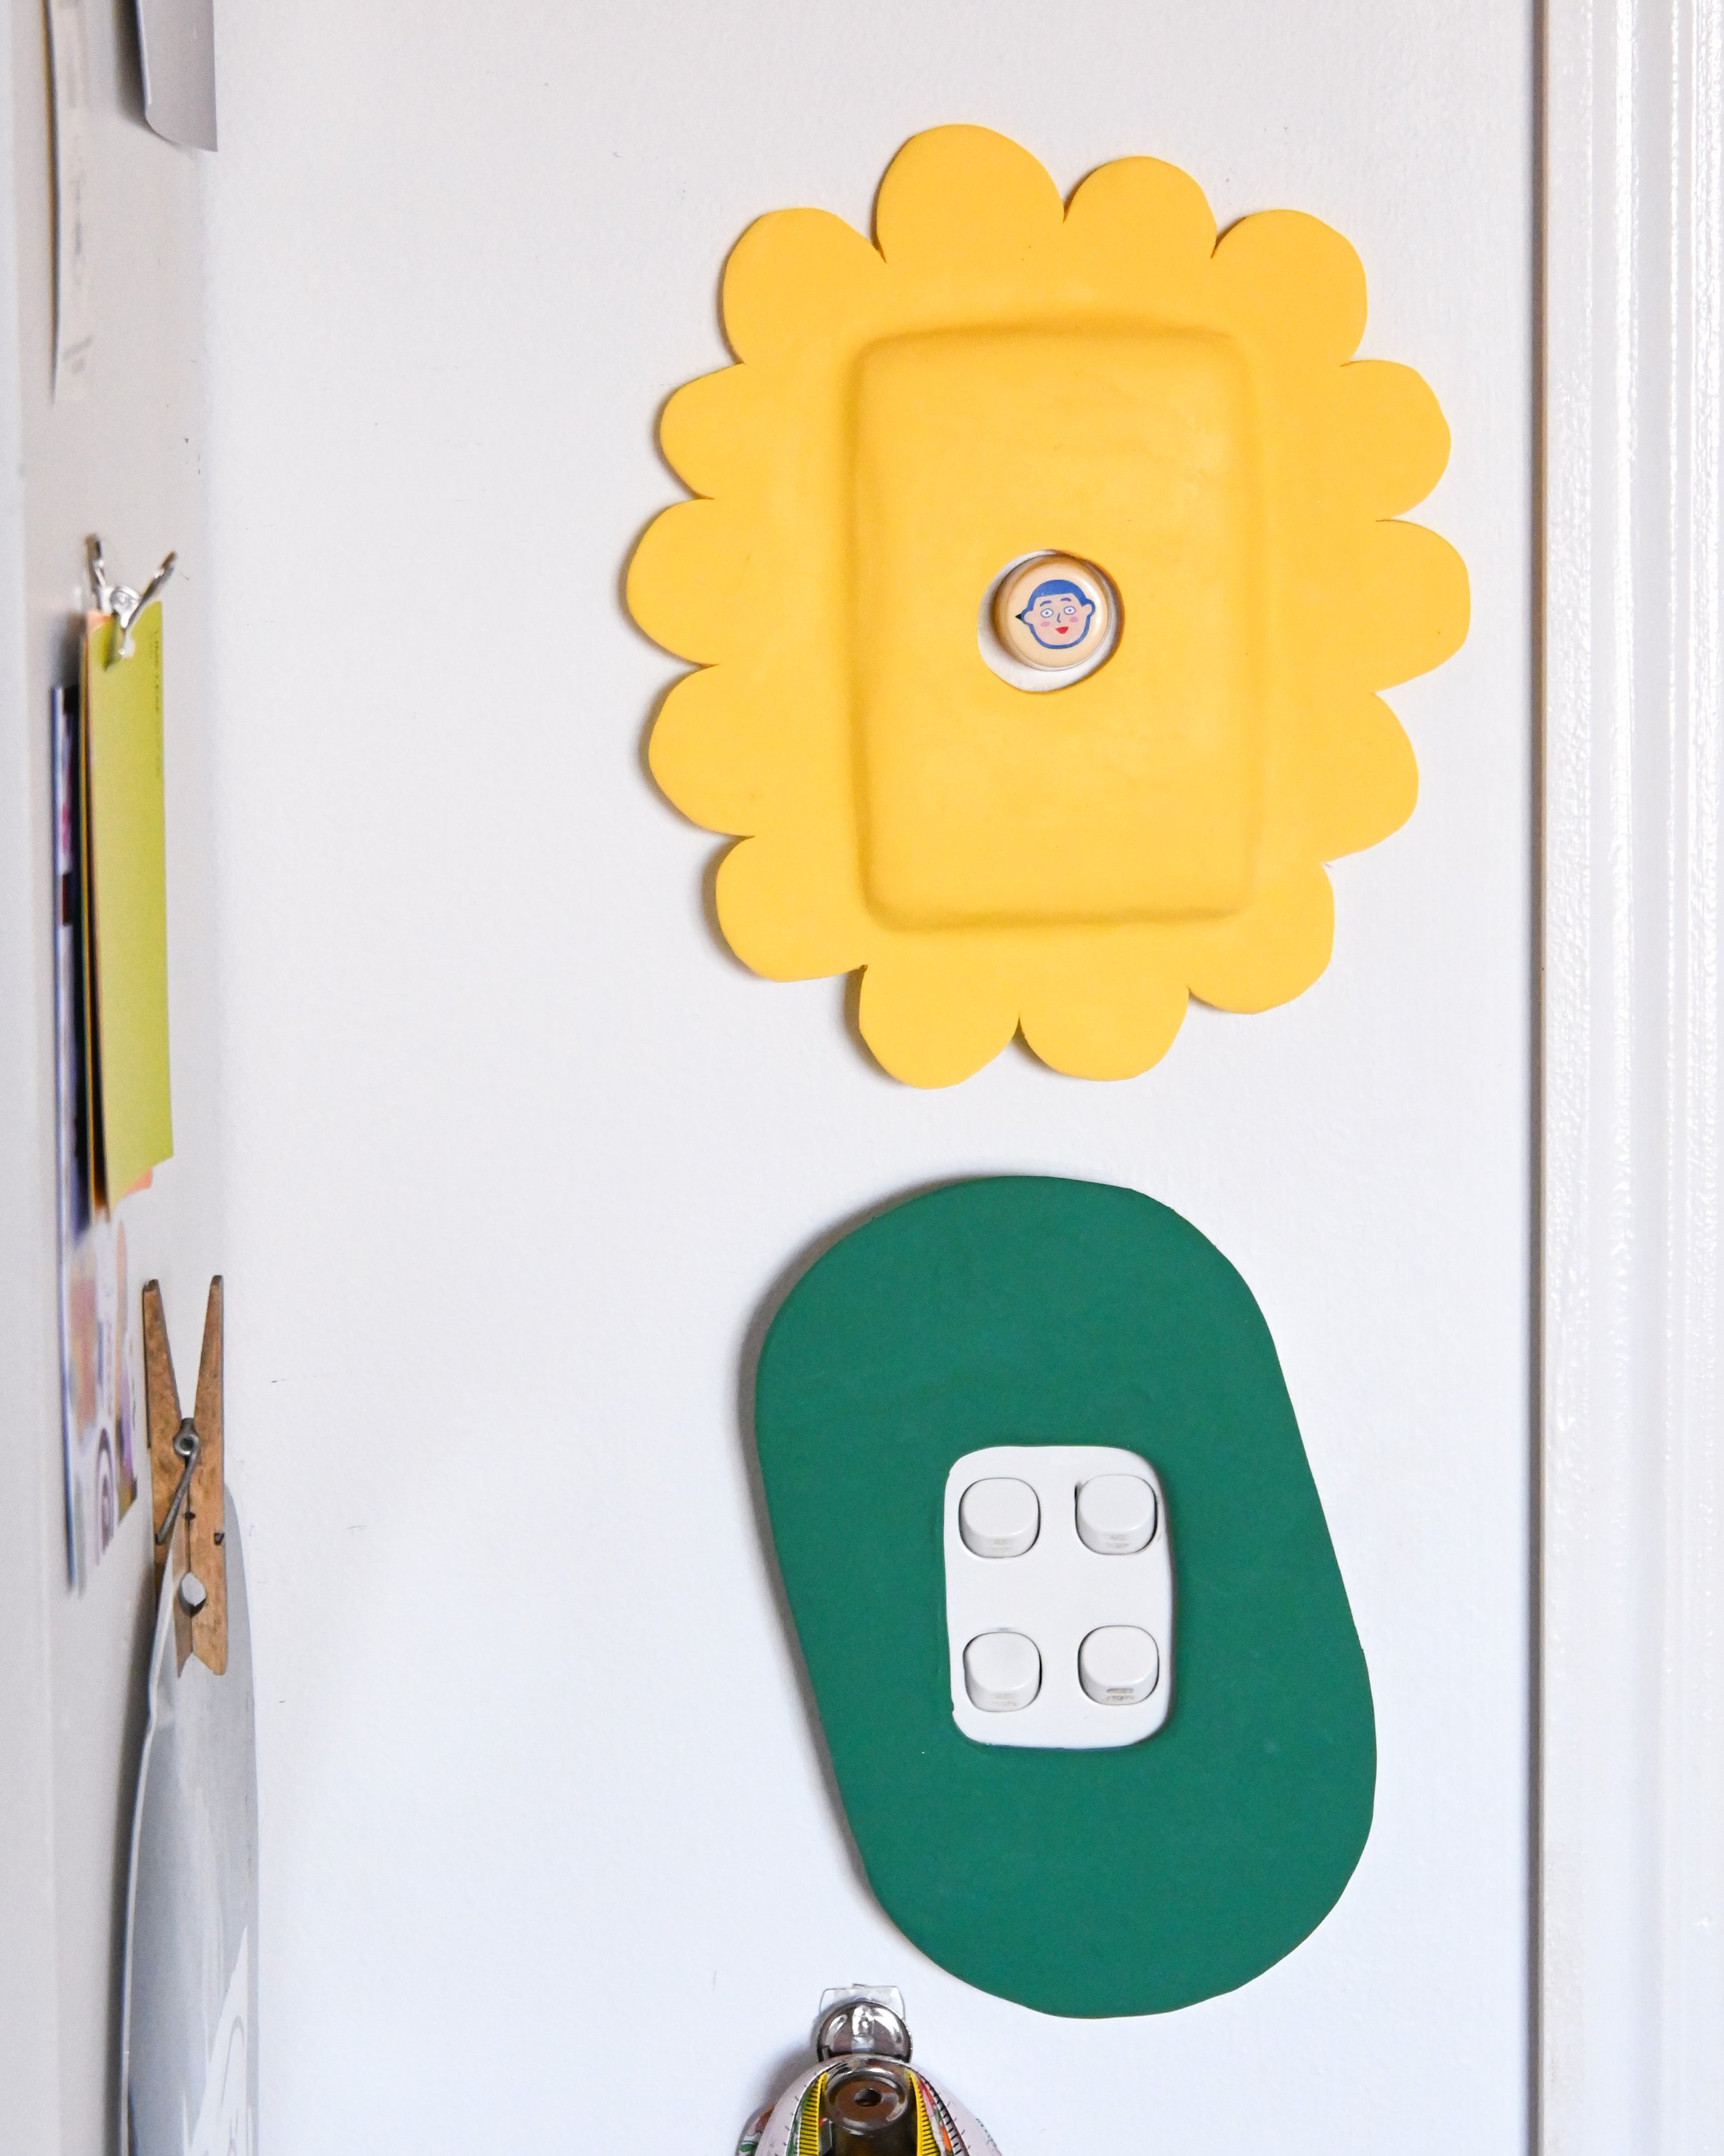
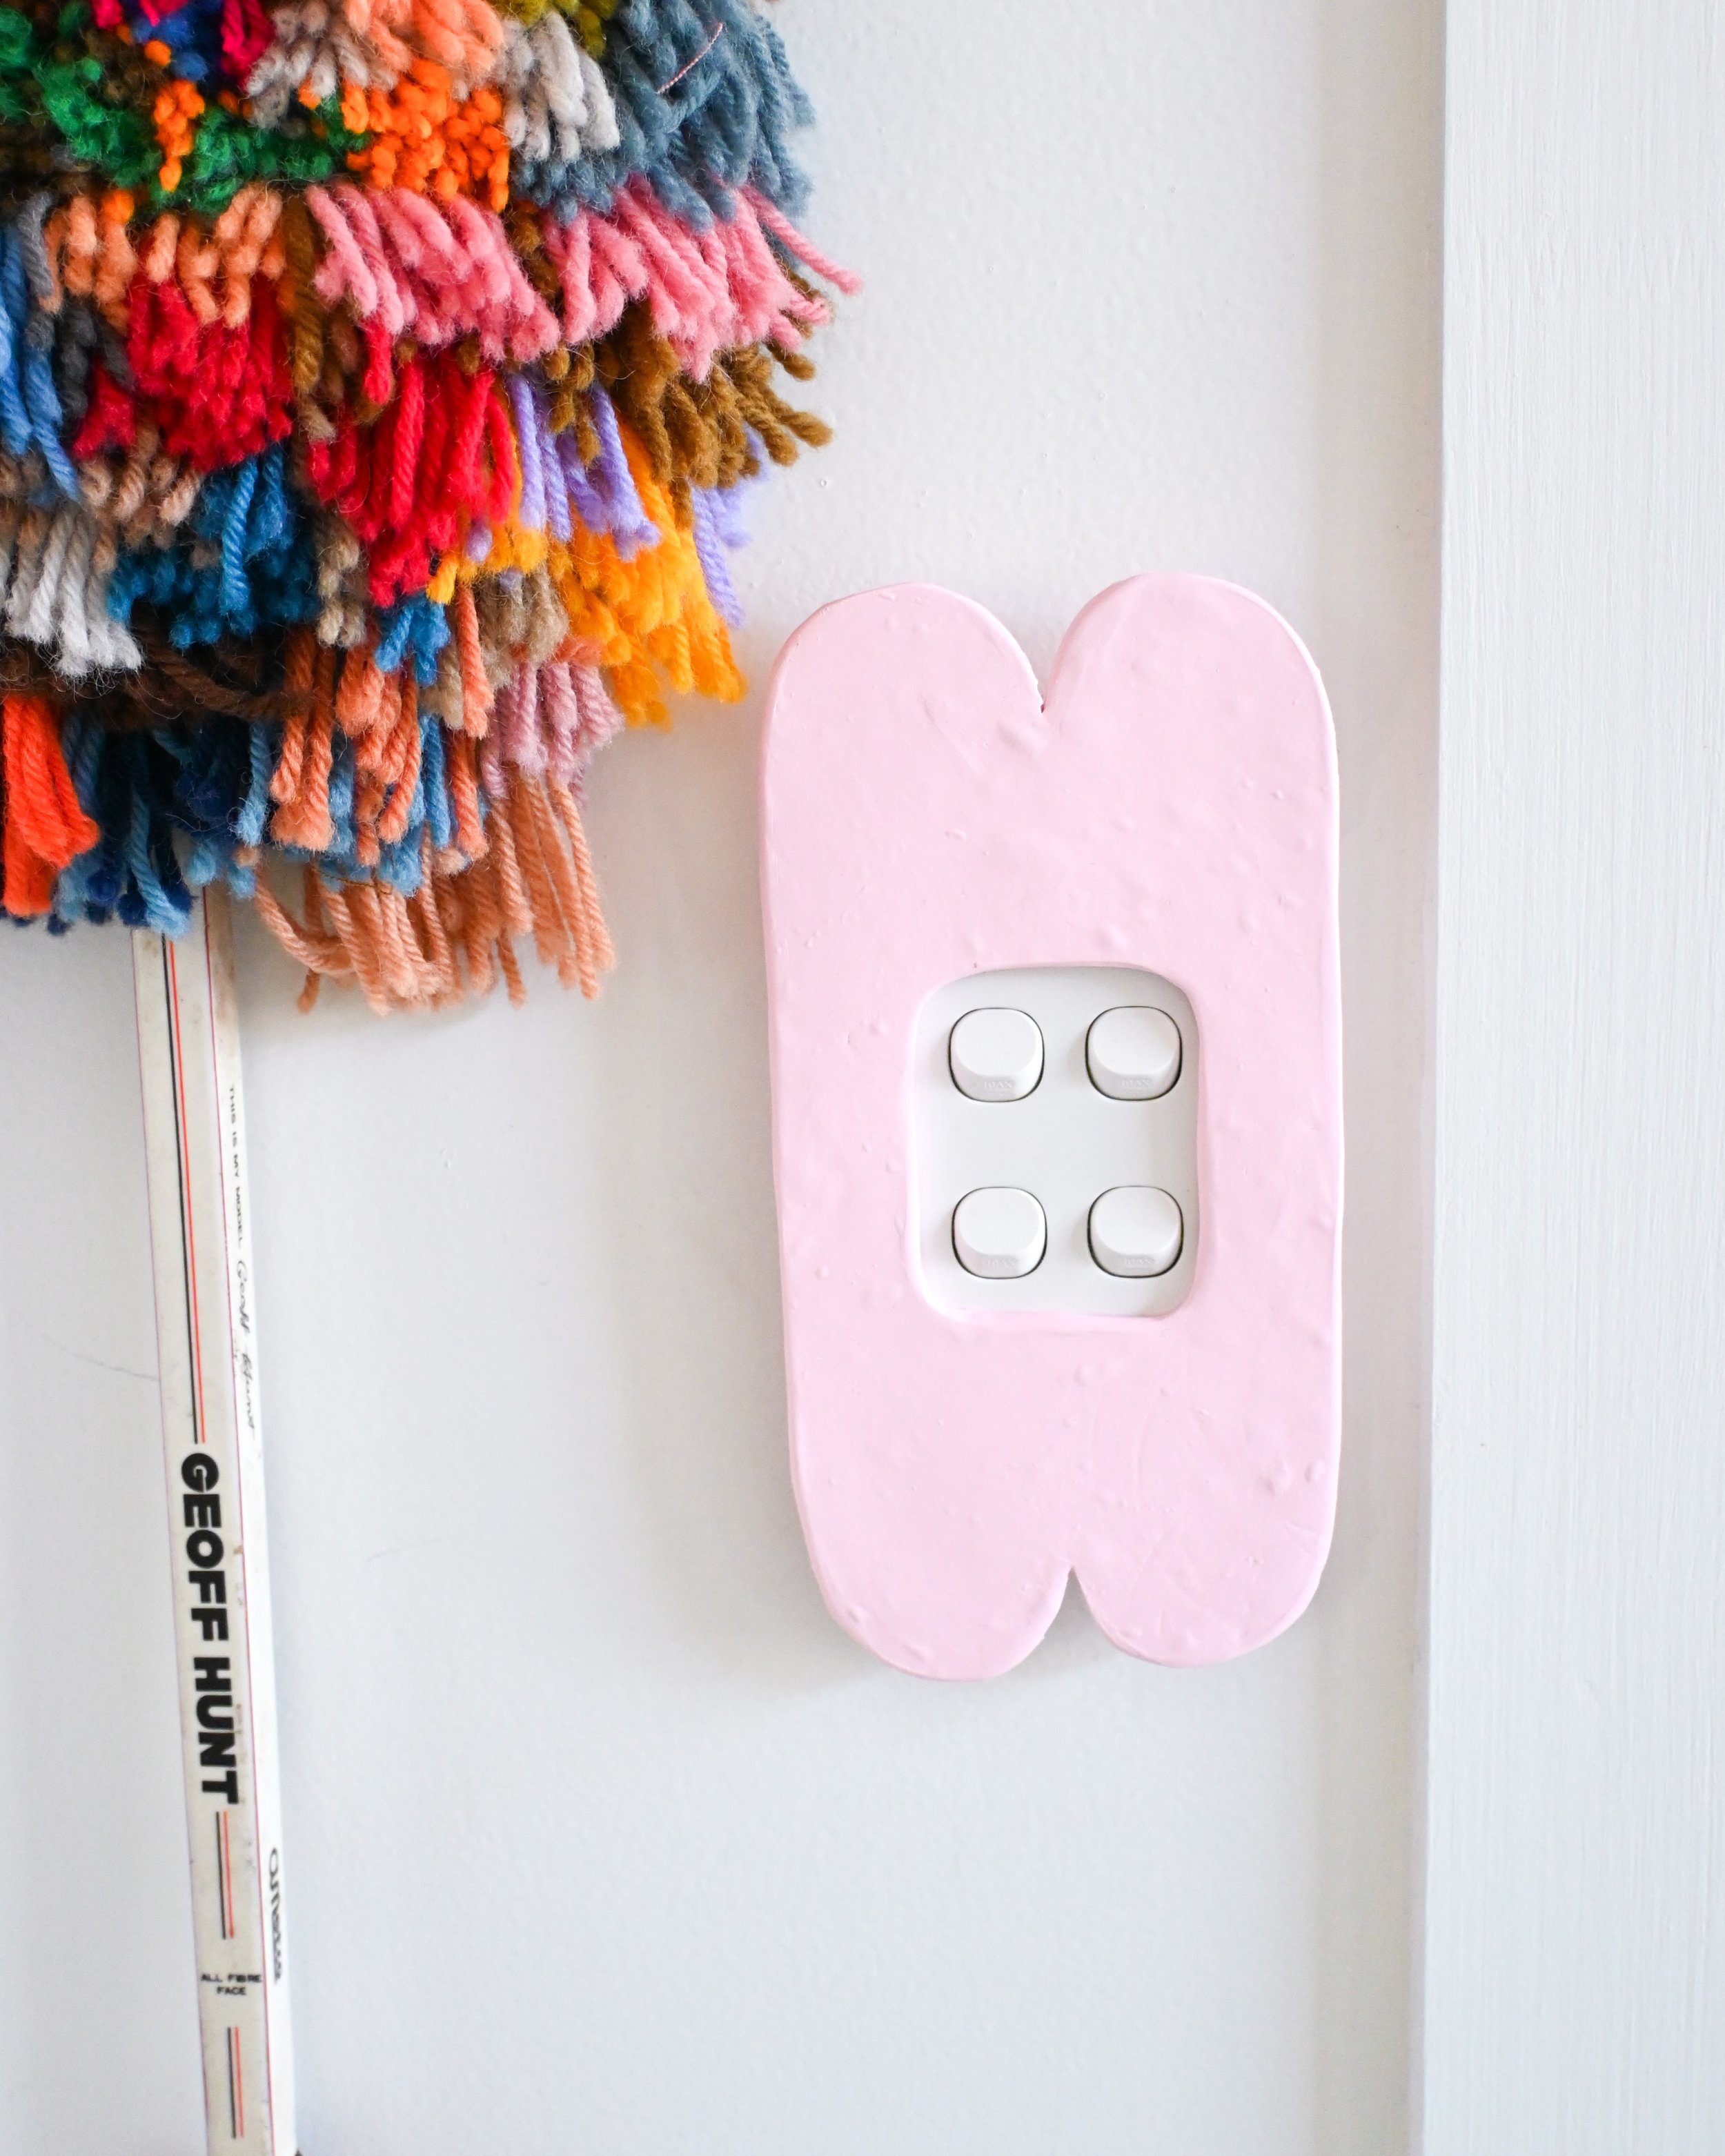
Now you can make your very own light switch cover using polymer clay with this super easy tutorial! This project is renter-friendly and gives you the opportunity to style every part of your space, light switches included! In my original tutorial, I made moulded covers to fit over the switch plate, but this time, I decided to make them flat, which means they are more universal and can fit on top of a variety of light switch plates. I decided to keep my shapes simple and use a colourful palette to add visual interest to my white walls. This project is really customisable and allows you to make covers that suit the styling and theme of your space. You could play with shapes, mix colours for a gradient effect or attach more clay to make prints and textures. I can’t wait to see how you make them your own!
This project is part of my Do It Yourself Decor series, and I will share a new project every month to inspire you to make things for your home. If you’re a brand and want to collaborate on a project, get in touch here.
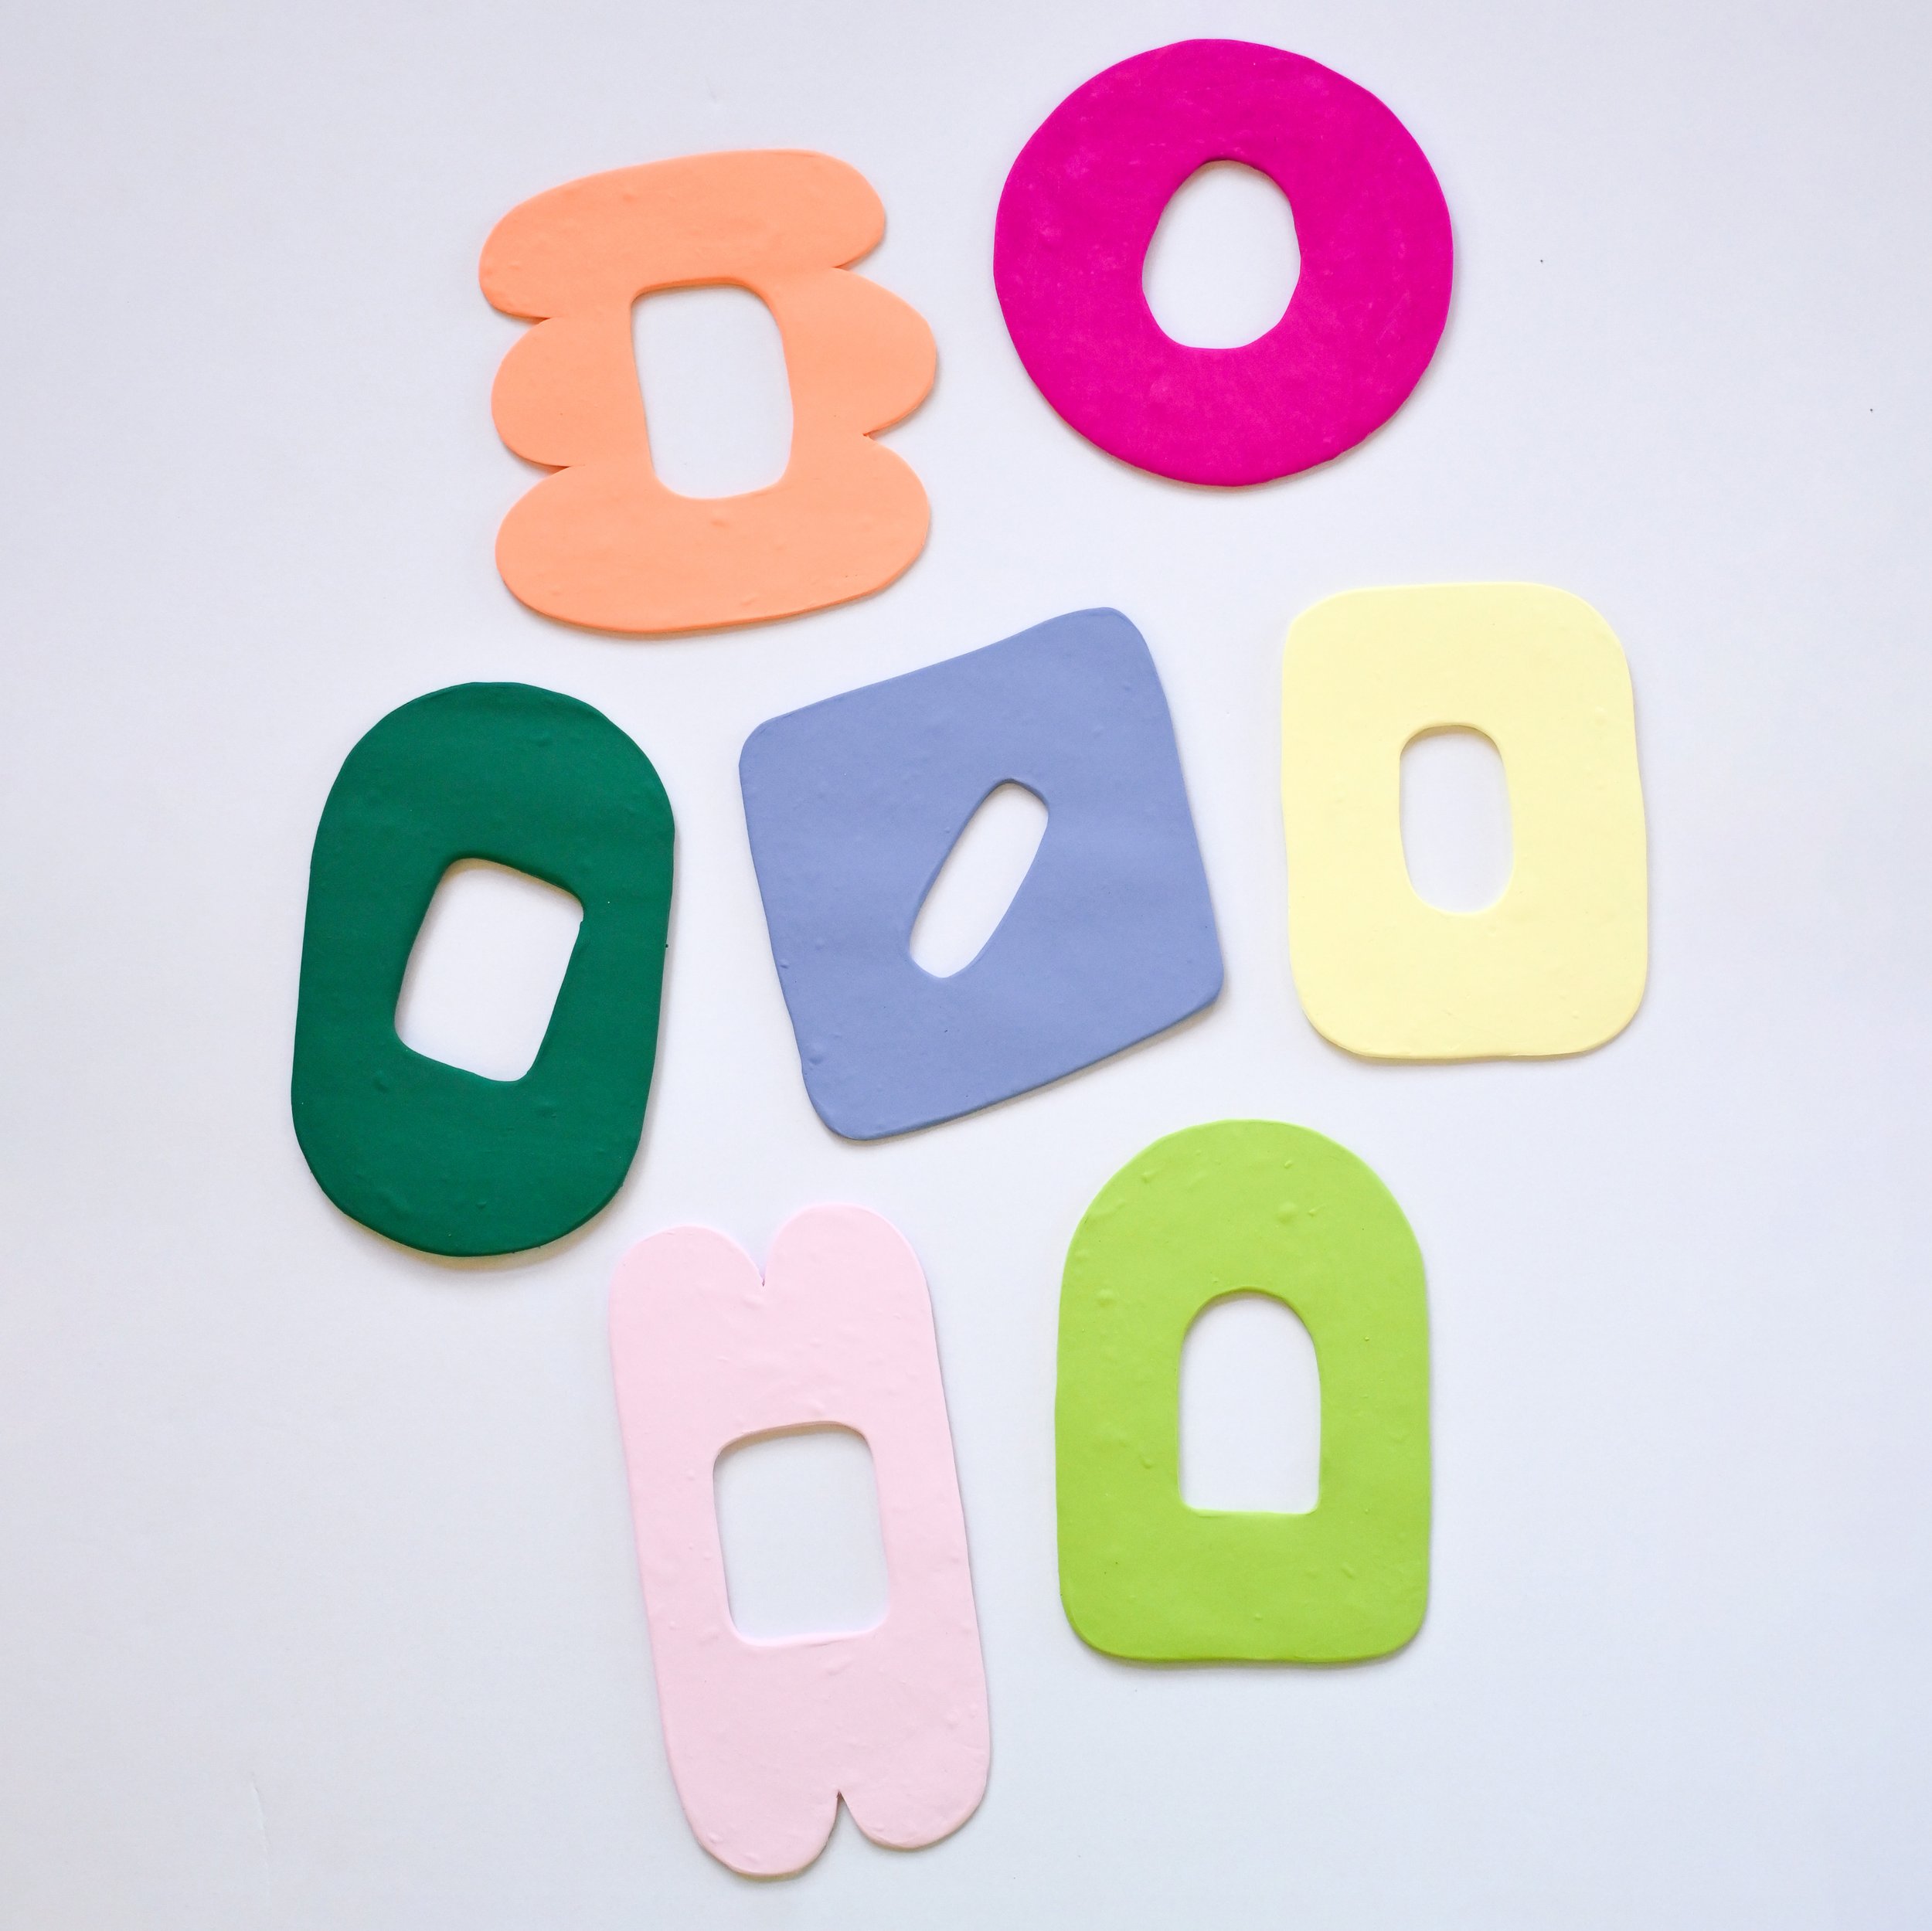
This project is brought to you by Karly of Jool By Bautista, a metal-based jewellery brand based in Federal, NSW. Karly’s small business journey began in 2016, with her clay jewellery brand Bautista and, more recently, has evolved into Jool, a brand creating playfully eccentric jewellery with precious gems and metals. With so many blocks of clay left over from her previous small business, she kindly donated some to help me bring this tutorial to life. Not only that, she’s taken the tutorial and made it her own, making a bunch of light switch covers in her style - I’ve shared them below! She also shared her top tips on working with polymer clay below:
Rubbing alcohol can remove hairs and impurities from your clay creation.
Add a tiny drop of olive oil if your polymer clay is super dry and crumbly.
Rolling out your clay with a pasta maker will help condition it and make it easy to work with.
Thanks, Karly! Now, onto the tutorial…
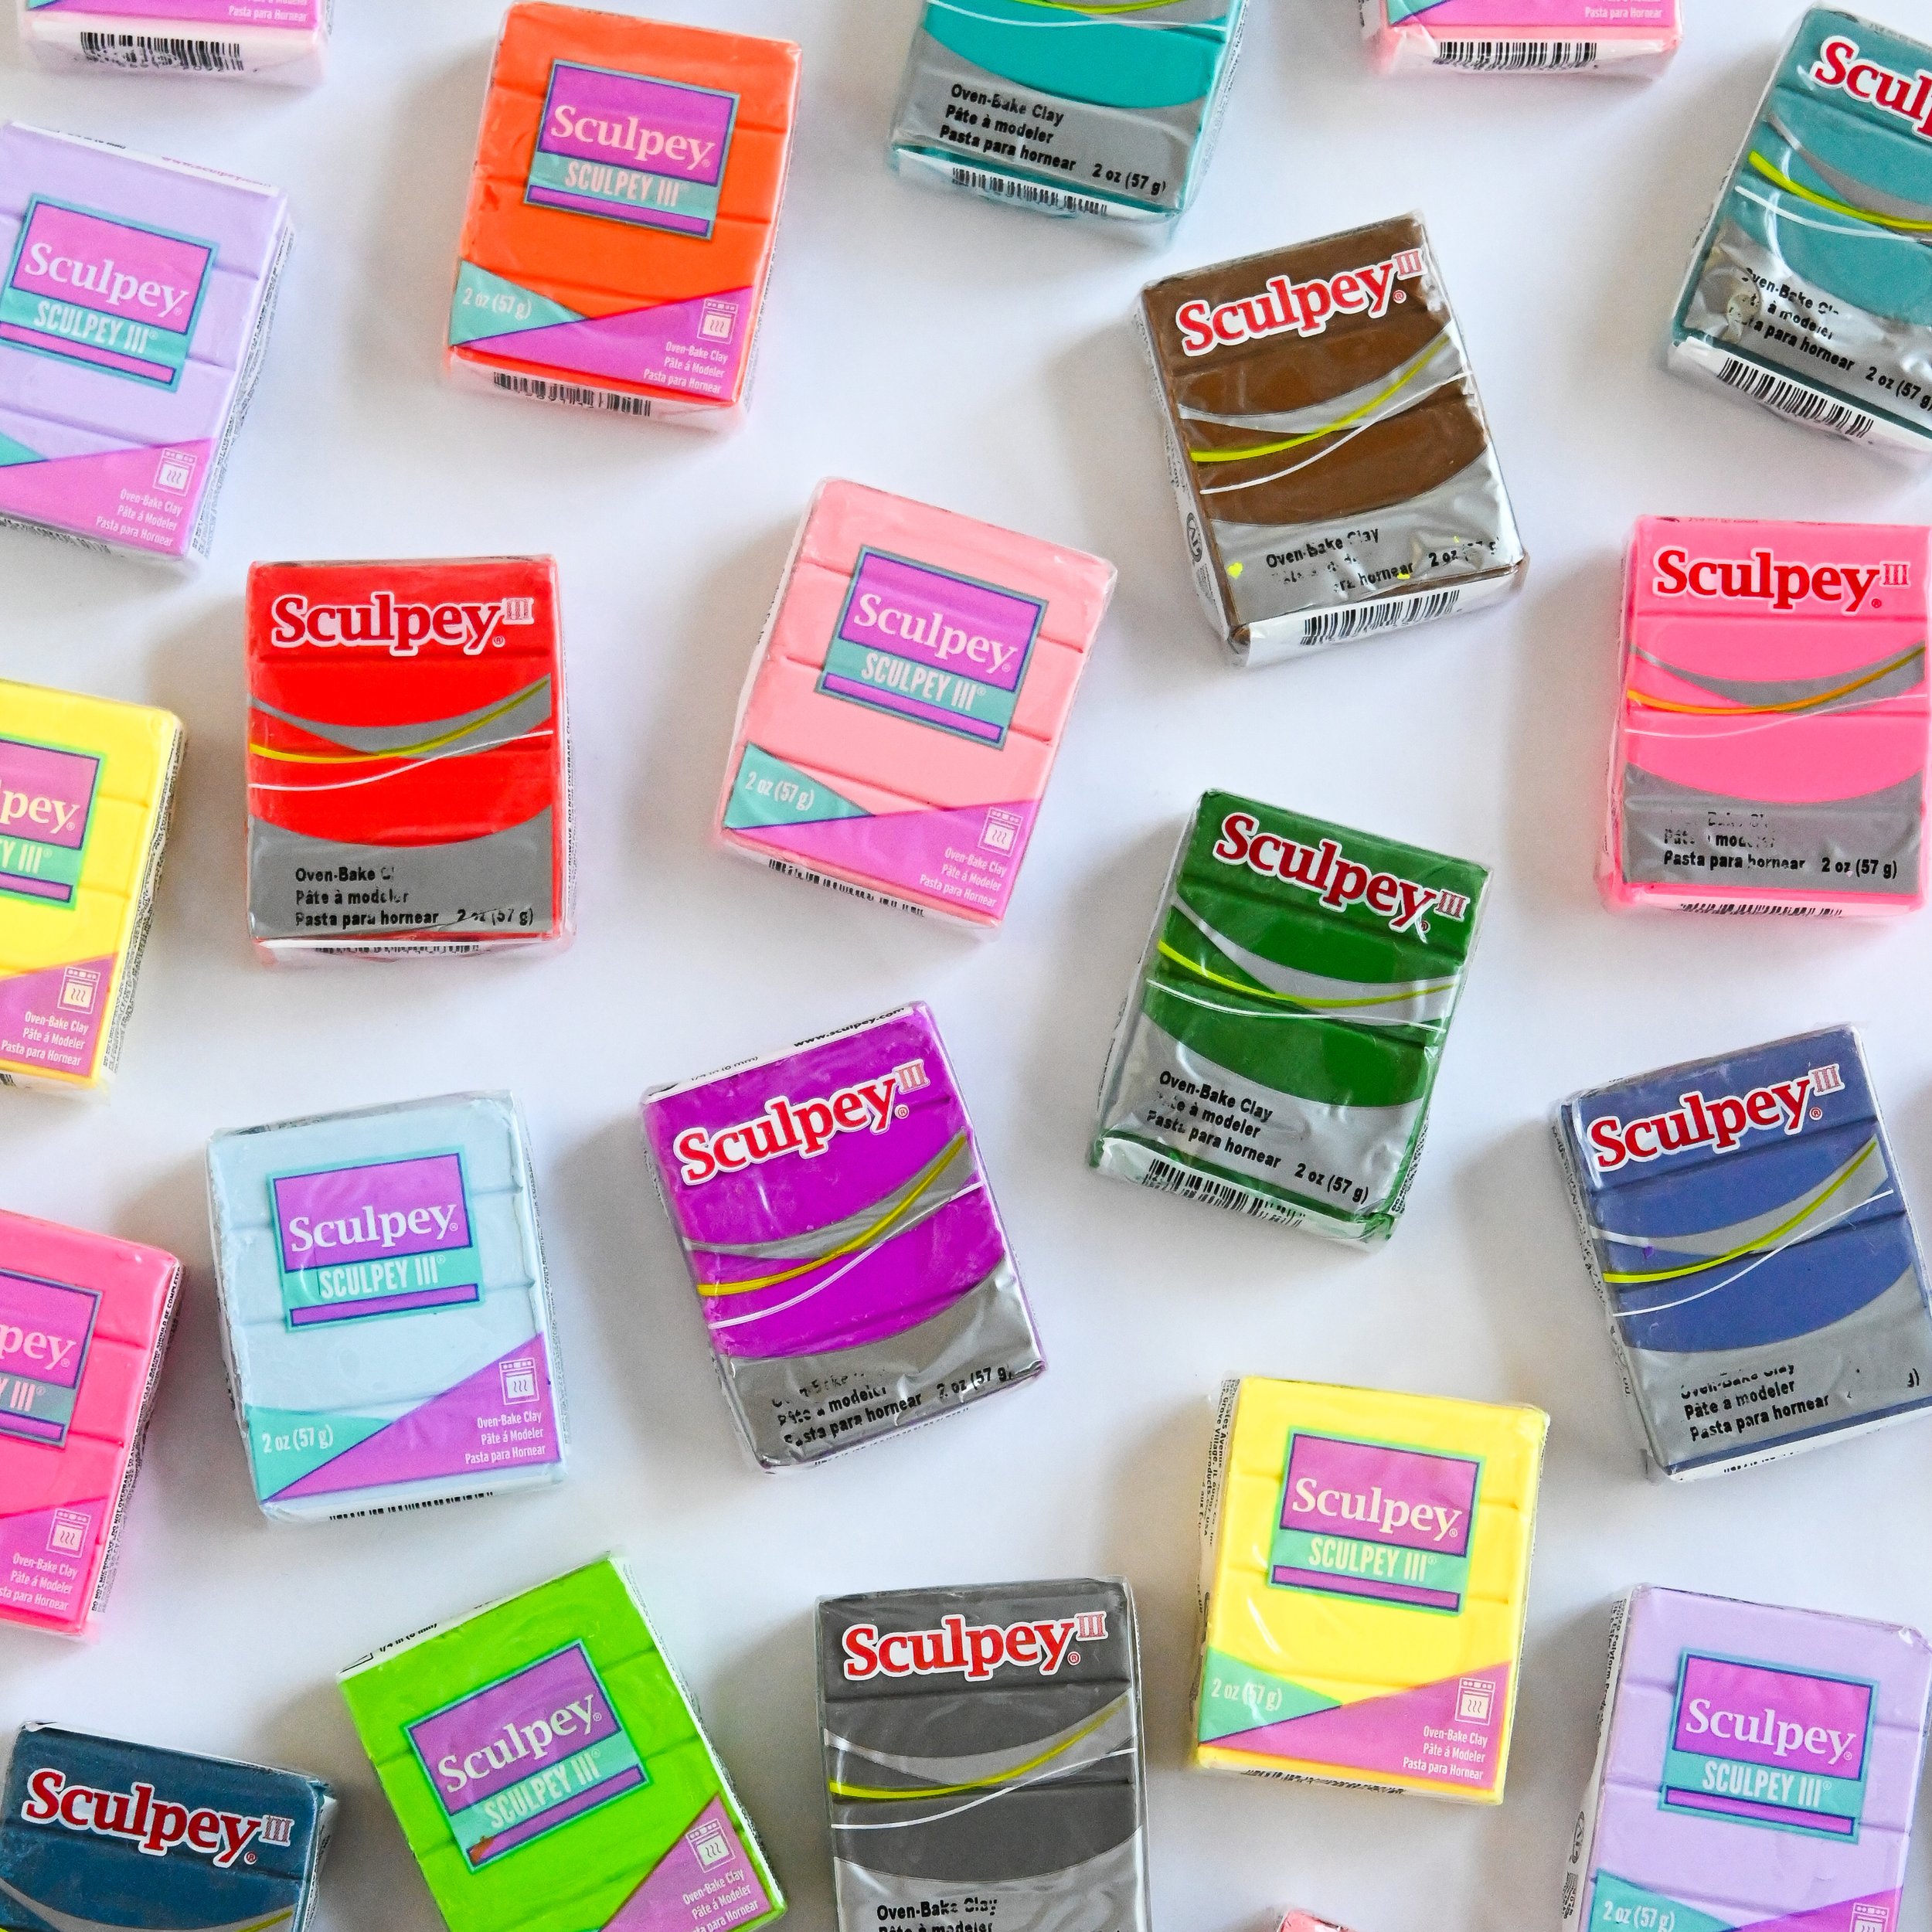
You will need:
2 x 57g blocks of polymer clay (or about 114g of polymer clay - you may choose to get various colours and mix them together for your desired shade)
Acrylic rolling pin
Craft knife or X-acto knife
Baking paper
Baking tray
Command Poster Strips (or double-sided tape, but be warned it may not be strong enough, and if your cover hits the ground, it might smash.)
Paper or card, pencil and scissors
Oven
Clean flat surface to work on (I worked on a large cutting mat)
Optional: Pasta maker (note: once you have used it to roll polymer clay, it is no longer food-safe)
Let’s make it:
Measure your light switch wall plate and make a template using paper or card. You could also remove the wall plate temporarily, or if you have one spare, you could use that instead. Turn on your oven and set it to 275 degrees F or 130 degrees C.
Combine two blocks of polymer clay in your hands, using the heat from your palms to warm the clay and make it malleable.
Lay out a piece of baking paper on a clean, flat surface and place your ball of clay on top. Slowly roll it out, picking up, turning, and flipping the clay after every roll to create an even shape. The faster you smoosh the clay, the more chances you have of getting cracks. Depending on the final shape you wish to create, you should end up with a pancake of clay double the size of your template. The ideal thickness is 5mm - 8mm.
Place your template in the centre of the clay, and slowly cut out the shape of your light switch cover using your knife. If you are worried about getting your shape right on the first go, make a paper template and trace that. The clay is very soft, so you don’t need to press down very hard. Then, cut out the middle of the light switch. Depending on the number of switches on your switch plate, you might need to cut a big or small hole.
Peel away the excess clay to reveal your light switch cover taking form!
Using the pad of your finger, gently rub and smooth the edges of the clay.
Pick up the baking paper with the light switch cover on top and place it on a flat baking tray.
Bake for the suggested time (I baked mine for 20 minutes) and then remove from the oven and cool for a couple of hours.
Once cool, stick them to your light switches using Command Poster Strips.

Share your de-light-ful creation and tag me @_diydaisy with #diydaisylightswitchcover so I can see it!
If you found this tutorial helpful, feel free to leave a donation or buy me a coffee on Ko-fi.
Every bit of support means so much and helps keep this blog going. Thank you!